Actions
What You'll Learn
In this guide, you'll discover how Actions can transform your application by adding interactive functionality to your elements. You'll learn to create links that edit records, display details, update connected records, and even send emails—all with a single click. By mastering Actions, you'll be able to build intuitive workflows that help users accomplish tasks efficiently and with minimal effort.
What are Actions?
Actions are a special type of link that can be incorporated into details, grids, searches, lists, maps, or calendar elements to initiate various actions. These links empower Live App users to easily access options such as editing, viewing more details, or triggering dynamic actions in the background.
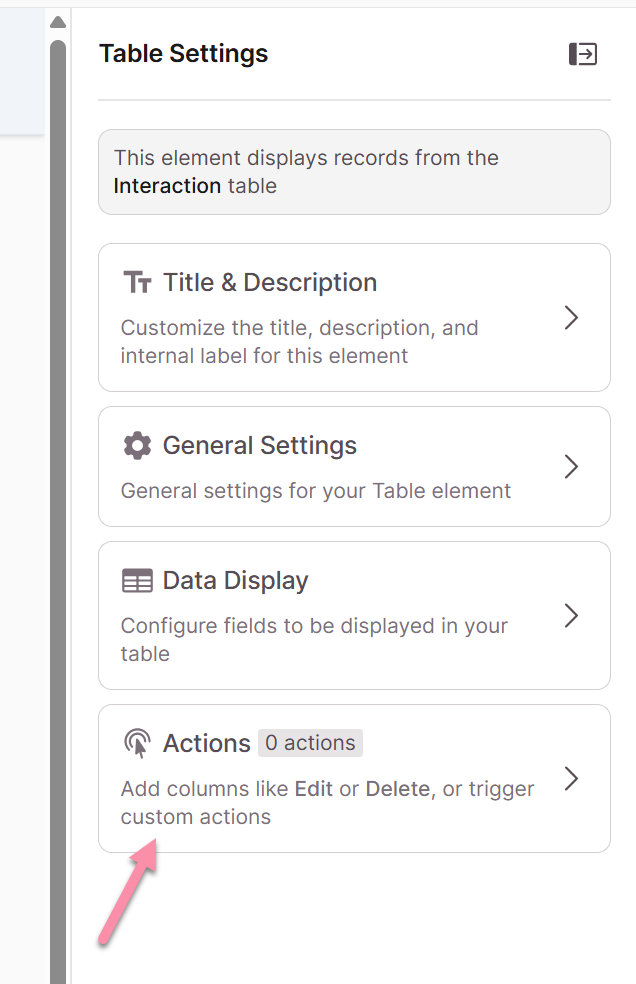
Actions can be located in the Actions section.
With action links, you can perform a variety of actions:
- Edit the record
- View record details
- Delete a record
- Link to another page
- Trigger an action such as updating or inserting a connected record or sending an email
Here are a few practical examples of how action links can be utilized:
- Change the status of a record to "completed" and set the time that action was taken
- Update a record's assignment to the logged-in user
- Approve a record and send an email confirmation of this approval
Managing Action Links
Adding Action Links
To incorporate an action link, navigate to the Pages section of your Knack Builder. From there, select the appropriate element (details, grid, search, list, map, or calendar elements) and open the element editor.
Each element type has a small variation in how action links are added. We'll go through the process of adding an action link to a grid element as an example.
Adding Action Links to Table Elements
To add action links, open the element editor in the toolbox and go to the "Add Columns" section. Then, click on the "Actions" tab.
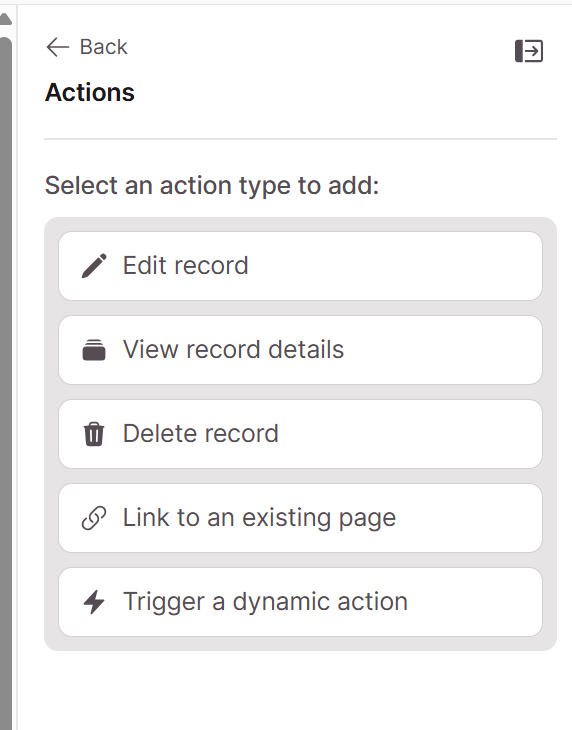
You will find a variety of options to add links to:
- Edit record: Adds a new edit form to make changes to the individual record
- View record details: Adds a new Details element and enables users to access a detailed view of the individual record
- Delete record: Permanently removes the record from the application/database
- Link to another page: Allows you to select a different page within your application to establish a link with
- Trigger an action: Enables you to specify a particular action that will occur when the link is clicked, such as updating or inserting a connected record, or sending an email
Editing Action Links
To make changes to an existing action link, open the element editor and click on the pen icon located on the action link column in the page preview.
This will open the action link settings in the toolbox on the left side, offering a range of options based on the type of action.
Deleting Action Links
To remove an action link from the element, open the element editor and click on the trash can icon located on the action link column in the element preview.
Caution: Once an action link is deleted, it cannot be restored. If you delete an action link that is linked to an edit or view more details action, the associated child page will also be deleted unless it is linked to from another part of your application.
Action Link Settings
The settings available may vary depending on the type of action link used. Additionally, when editing the field, you may encounter other options that are not specifically related to the action link settings, depending on the element type.
To modify an existing link, click on the column in the element preview. The toolbox on the left will then display settings that are specific to the type of action link.
Edit Record, View Record Details, and Link to Another Page Action Links
By utilizing these action links, you can easily navigate to edit a record, view record details, or link to another page within your app:
- For Edit record and View record details, the link will create a new child page with an edit form for modifying the record or a details element for reviewing the record's details
- For Link to another page, you will be prompted to select an existing page that has elements sharing the same source table as the original table
Settings
Here are the available options for these types of links:
- Page to link to: Displays the page to which the link navigates
- Link Type: Specifies whether the link will show customized text or utilize a value from a field in the record
- Text: Custom text for the link
- Field: Field value which will be used as the link text
- Icon: Include an icon next to the link
- Display Rules: Add rules to update the column's display
- Design: Adjust the column width and the alignment of the column
- Link Design: Allows you to utilize custom design settings
Deleting a Record with an Action Link
When utilizing an action link to delete a record, a link will be added directly to the element. If the user clicks on the link, they will be prompted to confirm before the record is permanently deleted from the application.
Note: The same settings as above apply to this action link type in the Column Properties.
Triggering an Action
The "trigger an action" feature enables you to perform actions in the background, such as approving a connected record or sending an email to a user.
The settings include:
- Link Text: The text that appears as the action link
- Criteria: Conditions that control how the action link is executed
- Actions: The actions triggered when the link is clicked
- Outcome: What happens after the action is completed
Link Text
This is the text that will appear as the action link. For example, if you have a link that updates a record to an approved status, you can set the link text as "Approve".
Criteria
This section outlines the conditions that must be met for the action to be triggered after the link is clicked. If all the criteria are satisfied, the action will be executed.
The default setting is to execute for every action link click. However, you can add criteria based on one or more specific record values.
For instance, if you prefer the action link to only function on records that have a date earlier than the current date, you could implement that criteria by selecting the "Add criteria" button.
Note: If you add multiple criteria, all criteria must be met for the action to be executed.
Actions
The actions define what Knack will do behind the scenes once the action link has been clicked.
Here are the actions you can choose from:
Action: Update this record
This feature allows you to update the record to which this link is added. It's useful for configuring status or workflow fields with just a click.
Additionally, you can assign logged-in users, enabling you to easily track who initiated this action.
Example: Set up an "Assign to me" link that sets an Assigned Date to the current date, changes a Status field to "assigned", and sets the assignee to the logged-in user.
Action: Update connected records
This option enables the update of connected records for the record to which this link is added. To utilize this option, your record's table must be connected to at least one other table.
Example: On a "confirm order" action link, when the status of an order is "confirmed", update the status field on the connected line items table to "confirmed" as well.
Action: Insert a connected record
This feature allows you to add a connected record to the record that this link is added to. To utilize this option, your record's table must be connected to at least one other table.
This option is valuable for including historical, versioning, and archived records based on the action link click.
Example: Upon clicking an "archive" action link, which sets the status field on a record to "archived", insert a new connected record of the same table with all of the same data, where the connection is called Record history entry.
Action: Send a custom email
This feature allows you to send an email related to the record to which this link is added. You have the flexibility to use record values to customize the recipients, subjects, and messages of the email.
Example: Using values from the Purchase Order record, this action link will notify the purchasing department which Purchase Order record's status has been set to "needs approval."
Values
In the "Values" section of action links, you can select the fields that will be updated by the actions. Click the "+" button to add multiple value settings, or click the "x" button to remove settings.
Values can be set to:
- To a connected value: Choose a field from a record connected to the form record
- To a custom value: This allows you to either:
- Enter a value manually
- Append or remove values for multiple choice fields or connection fields without overwriting existing values
- To the logged-in user: For user connection fields on pages that require a login
- To the current date: For date/time fields only
- To the user's current location: For address fields only when the user is logged in
Append/Remove Multiple Values
When using multiple choice fields or "many" connection fields with record rules, you can use the custom value option to either replace, append, or remove values from the field.
To use this option, select the "to a custom value" option in the "Values" section while building your action link. This will give you three options:
- By replacing with: Replaces the current field value with the selected values
- By adding: Appends the selected value(s) to any existing values in the field
- By removing: Removes the selected value if it exists in the field
Outcome
The outcome section determines what happens after the successful triggering of an action link. This is a vital component in configuring the workflow, as it allows for redirecting users to different pages or displaying specific messages.
Options include:
- Show a confirmation message: Shows a message in the upper right corner of the Live App
- Redirect to an existing page: Directs to another page within your app that you can choose
- Redirect to the parent page: Redirects to the parent page of the current page
- Redirect to another website's URL: Redirects to an external webpage of your choosing
- Redirect to a new child page: Creates a brand new child page for the redirection
Note: These follow all of the same setup and options as submit rules, with the exception that the confirmation messages with action links show up as notifications in the upper right-hand corner of the Live App.
Notes & Troubleshooting
-
Exercise caution when utilizing the "update connected records" option and determining where to provide this functionality to users in your app. This feature allows for simultaneous updates to multiple connected records instead of just single records.
-
To provide multiple action options for a record, multiple action links can be added to a single grid cell. However, the first action link (from top to bottom) where the criteria are met will be triggered and any remaining action links that follow will be disregarded.