Page Rules
What You'll Learn
You'll discover how to build intelligent pages that respond automatically to your app's data and user context. Learn to create personalized experiences that hide elements, display contextual messages, or redirect users based on specific conditions, all while understanding how multiple rules work together to create sophisticated user workflows.
Page rules enable you to create dynamic, responsive pages that automatically adapt to user roles, data conditions, and specific scenarios. These powerful automation tools trigger actions the moment a user opens a page, allowing you to build sophisticated user experiences that respond intelligently to your app's data and user context.
Understanding Page Rules
Page rules are automated actions that execute when specific conditions are met as soon as a user opens a page. Think of them as intelligent gatekeepers that can hide elements, display messages, or redirect users based on the data in your app and the characteristics of the logged-in user.
The power of page rules lies in their ability to create personalized, context-aware experiences. For example, you can automatically hide a registration form when an event reaches capacity, display different content based on a user's membership level, or redirect users to complete required information before accessing certain features.
Page rules work by evaluating conditions against your app's data and user information, then executing predefined actions when those conditions are met. This happens before the page fully renders, ensuring users see only the content and functionality appropriate to their situation.
Critical Note: Page rules should never be used as the primary method for protecting sensitive information or controlling access to data. Learn more here
Page Access and Configuration
Page rules are available for specific types of pages within your Knack app. You can implement page rules on child pages and pages that require user login (protected pages).
To access Page Rules in the Builder, navigate to the Pages section and select the page you want to configure. The page settings interface include these main tabs:
General Tab - Contains fundamental page settings including the page name, display options like opening the page in a modal, and printing preferences.

Page Rules -
Page rules are actions that can be automatically triggered based on conditions you define as soon as a user opens a page. For example, consider a scenario where users can register for an event with limited availability. In such cases, you can employ a page rule to automatically hide the registration form when the availability reaches zero.
Here are a few additional instances that demonstrate how you can make use of page rules:
- Hide a form to edit a record if the user role of the logged-in user is not an “Editor”.
- Hide a form to register for a class if the class attendance has exceeded a specific size.
- Redirect to a registration form if the logged-in user hasn’t registered.
- Warn the user if they need to update their data or complete some information.
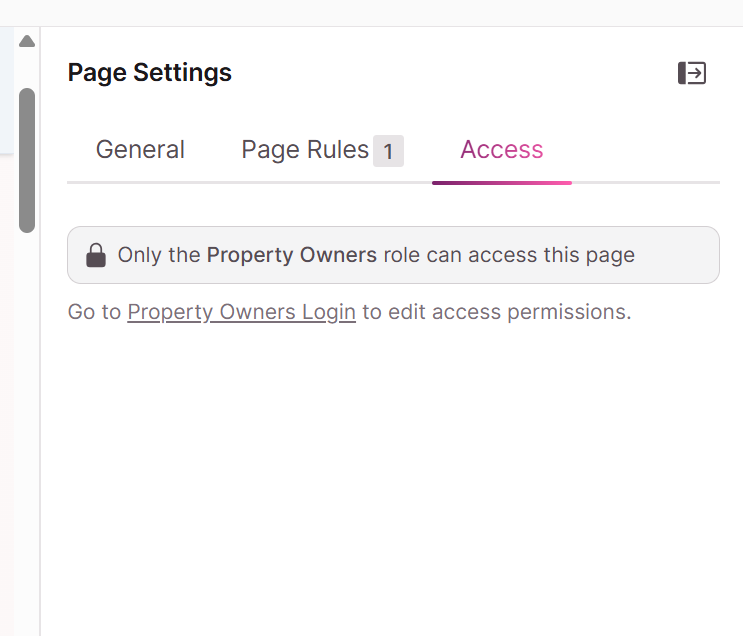
Access Tab - Provides information about which user roles can access the page and a link to the login page where configurations can be edited.
Building Effective Page Rules
Creating effective page rules requires understanding both the conditions that trigger them and the actions they can perform. The rule-building process involves defining specific criteria that must be met and then selecting the appropriate action to execute when those criteria are satisfied.
When defining conditions for your page rules, you select specific fields from your app's data structure and establish criteria for those fields. The available fields depend on the type of page you're configuring. For child pages, you can choose fields from the table that the page is based on, as well as fields from connected tables.
You can establish multiple conditions within a single rule, and all conditions must be true for the rule to trigger. This AND logic allows you to create sophisticated scenarios where multiple criteria must align before an action occurs.
Available Actions
Page rules can perform five distinct types of actions:
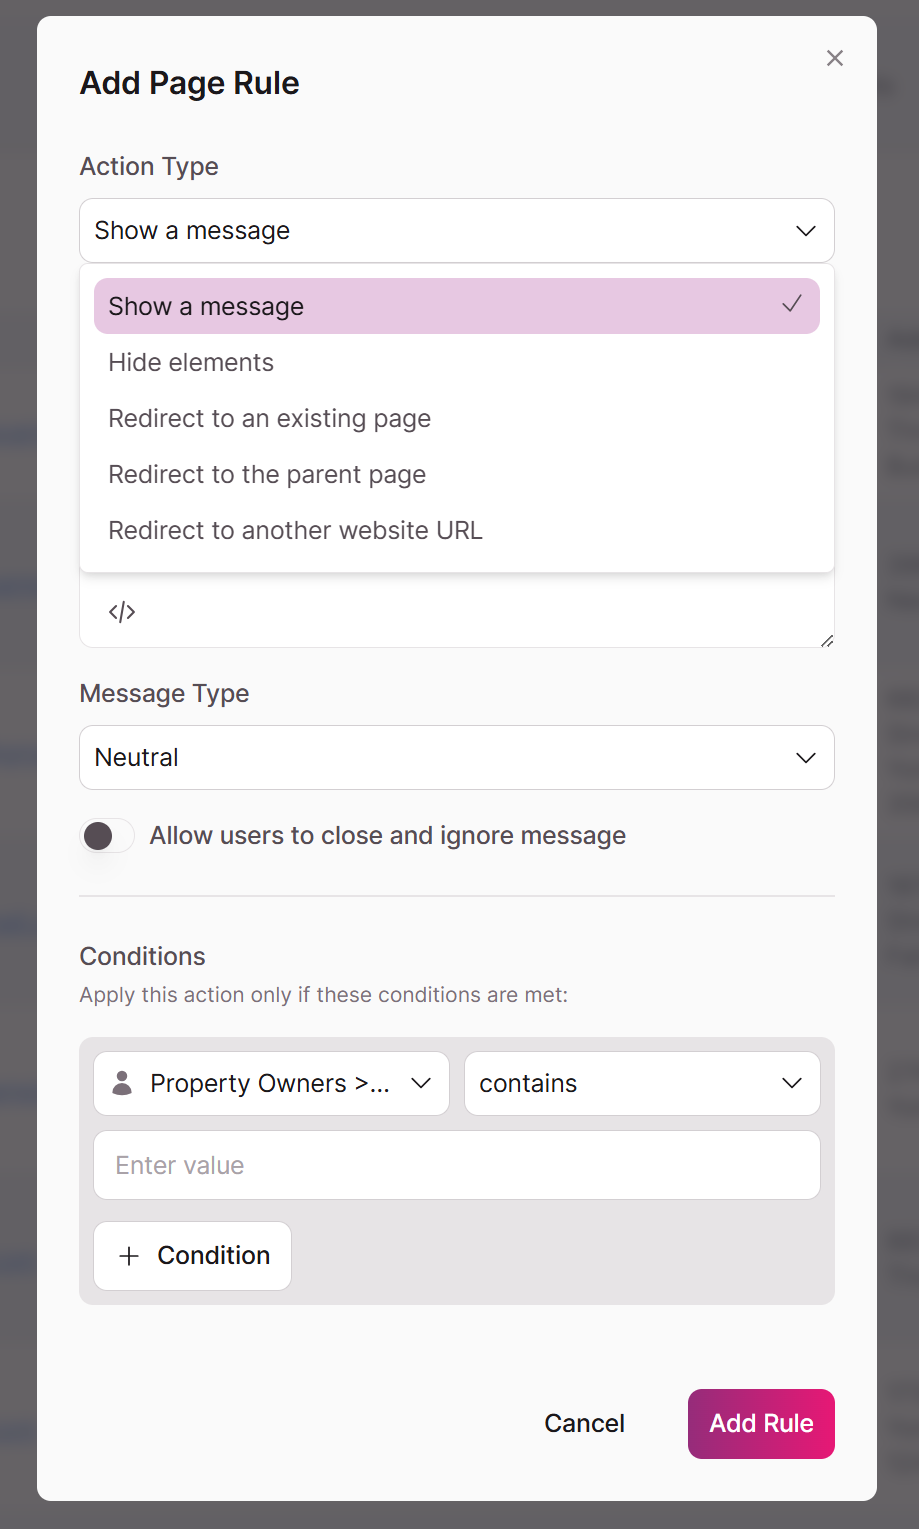
Hide Elements Action - Selectively remove page components based on defined conditions. Particularly useful for creating role-based interfaces where different users see different functionality. Plan your page layout to accommodate different visibility scenarios.
Show Message Action - Display contextual information to users based on specific conditions. Messages appear at the top of the page with four visual treatments: Neutral, Confirmation, Warning, and Red Alert. Configure whether users can dismiss these messages.
Redirect to Parent Page Action - Automatically return users to the originating page. Exclusively available for child pages and provides seamless navigation back through app flow.
Redirect to Existing Page Action - Send users to any other page within your app when specific conditions are met. All starting pages are available as redirect targets, as well as child pages that share the same source table.
Redirect to External URL Action - Direct users to websites or resources outside your Knack app. Useful for integrating with external systems or directing users to documentation.
Managing Multiple Rules
Understanding how multiple page rules interact is crucial for building reliable user experiences. Unlike some systems that stop processing after the first matching rule, Knack evaluates and triggers all rules whose conditions are met simultaneously.
If you have multiple rules with the same conditions, all matching rules will execute their actions. When multiple rules include redirect actions, the behavior depends on the specific combination. If one rule hides elements while another redirects the user, both actions technically trigger, but the redirect takes precedence.
Consider the logical flow of your rules when designing multiple conditions. Rules should complement each other rather than create conflicting user experiences.
User Journeys
Successful page rule implementation goes beyond basic conditional logic to create sophisticated user experiences that feel natural and intuitive. Consider the timing of rule execution, which occurs before page elements are fully rendered.
When designing page rules for user registration scenarios, think about the complete user journey. Create rules that guide new users through required setup steps, display different onboarding content based on their selected role, or automatically redirect users to complete missing profile information.
For data-driven applications, page rules can create dynamic interfaces that respond to changing information. Consider implementing rules that reflect the current state of your data, such as hiding booking forms when events are full or displaying different content based on inventory levels.
Role-based page rules enable you to create sophisticated permission systems that go beyond simple access control. You can show different functionality to different user types, create approval workflows where content appears differently based on approval status, or provide administrative tools that only appear for users with appropriate permissions.
Troubleshooting and Best Practices
When page rules don't behave as expected, systematic troubleshooting can help identify and resolve issues. Start by verifying that your conditions are correctly defined and that the fields you're referencing contain the expected data. Remember that all conditions in a rule must be true for the rule to trigger.
If rules aren't triggering when expected, confirm that the page type supports page rules and that you're not trying to base conditions on multi-record elements. Verify that the fields you're referencing are actually available to the page based on its source table and user role associations.
Test your page rules thoroughly across different user roles and data scenarios. Create test scenarios that cover edge cases and unusual data combinations to ensure your rules behave predictably in all situations.
Tip: Test your page rules thoroughly across different user roles and data scenarios to ensure they behave predictably in all situations.
Important Note about Page Rules and User Role Context
On protected pages, page rules that reference a user role table are always evaluated in the context of the logged-in user, not the record currently being viewed on the page.
This applies even when the user role table is referenced indirectly through one or more connected records. For example, if a page rule condition follows a path such as:
User Role → Connected Record → Field
The condition will be evaluated using the data connected to the logged-in user’s record, not the data connected to the record displayed on a details page.
As a result, page rules may behave differently than expected if you assume conditions are evaluated against the viewed record and its connections.
When building page rules on protected pages, ensure that any conditions involving user roles are intended to reflect the logged-in user’s data, rather than record-level relationships.
Overall App Design
Page rules work most effectively when they're integrated thoughtfully into your overall app design and user experience strategy. Consider how rules support your app's primary objectives and user workflows rather than implementing them as isolated features.
Think about the user's mental model of your app and ensure that page rule behaviors align with user expectations. Sudden redirects or hidden functionality can be confusing if they don't match the logical flow of your application.
Page rules should complement rather than replace good information architecture and navigation design. Use rules to enhance well-designed pages rather than to fix fundamental usability issues.