Creating & Managing Fields
Fields are the individual data components within your Knack tables that define how your information is structured and stored. This guide will walk you through the essential processes of creating, editing, and organizing fields.
What You'll Learn
In this guide, you'll discover how to add new fields to your tables, modify existing fields, convert between field types, and organize your fields efficiently. These skills form the foundation of effective database design in Knack.
Adding New Fields
You have two methods to add fields to your tables:
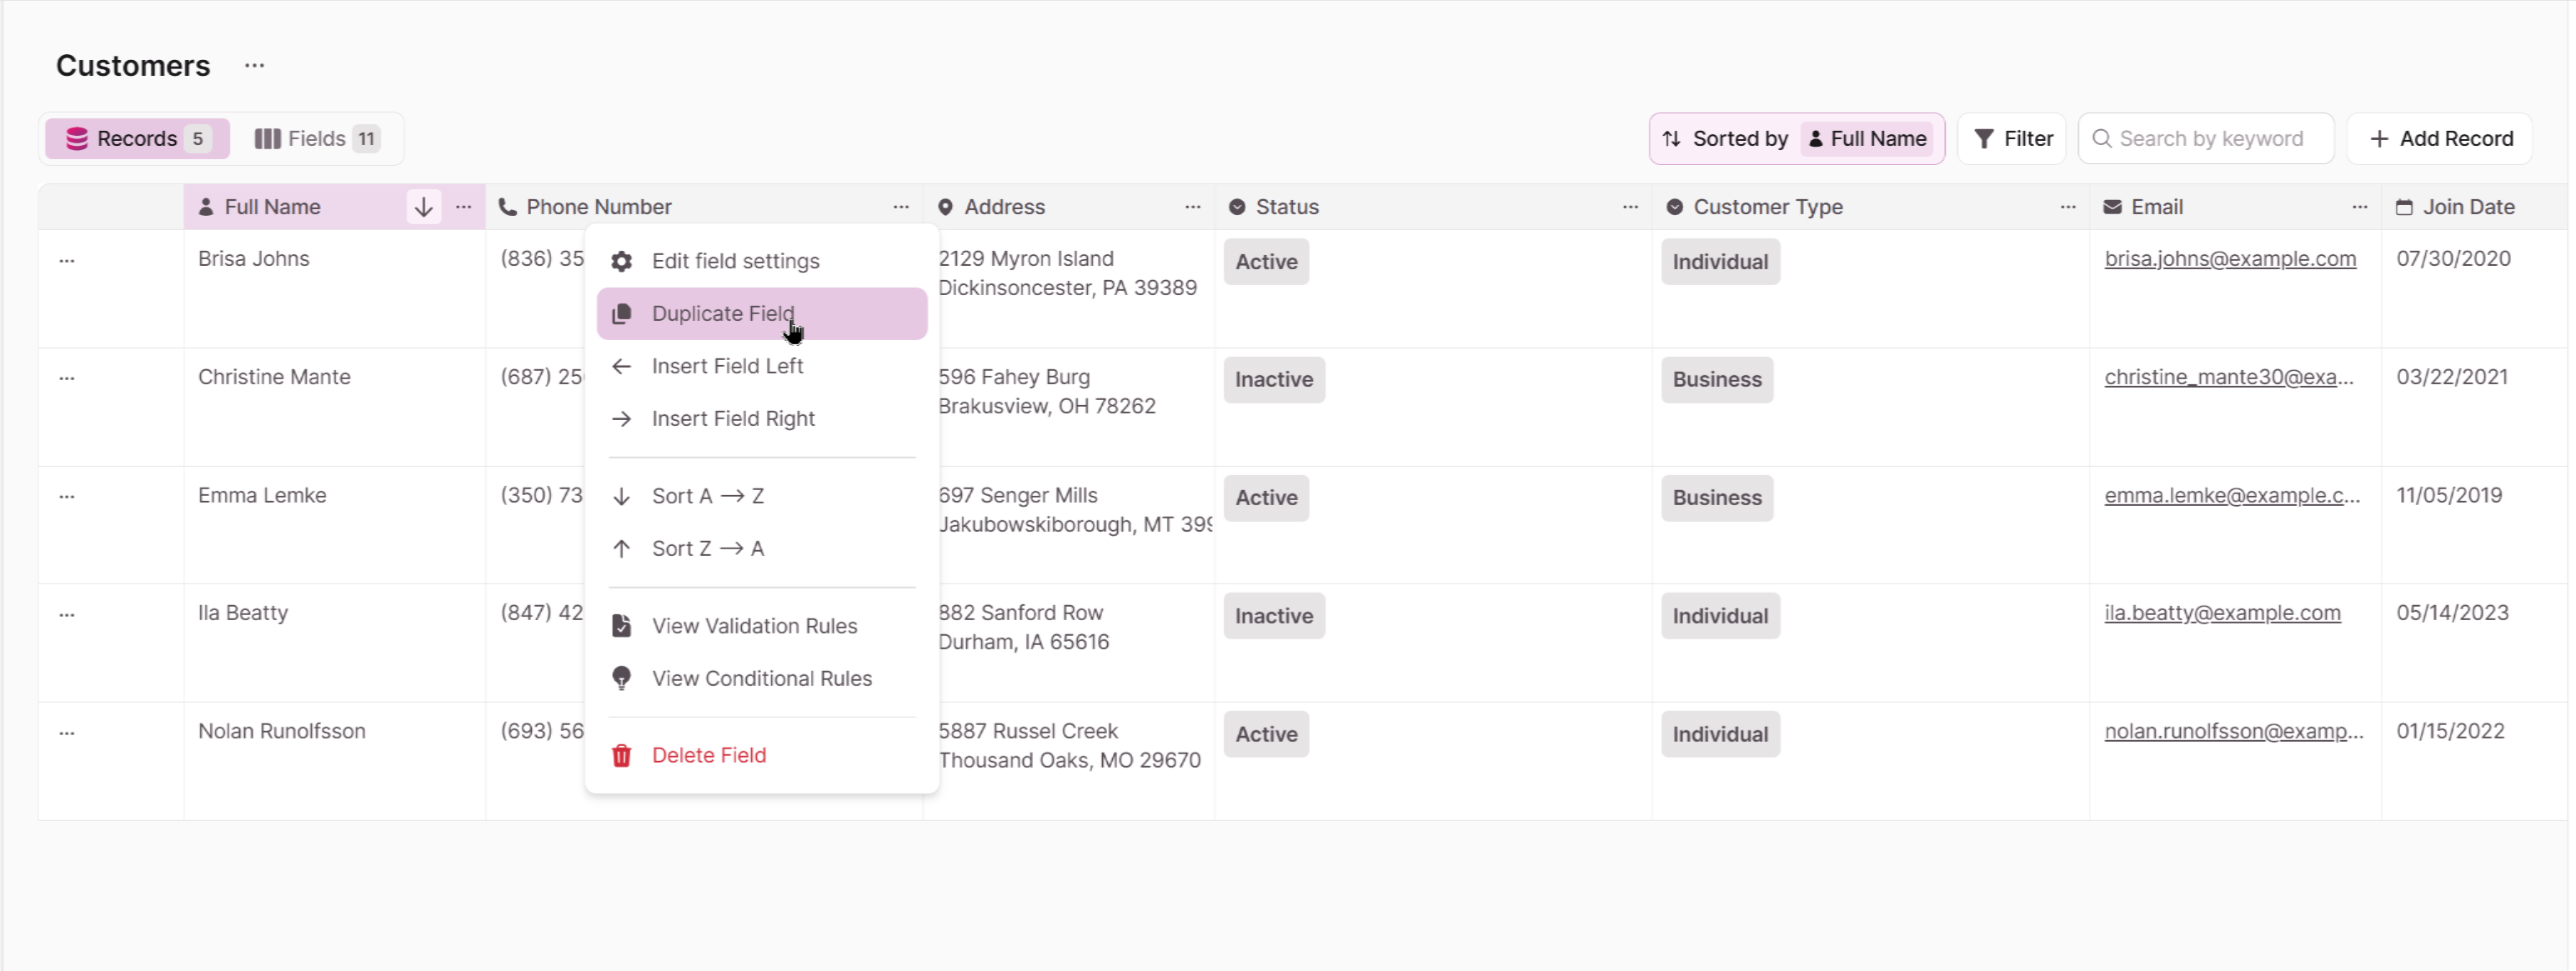
Method 1: From the Records Tab
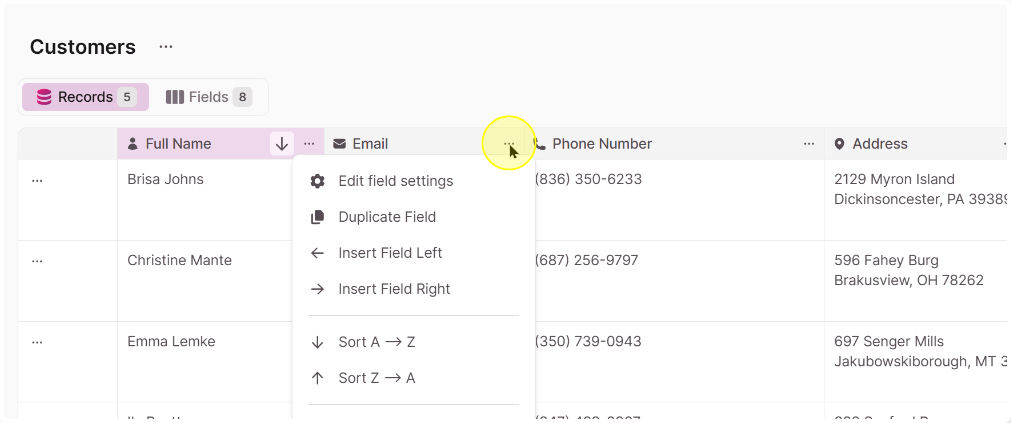
- Select an existing field
- Click the ellipsis (...) in the field header
- Choose "Insert Field Left" or "Insert Field Right"

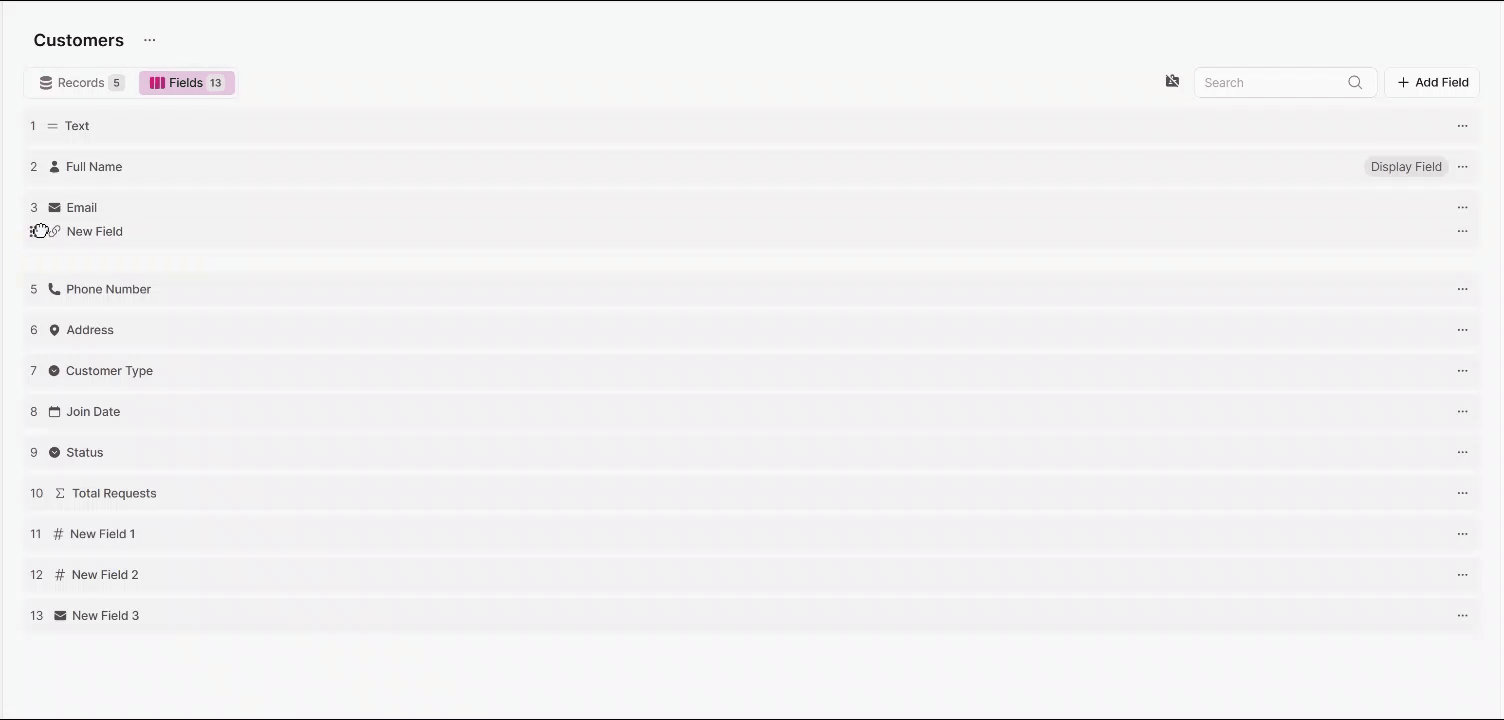
Method 2: From the Fields Tab
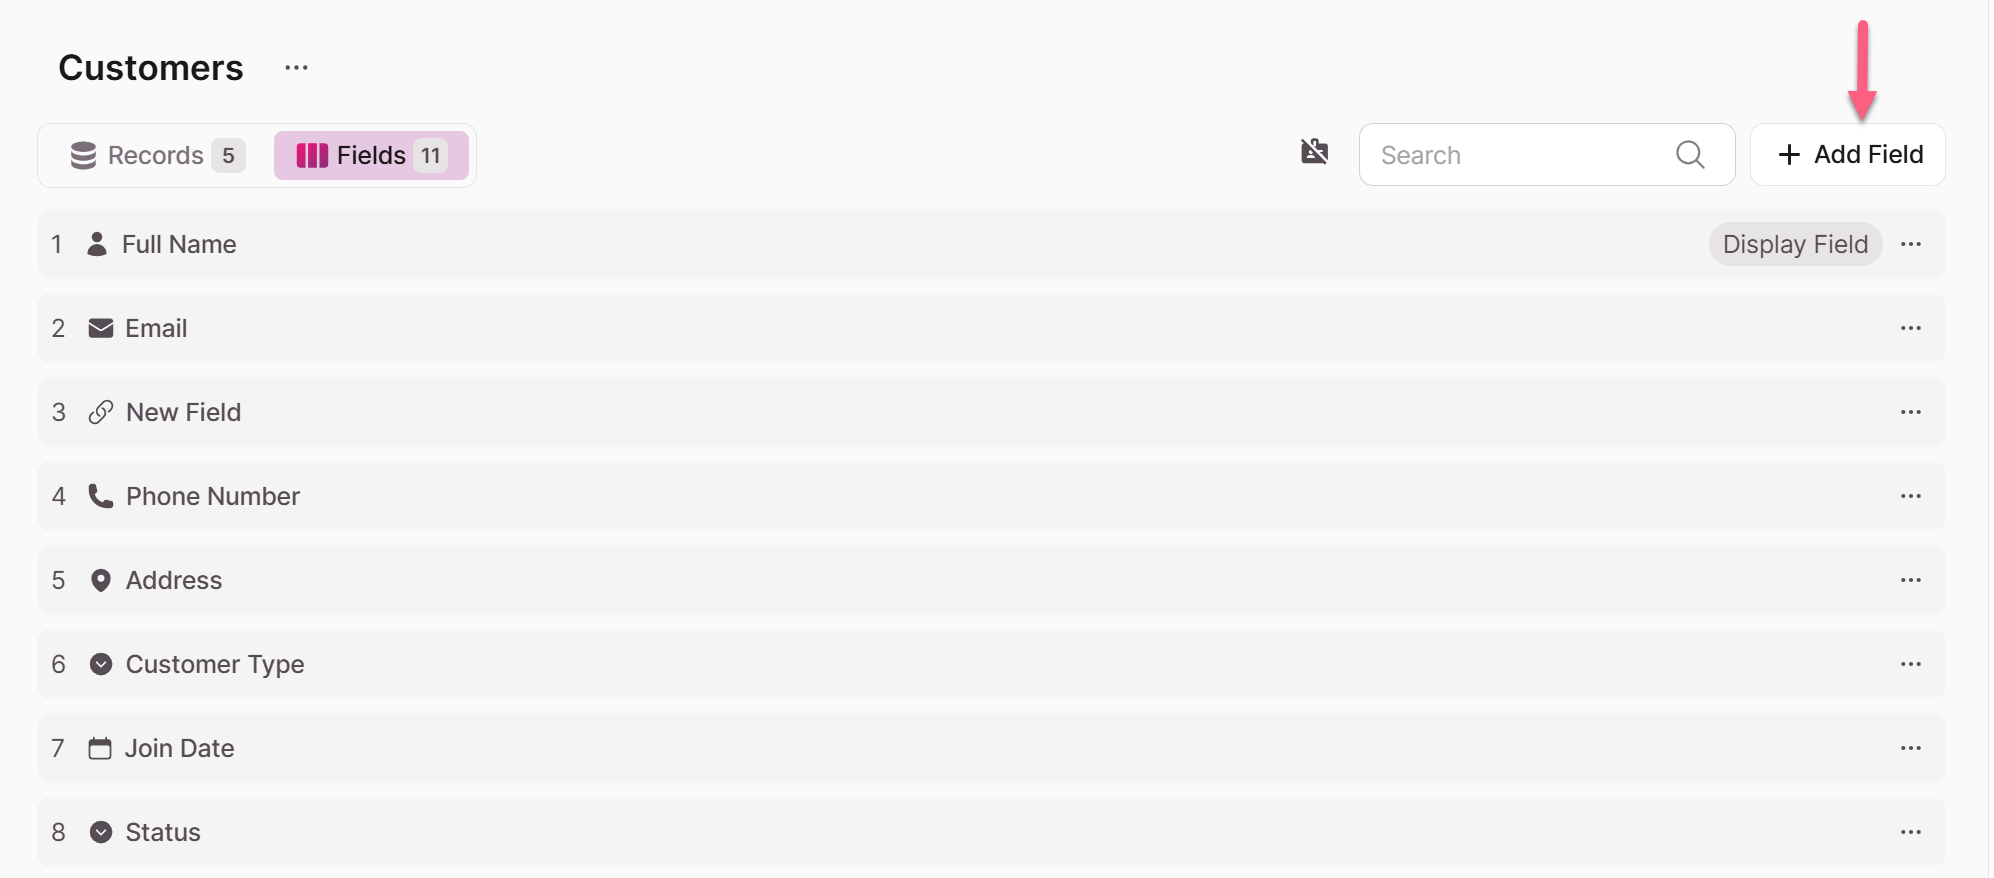
- Navigate to the Fields tab
- Click "Add Field"
- Select the desired field type
- Configure field settings
When naming fields, use clear names that will be meaningful and understandable
Editing Fields
To modify a field's settings:
- In the Builder, select your table
- Click the ellipsis (...) in the field header from the Records or Fields tab
- Select "Open Field Settings"
Converting Field Types
In many cases, Fields have the flexibility to be converted from one type to another. For example, if you have a Short Text field that you believe would serve users better as a Paragraph Text field, allowing them to provide more detailed information.
You can change a field's type after creation:
- From the Fields tab of the DataTable,
- Click the ellipsis (...) icon to the right of the the field name
- Select "Change Field Type"
- Choose the new field type

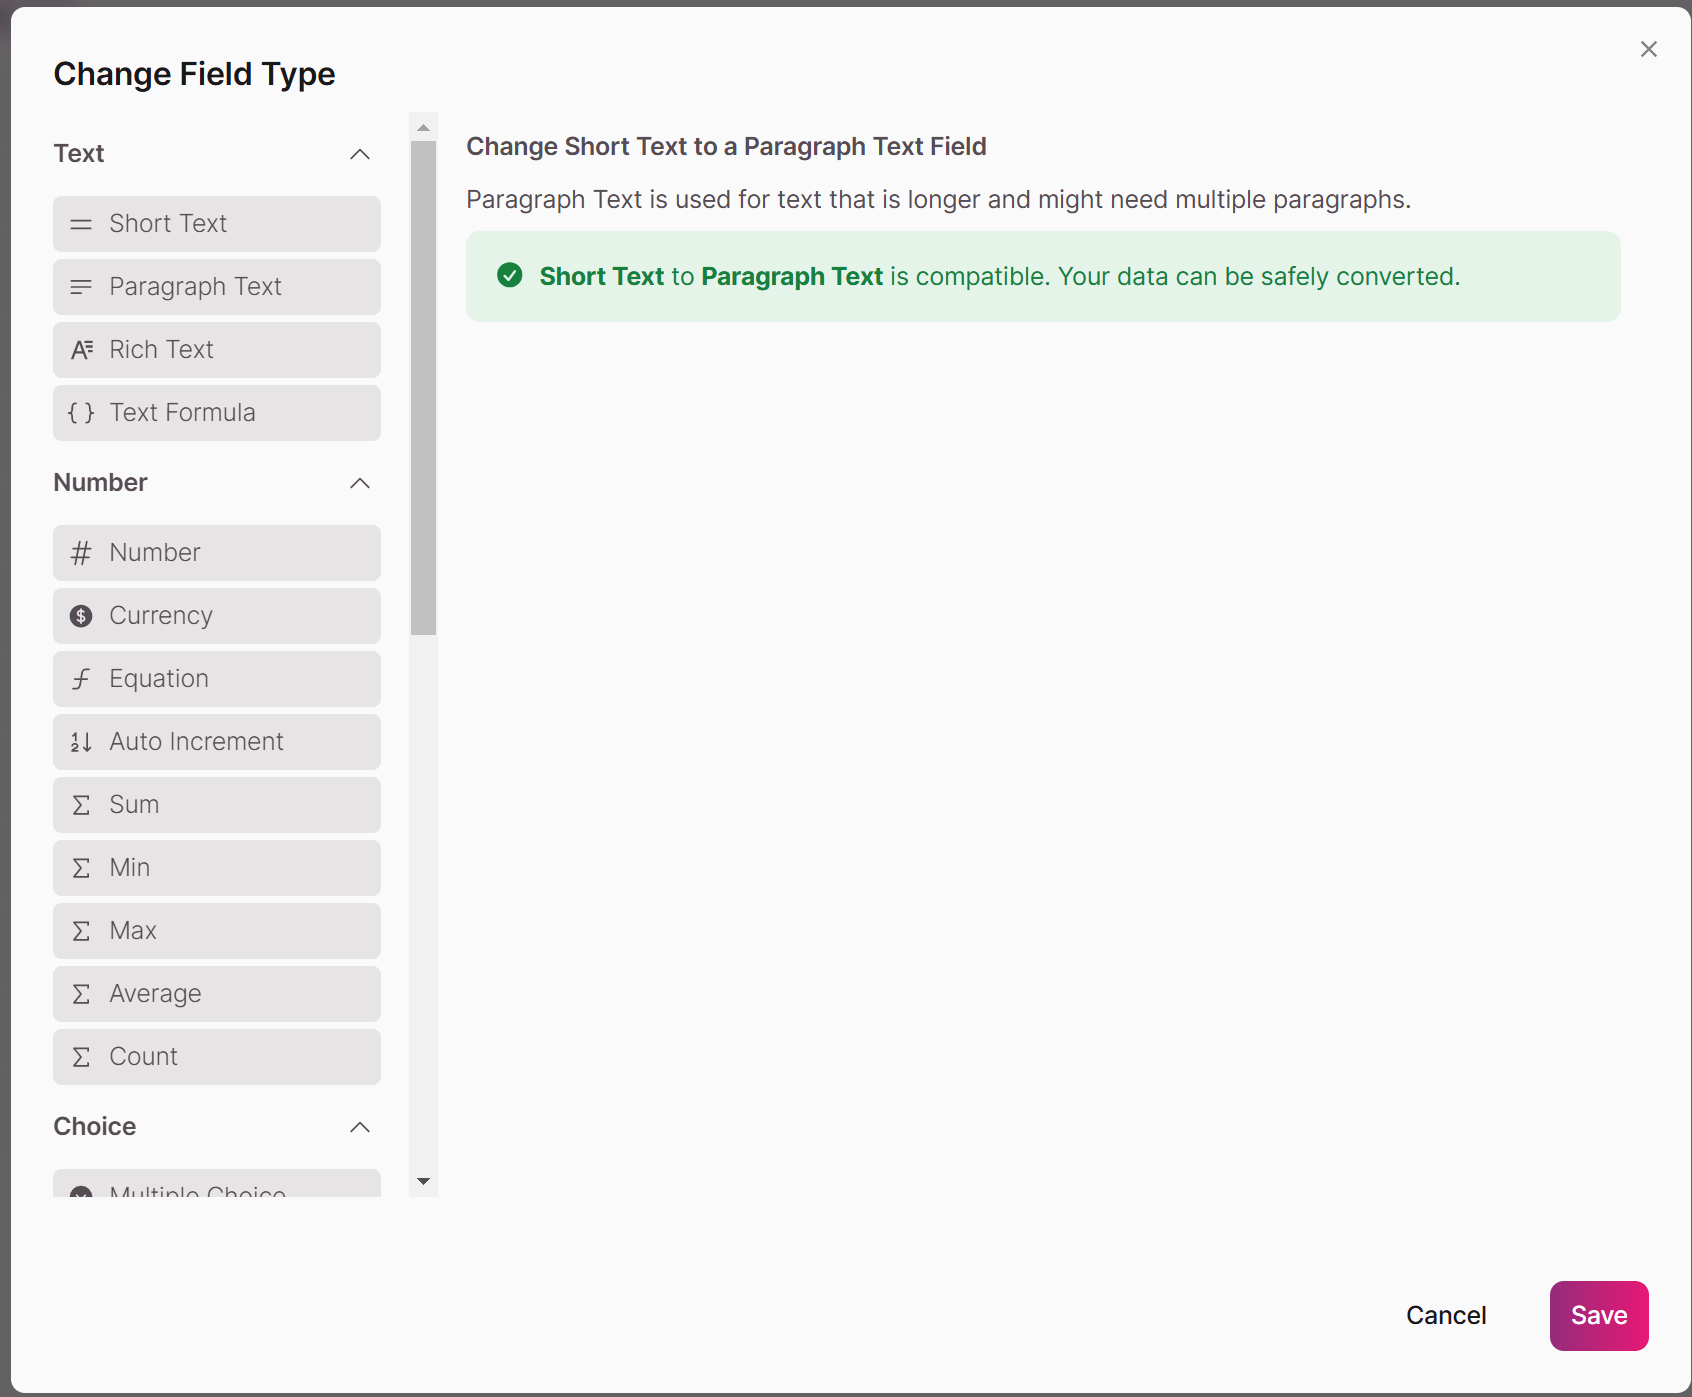
An editor will be opened for you to select the new field type.
Notes:
- Changing the field type for default fields in User Roles is not possible.
- As of 2024-01-15, conversions between compatible field types will be processed by our support team if the number of records exceeds a size threshold. Incompatible field conversions are not affected by this update.
- For conversions between compatible field types, we will be doing a check on the table size and record count before proceeding with the conversion. If the conversion exceeds our threshold, users will receive a notification in the Builder that they will need to submit a ticket to our support team to complete the field conversion.
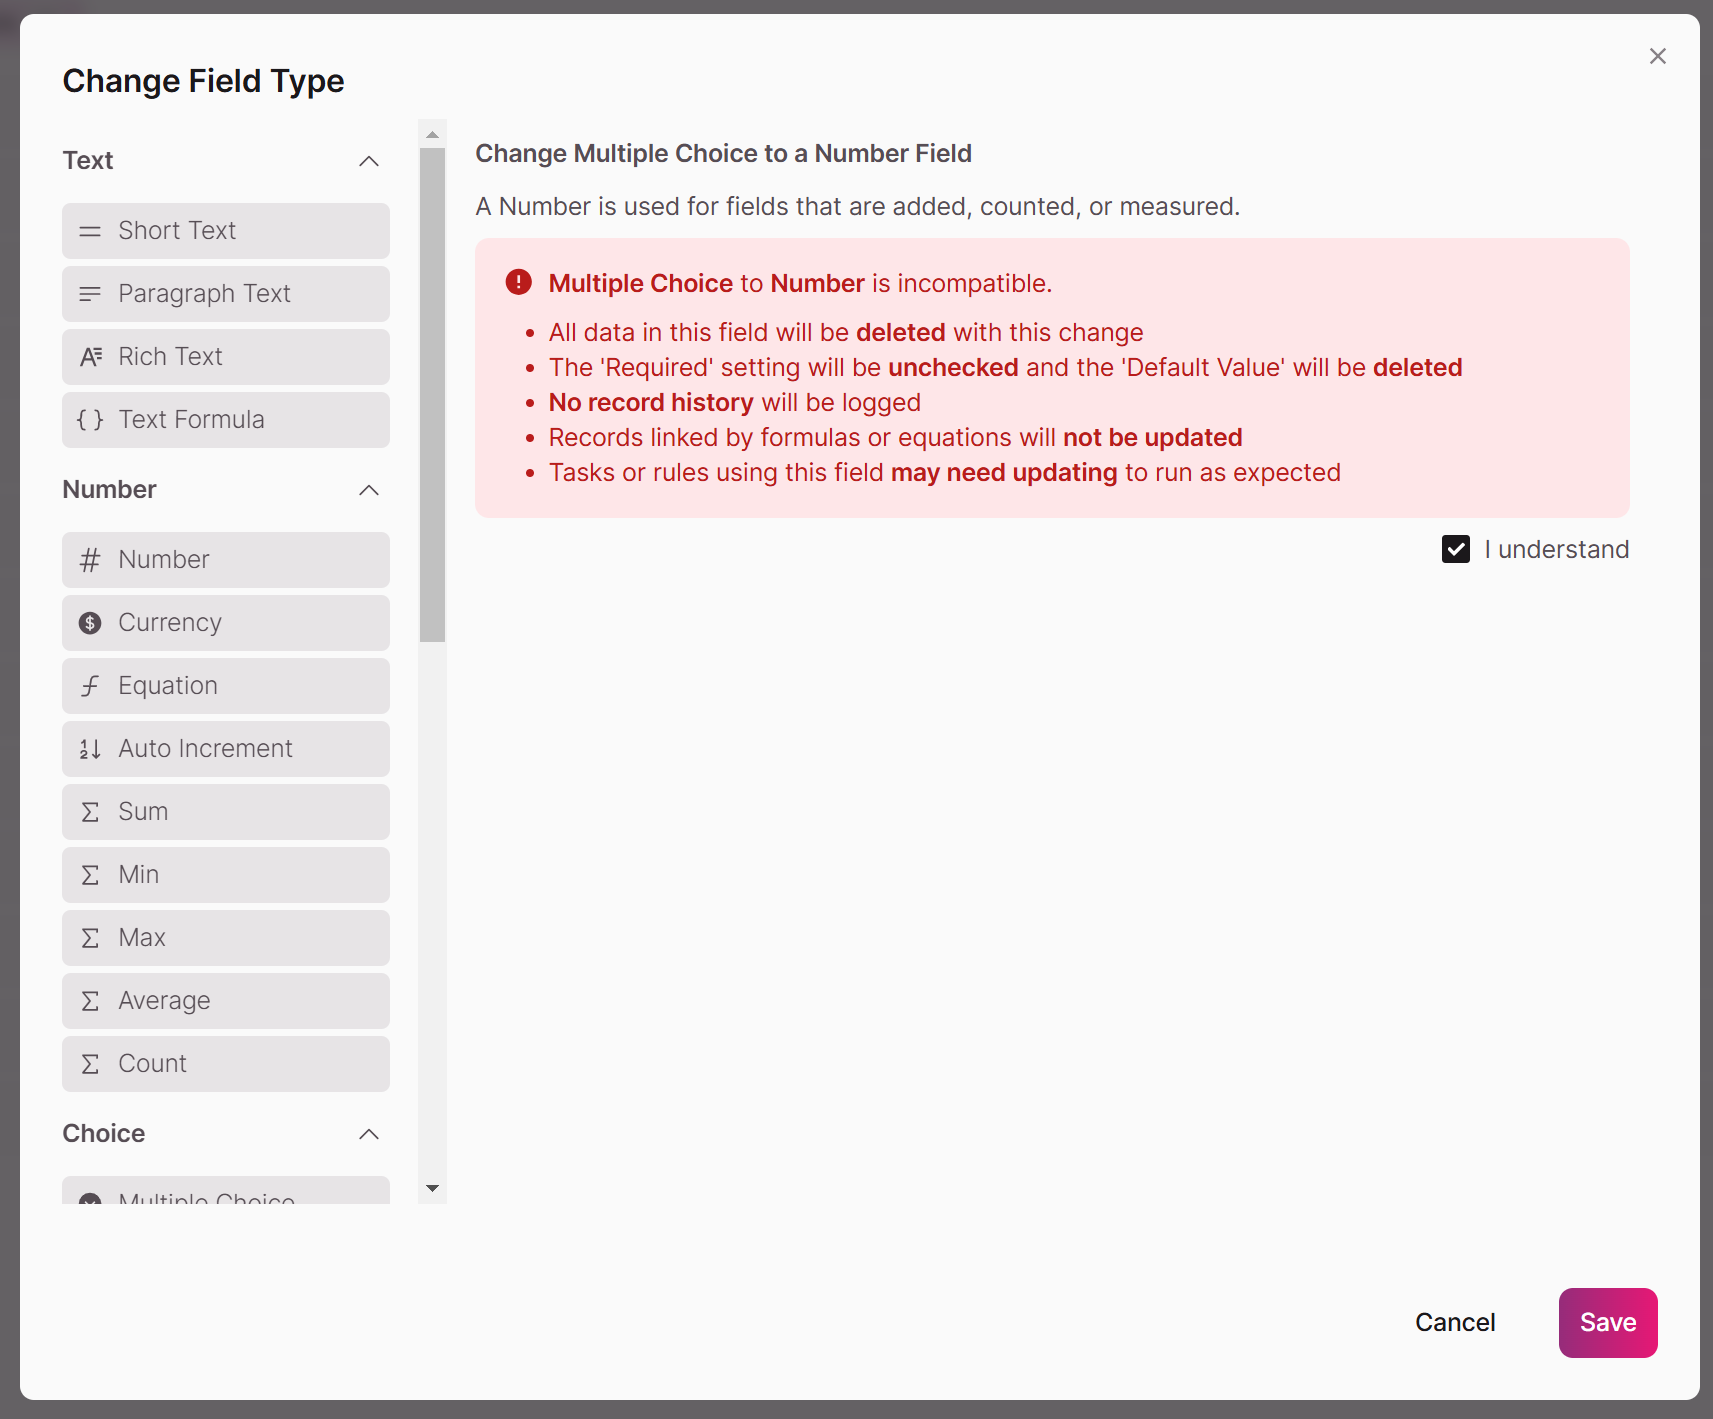
Incompatible Field Types
Certain field types may not be compatible. If you happen to select a field type that is incompatible, a message will appear to inform you of this.
In order to save your changes, you will need to acknowledge and select "I understand".
Notes:
- For incompatible field types (such as a Yes/No field -> Formula field), these conversions are allowed, with no size threshold. All data in the field will be deleted, 100% of the time.
- With incompatible field type conversions, the field key will be retained, meaning that any tasks, formulas, rules, API calls, etc. that depend on the field key will remain intact.
- Changing a field type to an incompatible field type will not cause any cascading operations of updating equations, tasks, records, etc.
Changing field types may affect existing data. Some conversions (like short text to rich text) preserve data, while others (like paragraph text to file) clear existing values**. You'll receive this warning when selecting an incompatible field type.
Deleting Fields
To remove a field:
- Click the ellipsis (...) icon in the field setting
- Select "Delete Field"
- Confirm deletion
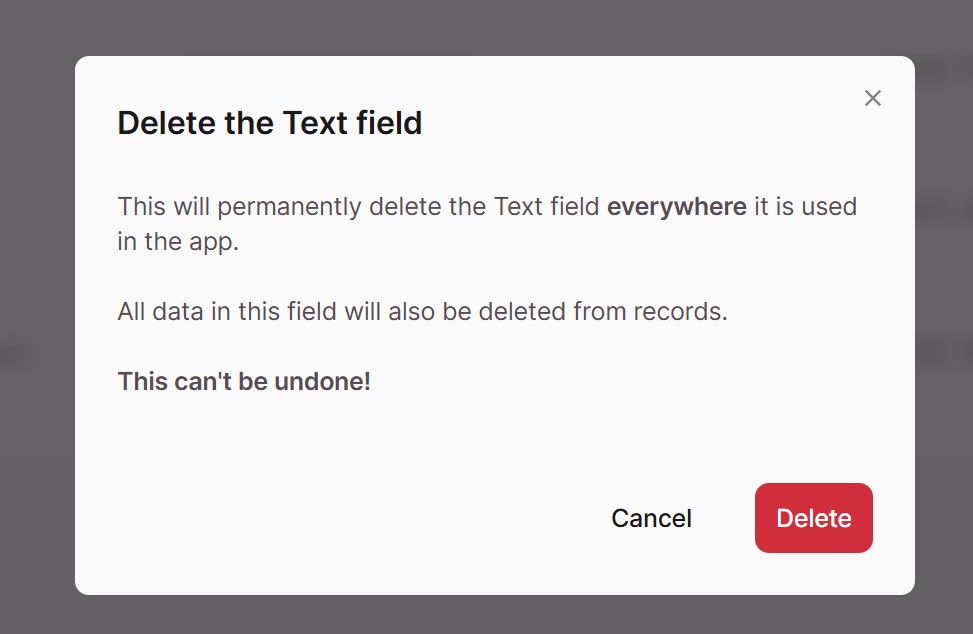
⚠️ Warning: Deleting a field removes it and all associated data from your entire application. The field will no longer be visible in any elements.
Organizing Fields
Reordering Fields
- On the Fields tab, click and drag fields to rearrange their order in the table
Tip: Formula and equation fields run in order of field placement. Make sure to place these fields after any dependent fields.
Duplicating Fields
- From the Records tab, click the ellipsis in the field header
- Select "Duplicate Field"
- Adjust settings as needed
📝 Data inside the duplicated fields will NOT be copied
Duplicate Fields Between Tables
- Click the ellipsis (...) icon next to the table's name
- Select "Duplicate"
- Choose to duplicate to a new or existing table
- Select which fields to duplicate
📝 Data inside the duplicated fields will NOT be copied
Field Keys
- Each field has a unique identifier (e.g., "field_1")
- Toggle the field key display using the key icon in the Builder
- Field keys are useful for API integration and advanced functionality

Tip: Field keys remain constant even if you rename a field, making them reliable identifiers for API usage
Validation Rules
Validation rules are customizable criteria that check if data meets specific conditions before it can be saved. These rules apply when adding or editing records in both the Builder and Live App, displaying error messages when the entered information doesn't satisfy your requirements.
- Set minimum/maximum values for numeric fields
- Create pattern requirements for text fields
- Define date ranges
- Establish custom validation messages
Learn more about Validation Rules here
Conditional Rules
Conditional rules are automated triggers that set field values based on defined conditions. Once applied to a field, these rules take complete control of that field's values—making the field respond automatically to changes in your data without requiring manual updates.
For example, conditional rules can:
- Set a Student Rank field to "Honor Roll" if the GPA is higher than 3.0
- Assign a Commission Rate of 5% if an employee's Years of Experience is greater than 2
- Change an Invoice Status to "Overdue" if Days Past Due is greater than 30
Learn more about Conditional Rules here
Field Limitations
There is a limitation of 1,580 columns per table. This doesn't directly translate to 1,580 fields because some field types use multiple columns:
- Address: 9 columns
- Person: 5 columns
- Phone: 5 columns
- Date/Time: 4 columns
- Timer: 3 columns
- Email, Link, Signature: 2 columns each
- Other field types: 1 column each
Updated 11 months ago