Display Rules
Control when fields appear, change labels dynamically, and customize formatting based on user input or data conditions.
What you'll learn:
- How to create conditional field visibility and formatting
- The difference between dynamic and standard display rules
- Best practices for organizing multiple display rules
- How to troubleshoot common display rule issues
Understanding Display Rules
Display rules make your forms and views responsive to data by controlling how fields appear and behave. You can hide irrelevant fields, change labels based on selections, add visual indicators, and create step-by-step workflows that guide users through complex processes.
Display rules work on three element types:
- Form elements - Control field visibility and formatting during data entry
- Details elements - Format how record information is displayed, and show or hide values
- Table elements, including Search Result tables - Add conditional formatting to table columns
Critical Note: Display rules should never be used as the primary method for protecting sensitive information. Learn more here
When Display Rules Activate
Display rules check their conditions in two scenarios:
- Page load - All rules evaluate when the element first loads on the page
- Field changes - Rules re-evaluate when users modify input
This means your elements can respond to user selections and data input, showing relevant fields and hiding unnecessary ones, and visually showing importance with colors and icons.
Building Display Rules on Forms
Every display rule follows the same structure: When these conditions are met, Then apply the actions.
Setting Conditions (When)
Define what triggers your rule by specifying:
- Field to check - Any field added to your form, details, or table element
- Comparison type - Equals, contains, is greater than, etc. The options change based on the field type.
- Value to compare - The target value that activates the rule
You can add multiple conditions that must all be true for the rule to trigger.
Tip: For fields you need to reference but don't want visible, add them to your form and hide them with a display rule. Hidden fields can still be used as conditions in other rules.
Defining Actions (Then)
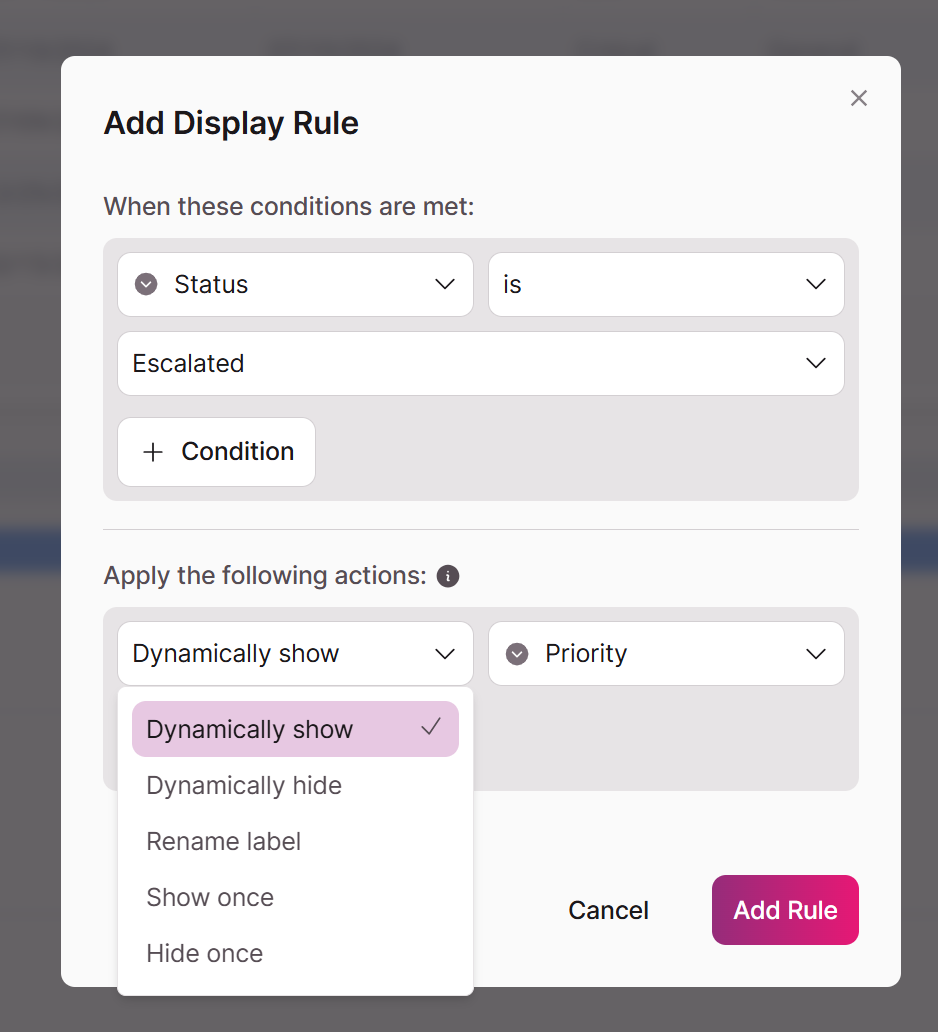
Choose what happens when conditions are met:
Forms

- Dynamically Show
- Dynamically Hide
- Rename Label
- Show once
- Hide once
Form Rule Types: Dynamic vs Standard
Understanding rule types helps you create predictable, maintainable display logic.
Dynamic Rules
Available Actions:
- Dynamically Show: When conditions are met, the field is shown, otherwise, it is hidden
- Dynamically Hide: When conditions are met, the field is hidden, otherwise, it is shown
Standard Rules
Available Actions:
- Show Once - Displays the field when conditions are met
- Hide Once - Hides the field when conditions are met
Unlike dynamic rules, standard rules do not automatically reverse when conditions change
Rename Label
Available Actions
- Rename Label - Dynamically changes the label name when conditions are met. Once renamed, the label keeps its new name until another qualifying condition causes it to change again.
Practical Examples
Job Application Form
You could create a form where different positions show relevant questions:
Condition: Position field equals "Software Developer" Action: Dynamically Show "Programming Languages" field
Condition: Position field equals "Sales Rep" Action: Dynamically Show "Previous Sales Experience" field
Appointment Scheduling
Prevent same-day rescheduling:
Condition: Appointment Date is before today Action: Show Once: "Reschedule Date" field
Managing Multiple Rules in Forms
Rule Order and Precedence
Rules evaluate from top to bottom, but precedence varies by type:
Dynamic Rules:
- All rules evaluate in sequenced order
- The last matching rule takes precedence
- Order: Place the most general conditions first → and the most specific conditions last
Standard Rules:
- All rules evaluate in sequenced order
- Order: Specific conditions first → General conditions last
Mixed Rule Types:
- Dynamic rules override standard rules if there is a conflict (for example a dynamic and standard rule set on the same field)
Organization Best Practices
Keep it simple:
- On forms, use one type of rule when possible (dynamic only or standard only)
- Avoid redundant or conflicting conditions
Table Element Display Rules

Available Actions
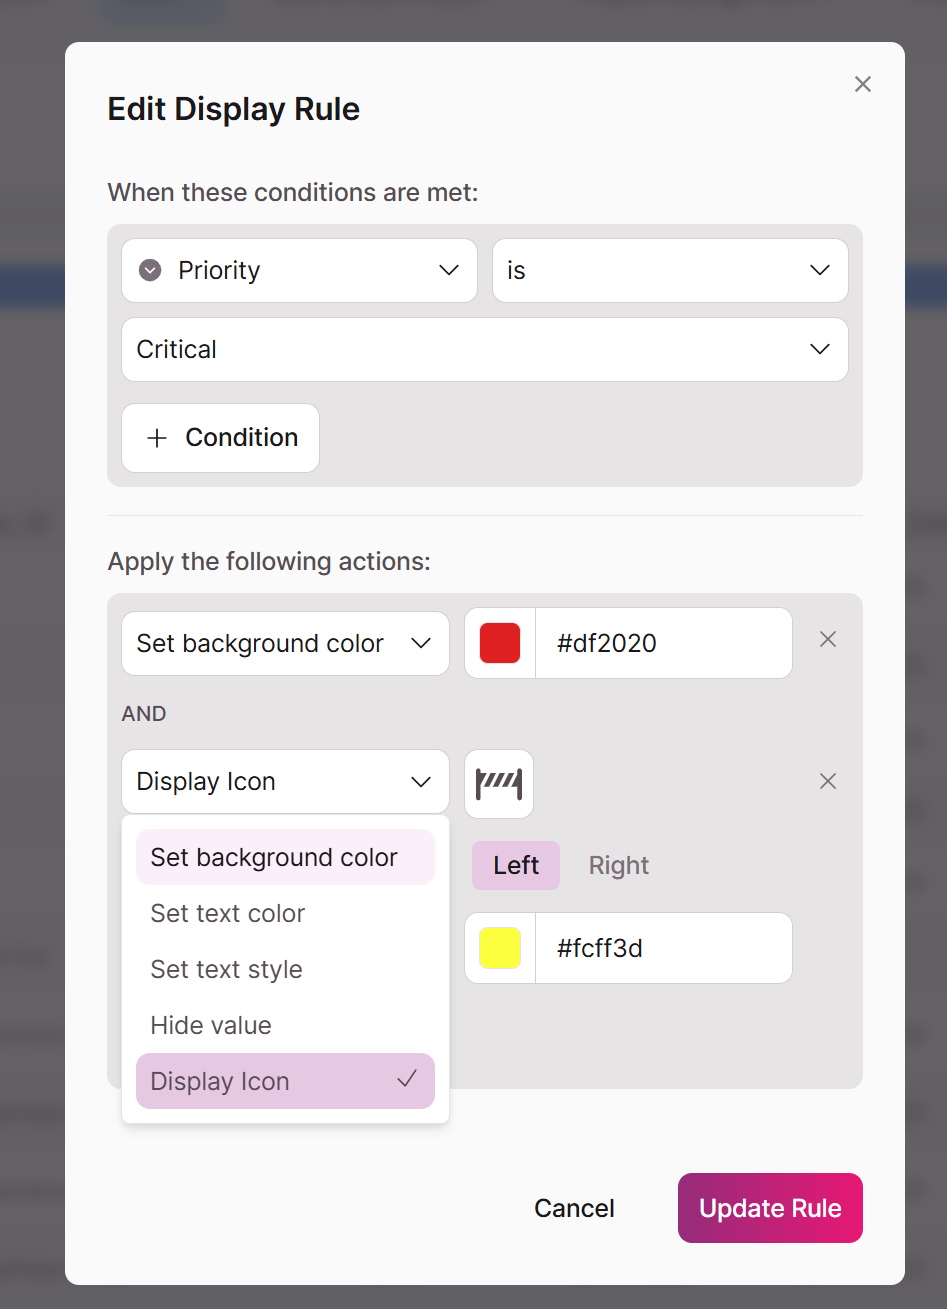
- Set Text Color - Change text to any color
- Set Text Style - Apply bold, italic, or strikethrough
- Set Background Color - Highlight cells with color
- Display Icon - Add status icons with custom colors
- Hide Value - Remove specific cell content
Practical Examples
Project Status Tracking Table
Condition: Status equals "Complete" Actions: Green background, checkmark icon, bold text
Condition: Status equals "Overdue" Actions: Red background, warning icon, italic text:
Condition: Status field equals "Urgent" Actions: Set background color to red, display warning icon
Details Element

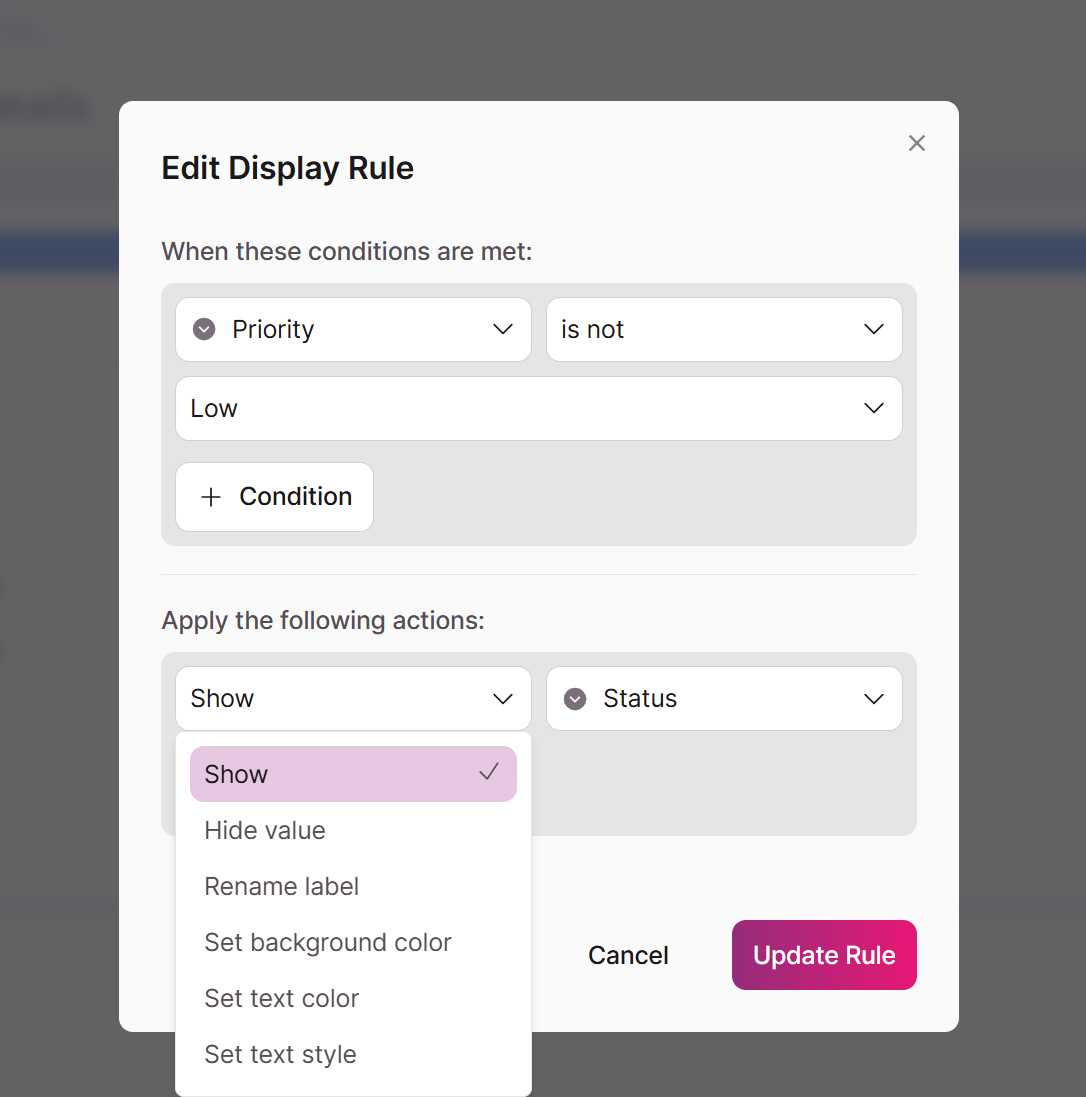
Available Actions*
- Set Text Color - Change text to any color
- Set Text Style - Apply bold, italic, or strikethrough
- Set Background Color - Highlight cells with color
- Display Icon - Add status icons with custom colors
- Hide Value - Remove specific cell content
- Show Value - Show specific cell content
Practical Examples
Example: Hide the Late Fee field if the Due Date is earlier than the current time. This ensures that the user does not see a late fee when it is not necessary.
Troubleshooting Common Issues
Hidden Fields Not Saving Data
Problem: Hidden form fields lose their values Solution: Hidden fields don't submit data - this is expected behavior
Rules Not Reversing
Problem: Hide Once rule doesn't show field again Solution: Create a separate Show rule with opposite conditions, or use Dynamic Show/Hide rules
Unexpected Results
Problem: Rules behave differently than expected Solution: Check if you're using dynamically show or dynamically hide - they have opposite logic
Mixed Rule Conflicts
Problem: Dynamic and standard rules interfere Solution: Dynamic rules always win - don't place mixed rule types on the same field
Display Rules are for User Experience Only
Use display rules appropriately:
- Simplify complex forms by showing/hiding relevant fields
- Improve user experience with conditional field display
- Create dynamic interfaces that respond to user input
Best Practice: Think of display rules as a user experience tool, not a security feature.
When Display Rules Are Appropriate
✅ Good use cases:
- Showing/hiding fields based on form selections
- Creating cleaner interfaces by reducing visual clutter
- Implementing conditional field visibility for better UX
- Guiding users through multi-step processes
When to Use Alternative Security Measures
🚫 Avoid display rules for:
- Hiding sensitive personal information
- Protecting financial data
- Concealing administrative fields
- Any data that must remain truly private
Updated 29 days ago
