Creating Connections
Learn how to add connection fields to your tables and establish relationships between different types of data.
What You'll Learn
This guide walks you through the process of creating connections between tables in your Knack application. You'll learn how to add connection fields, choose the right tables for your connections, and configure connection settings.
Adding a Connection Field
Creating a connection between tables involves adding a special field type - the Connection field - to one of your tables. Here's how to do it:
- Determine which table you want to create the connection field in.
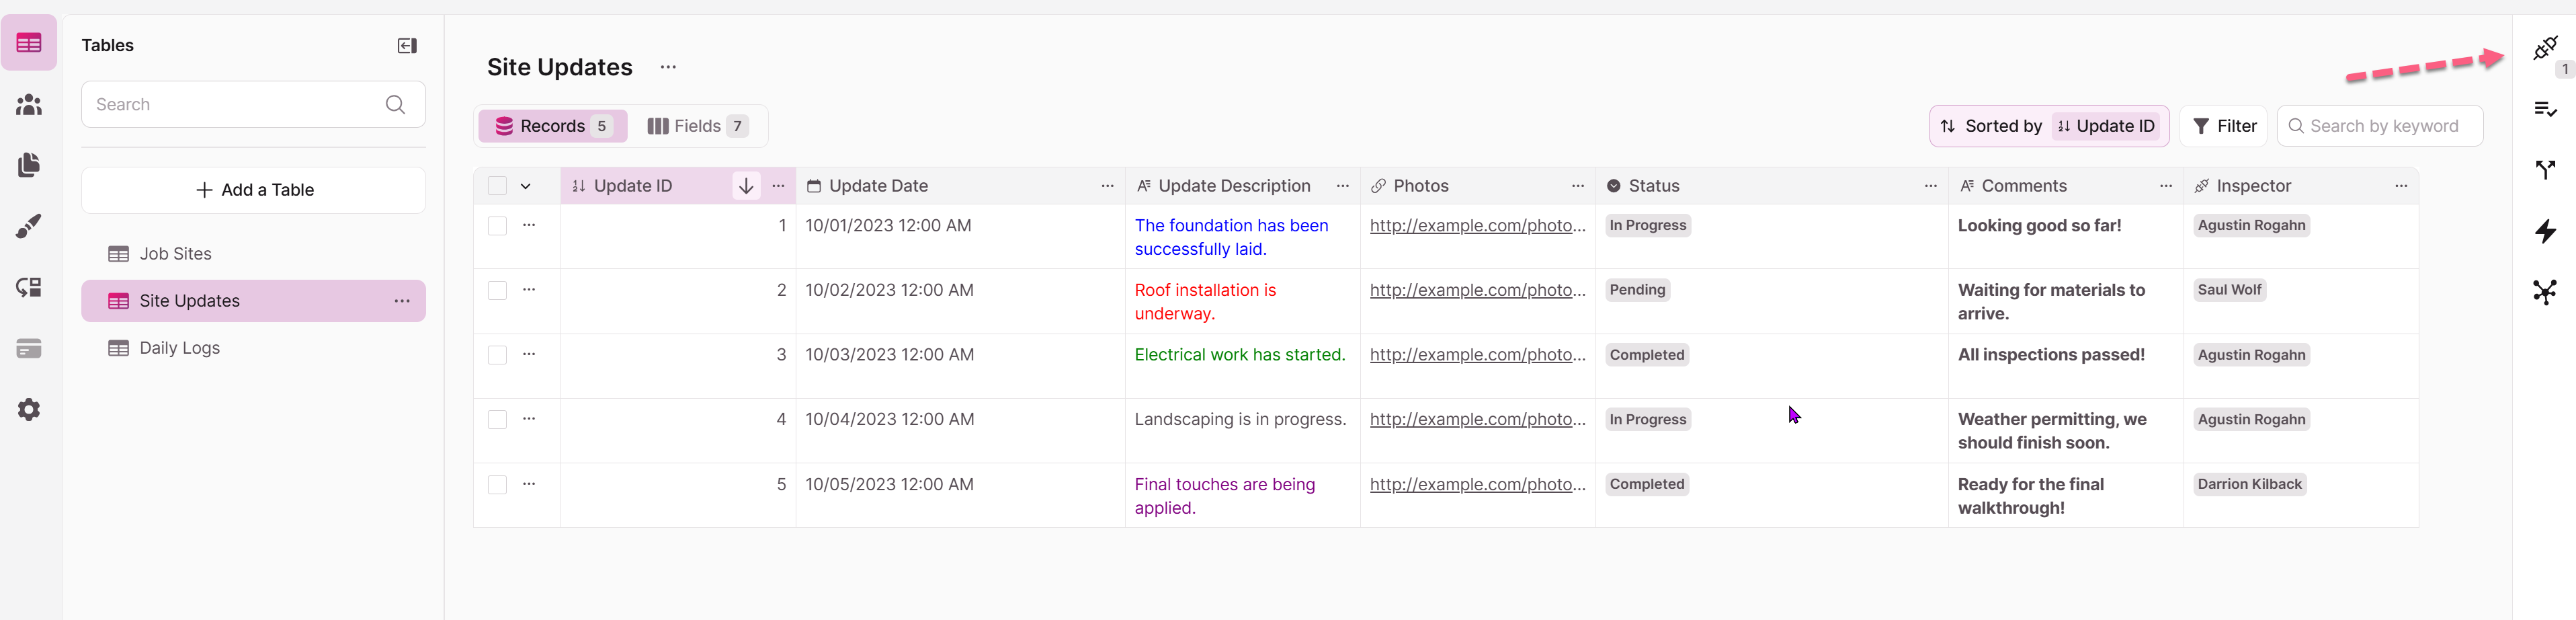
- Navigate to the Records or Fields for that table
- From the right panel, select Add Connection

- Alternatively, in the records tab, insert a new field by selecting the field header from an existing field, and click to add a new field to the left or right. Select Connection as the field type.
- In the fields tab, select Add Field, and select Connection as the field type
Choosing the Correct Table
Where you place your connection field depends on the type of relationship you want to create. Follow these guidelines when deciding where to place your connection:
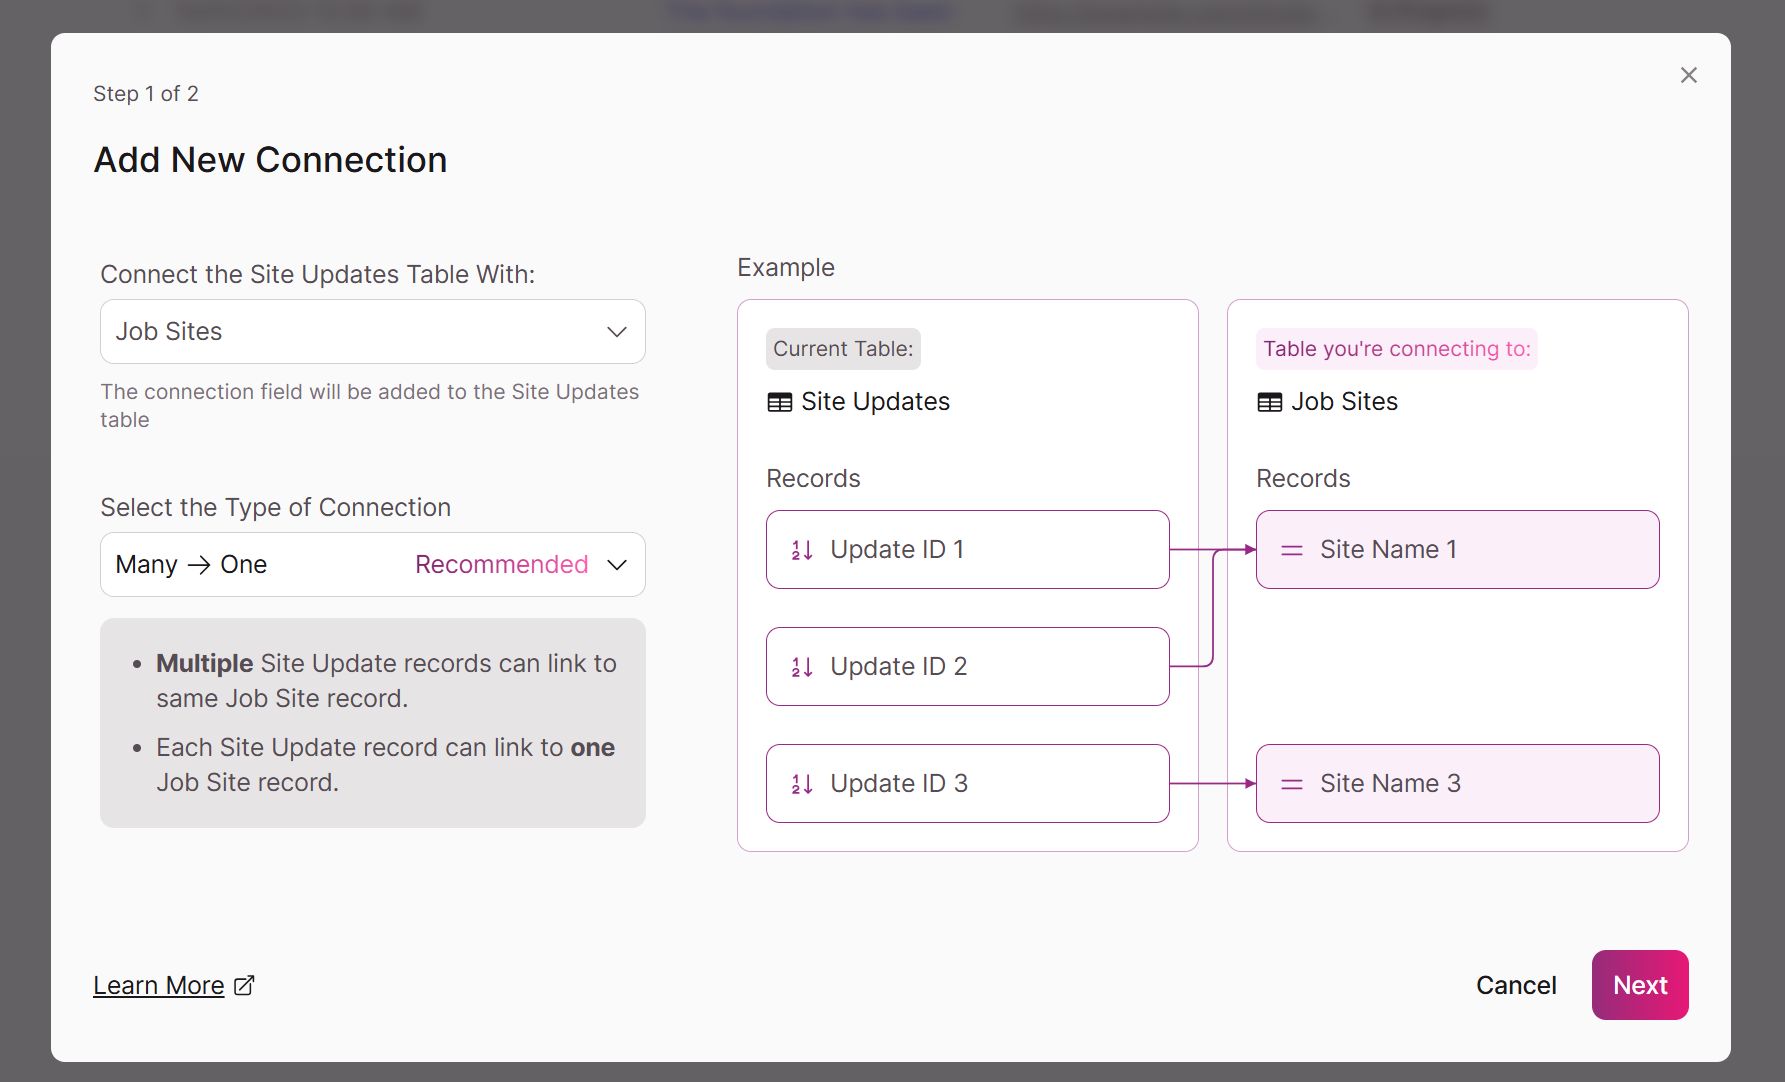
For Many-to-One Relationships:
- Add the connection field while on the "many" table. Each record in the "many" table allows you to select one value from a list of values in the connected table.
- Example: Navigate to an Employees table and add a connection field. Select the Company table to connect to. Each Employee can belong to one Company, and a Company can have many Employees.
For Many-to-Many Relationships:
- Add to the table used more frequently
- Example: Navigate to a Students table and add a connection field to Courses. A student can select multiple courses, and when you go to the Courses table, each course can have multiple students selected. Students will be updated more frequently than courses, so add the connection field there.
Configuring Connection Setting
When creating a connection field, you'll need to configure several settings:
- Basic Settings:
-
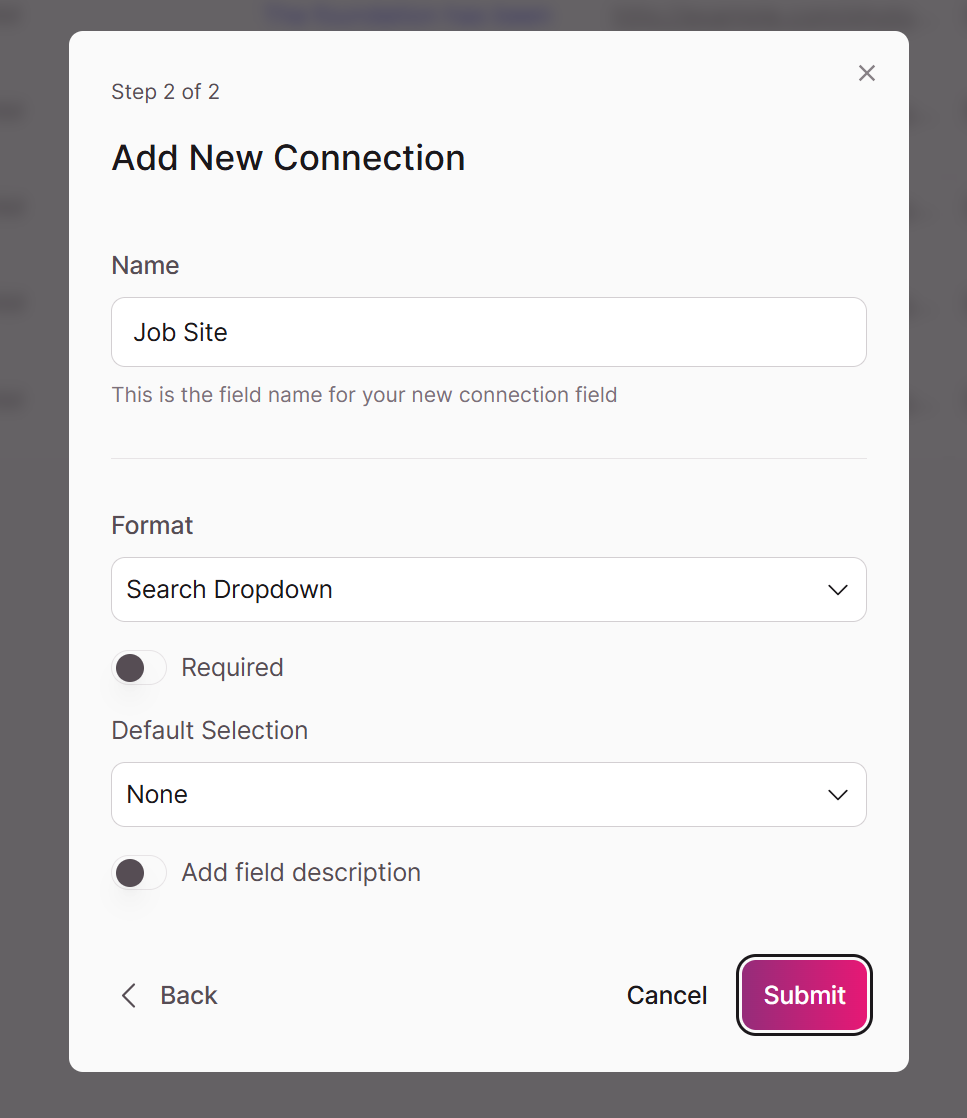
Name: The field name that appears in your Builder
-
Description: Internal field description (appears as tooltips when viewing records)
-
Required: Whether selecting a value in the connection field is mandatory
-
Default: Default selection option
Format Options Based on Relationship Type (applicable in the Live App):
- For Many-to-One Relationships:-
- Searchable Dropdown: Single-select dropdown with search capability
- Radio Buttons: List of options with single-choice radio buttons
- For Many-to-Many Relationships:
- Multi-Select Dropdown: Dropdown allowing multiple selections
- Checkbox List: List with multiple-choice checkboxes
- For Many-to-One Relationships:-
-
Examples
Creating an Employee-Company Connection
- Navigate to your Employees table
- Add a new Connection field
- Select the Companies table as the table to connect to
- Choose "Many-to-One" as the connection type (many employees can link to one company)
- Name the field "Company"
- Set format to "Searchable Dropdown"
- Save the connection field
Creating a Students-Courses Connection
- Navigate to your Students table
- Add a new Connection field
- Select the Courses table as the table to connect to
- Choose "Many-to-Many" as the connection type (students take multiple courses)
- Name the field "Enrolled Courses"
- Set format to "Multi-Select Dropdown"
- Save the connection field
Tip: It's helpful to have some records in the table you are connecting with first to test with
Updated about 1 year ago