Adding and Configuring the Accept Payment Element
Add a checkout to any page that displays a single record, and configure how the payment is collected, processed, and followed up.
What you'll learn:
- Where you can add an Accept Payment element and how to add it
- How to configure checkout, payment, and summary settings
- How to automate what happens after a payment with rules
Where you can add an Accept Payment element
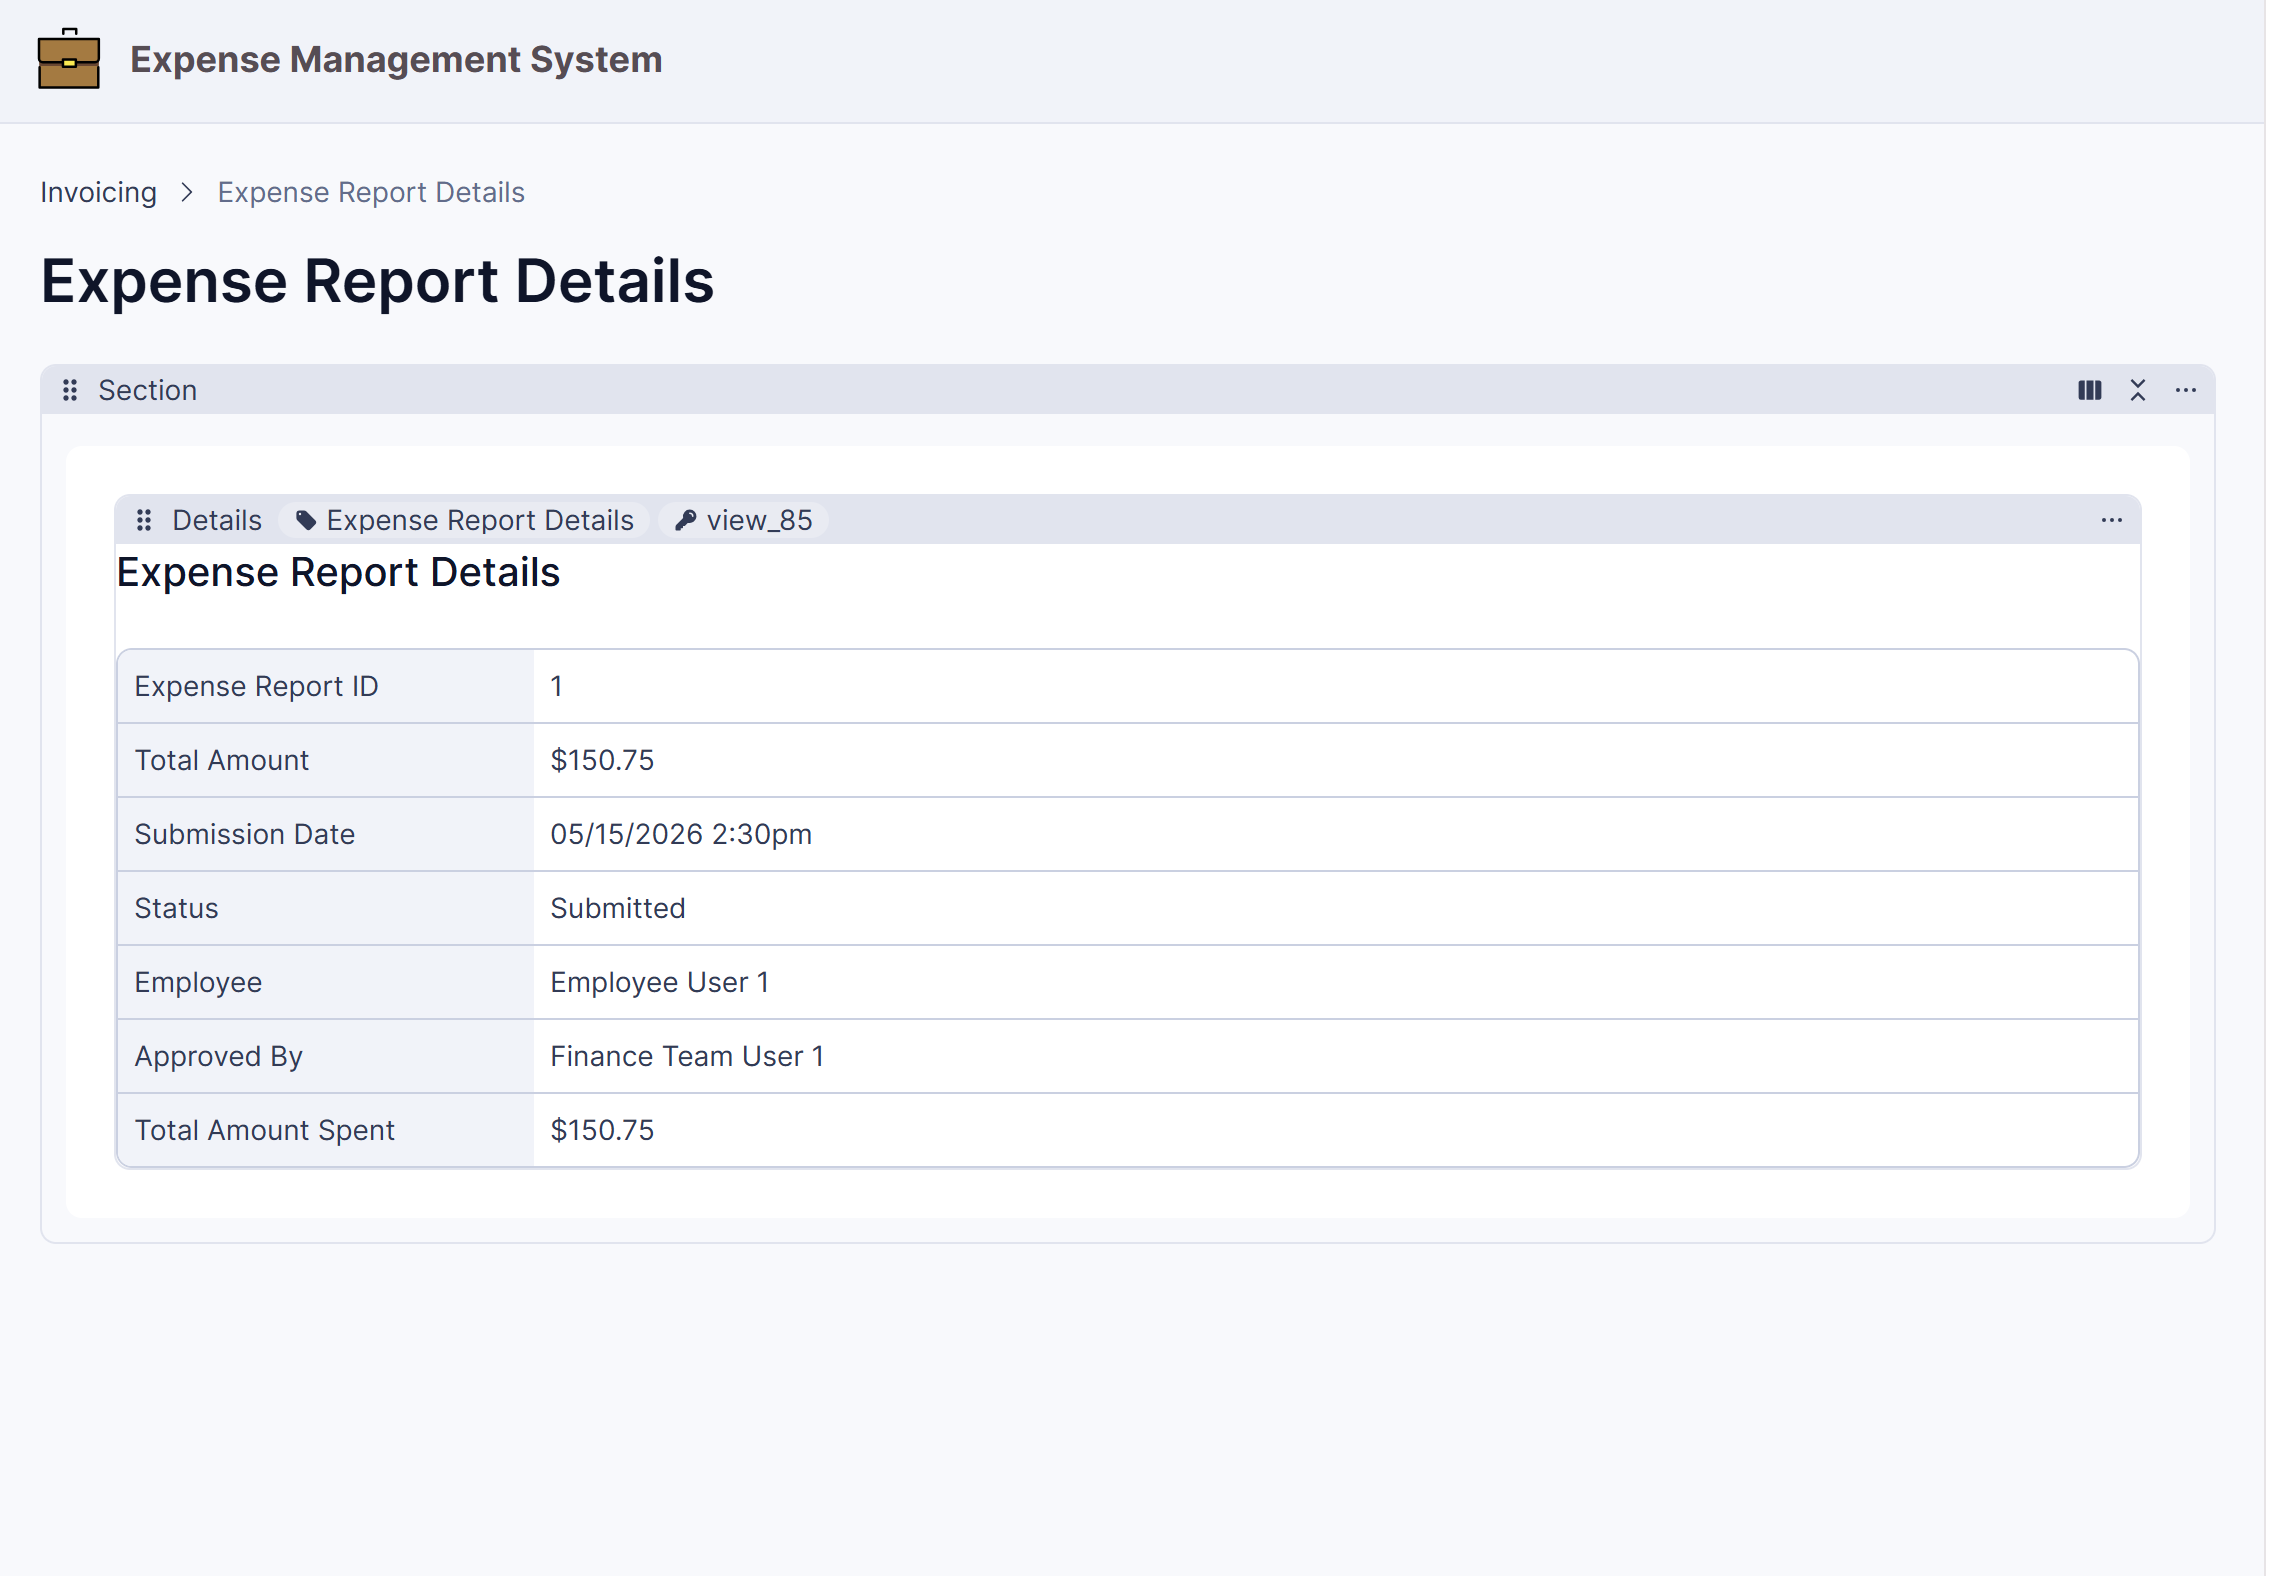
You can add an Accept Payment element to any page that displays a single record and includes a numeric field to use as the total, such as a details page for an order or invoice. This includes public pages — users don't need to be logged in to make a payment.
Note: Payment elements are only available on pages that can display a single record, like a details page. If the option is unavailable, hover over it to see a tooltip explaining the requirement.
Adding the element
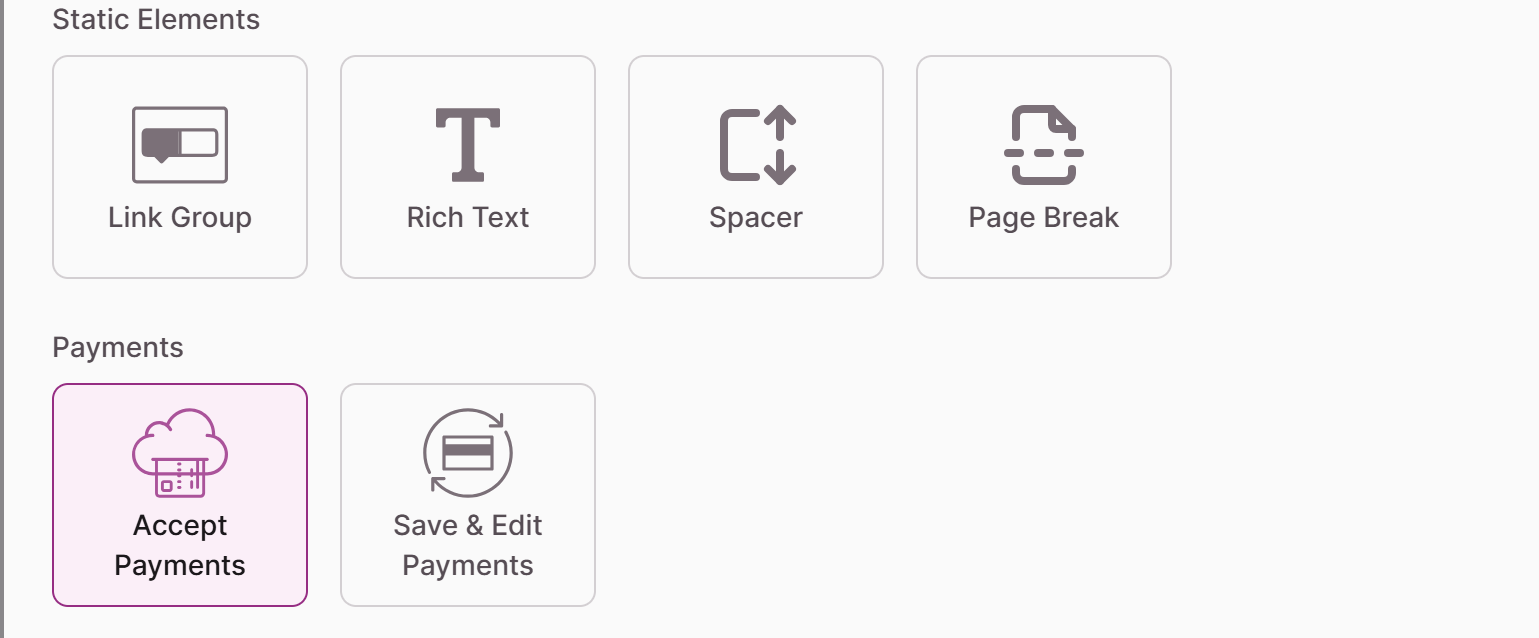
There are two ways to add an Accept Payment element:
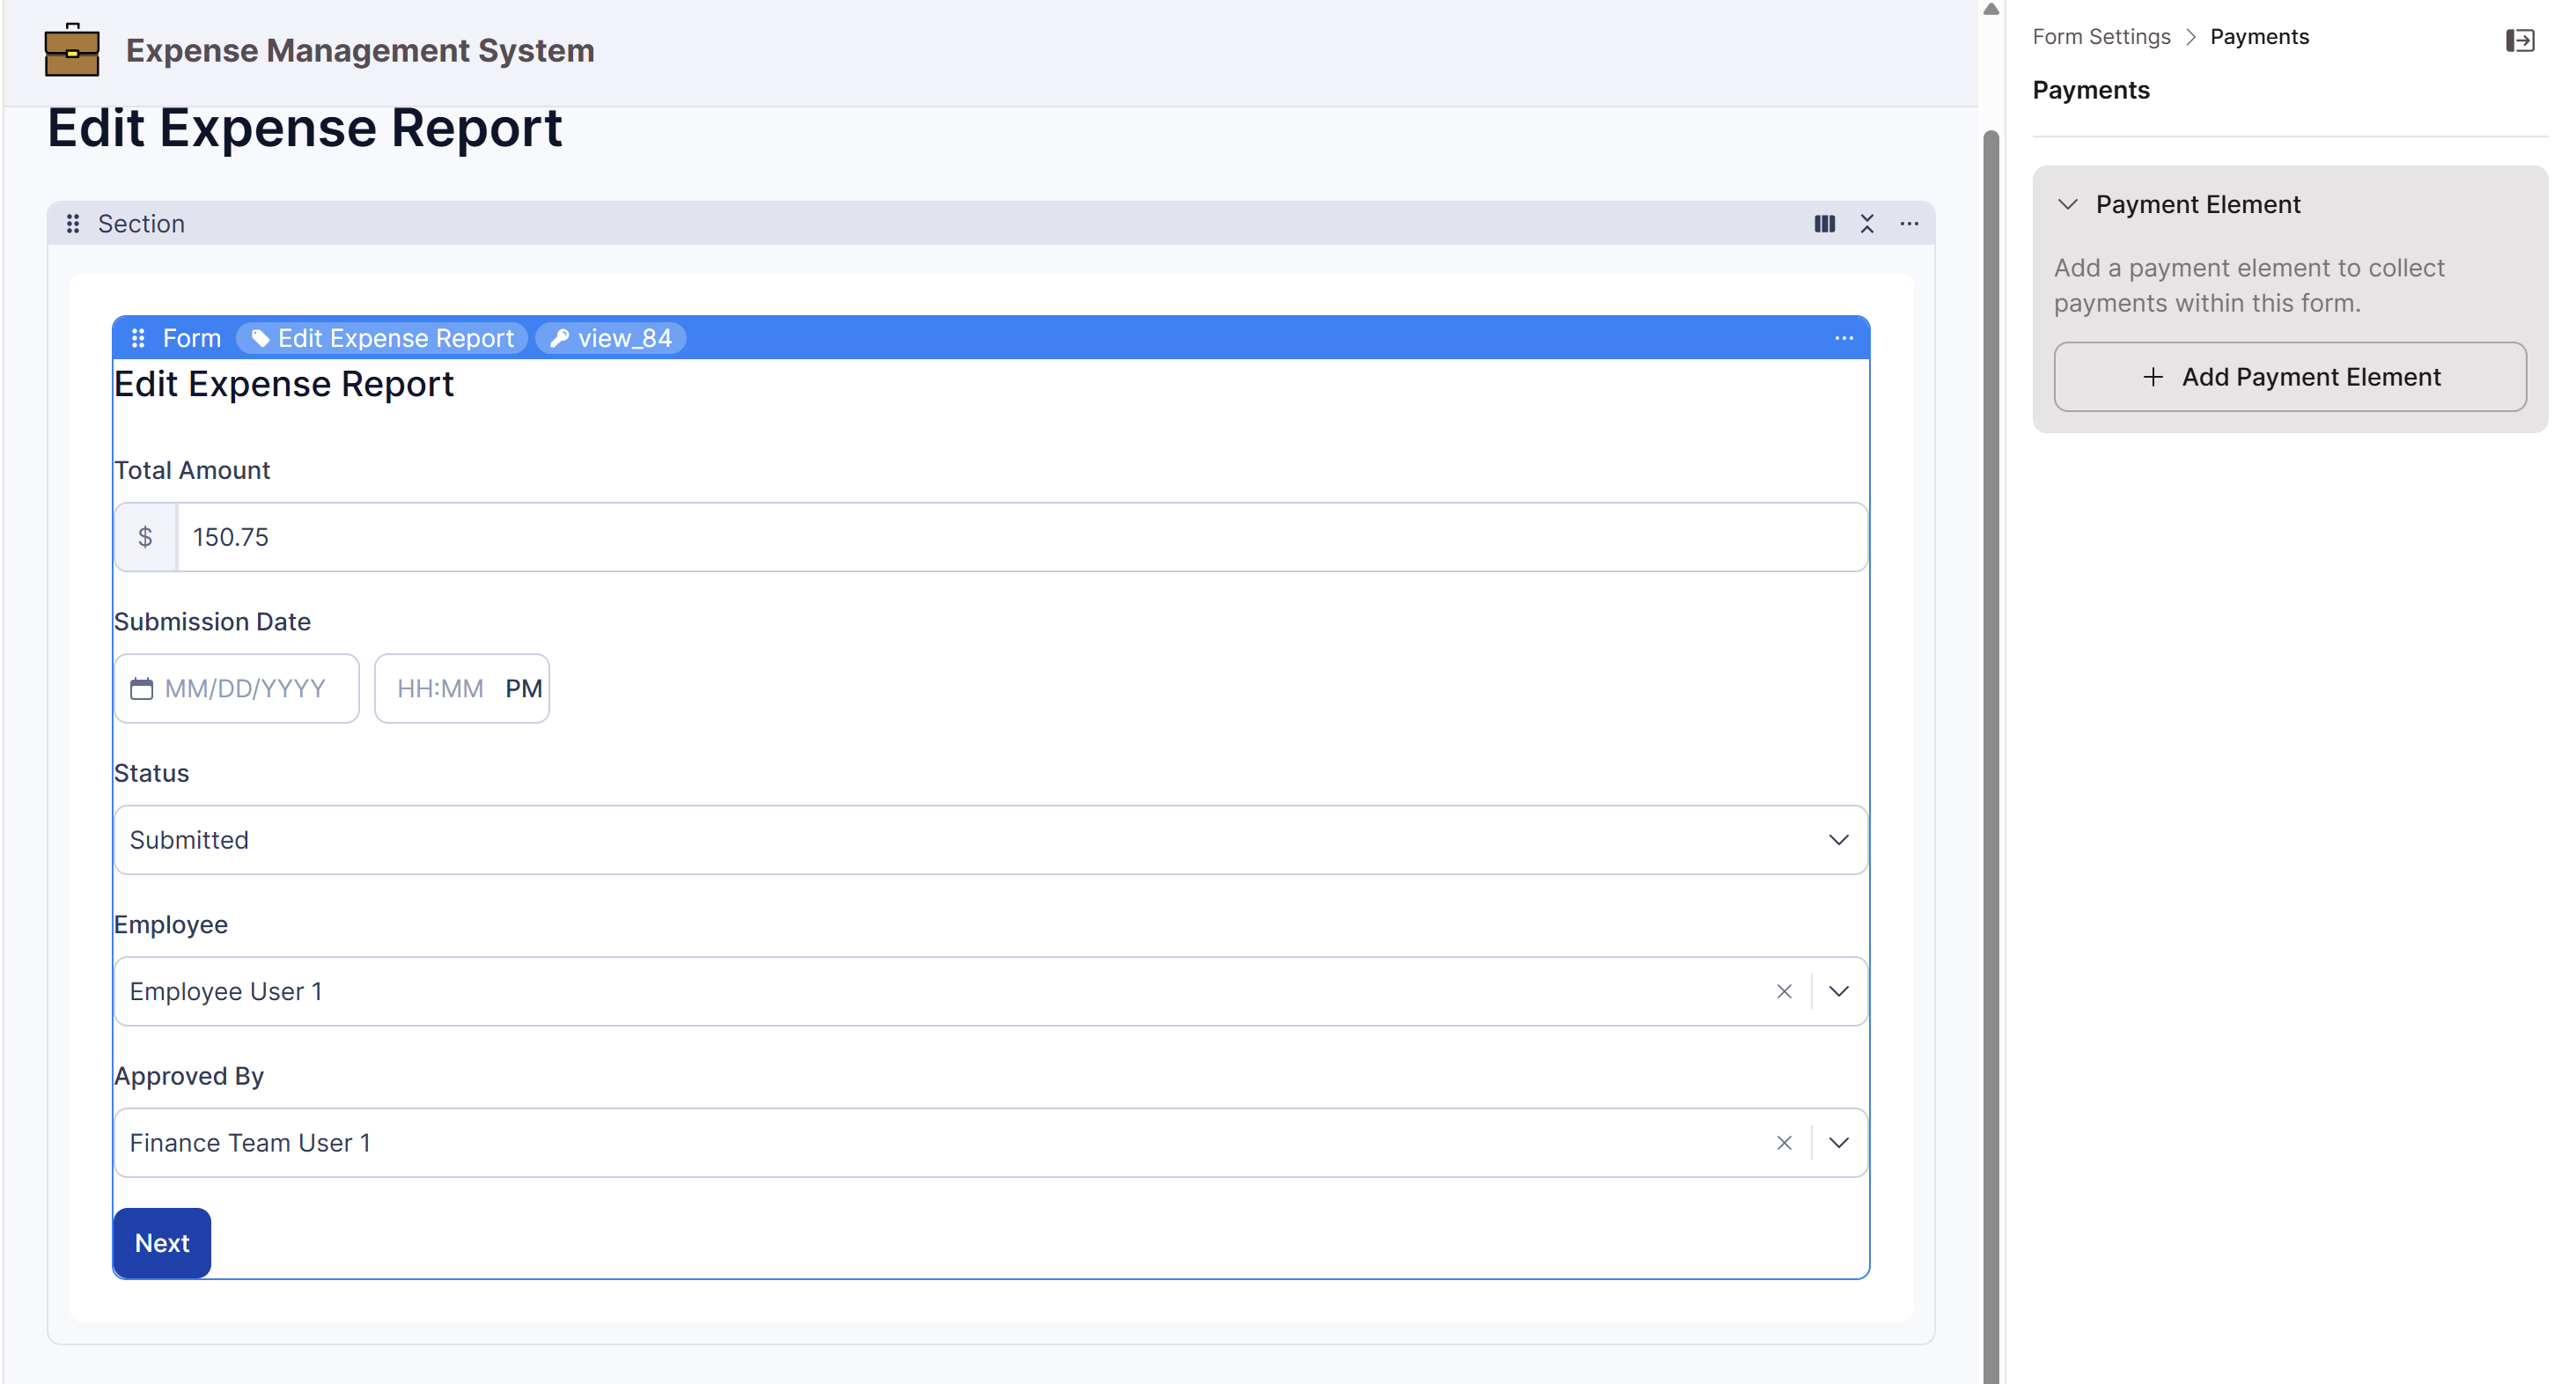
- From the element picker — Add it directly to a new or existing page that shows a single record, then choose the record it will collect payment for.
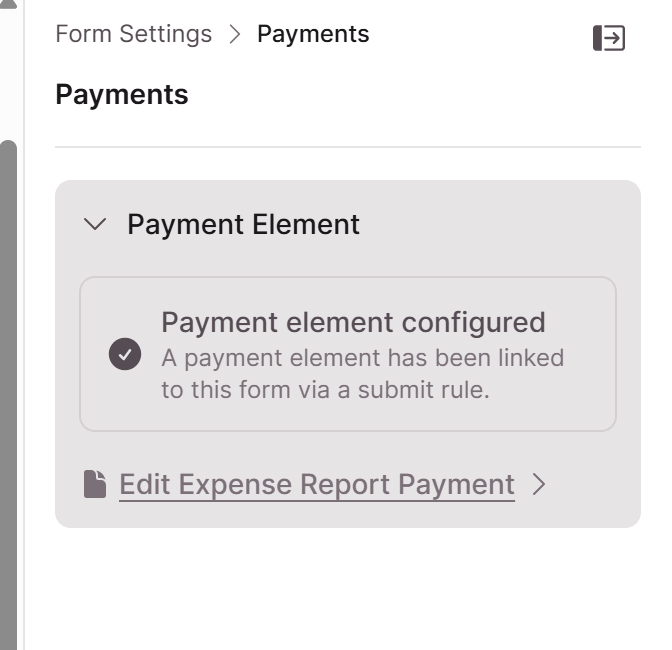
- From a form — When you have a form that adds, updates, or displays a single record, you can add a payment step to it. This links a payment element to the form via a submit rule, so users complete the form and then pay.
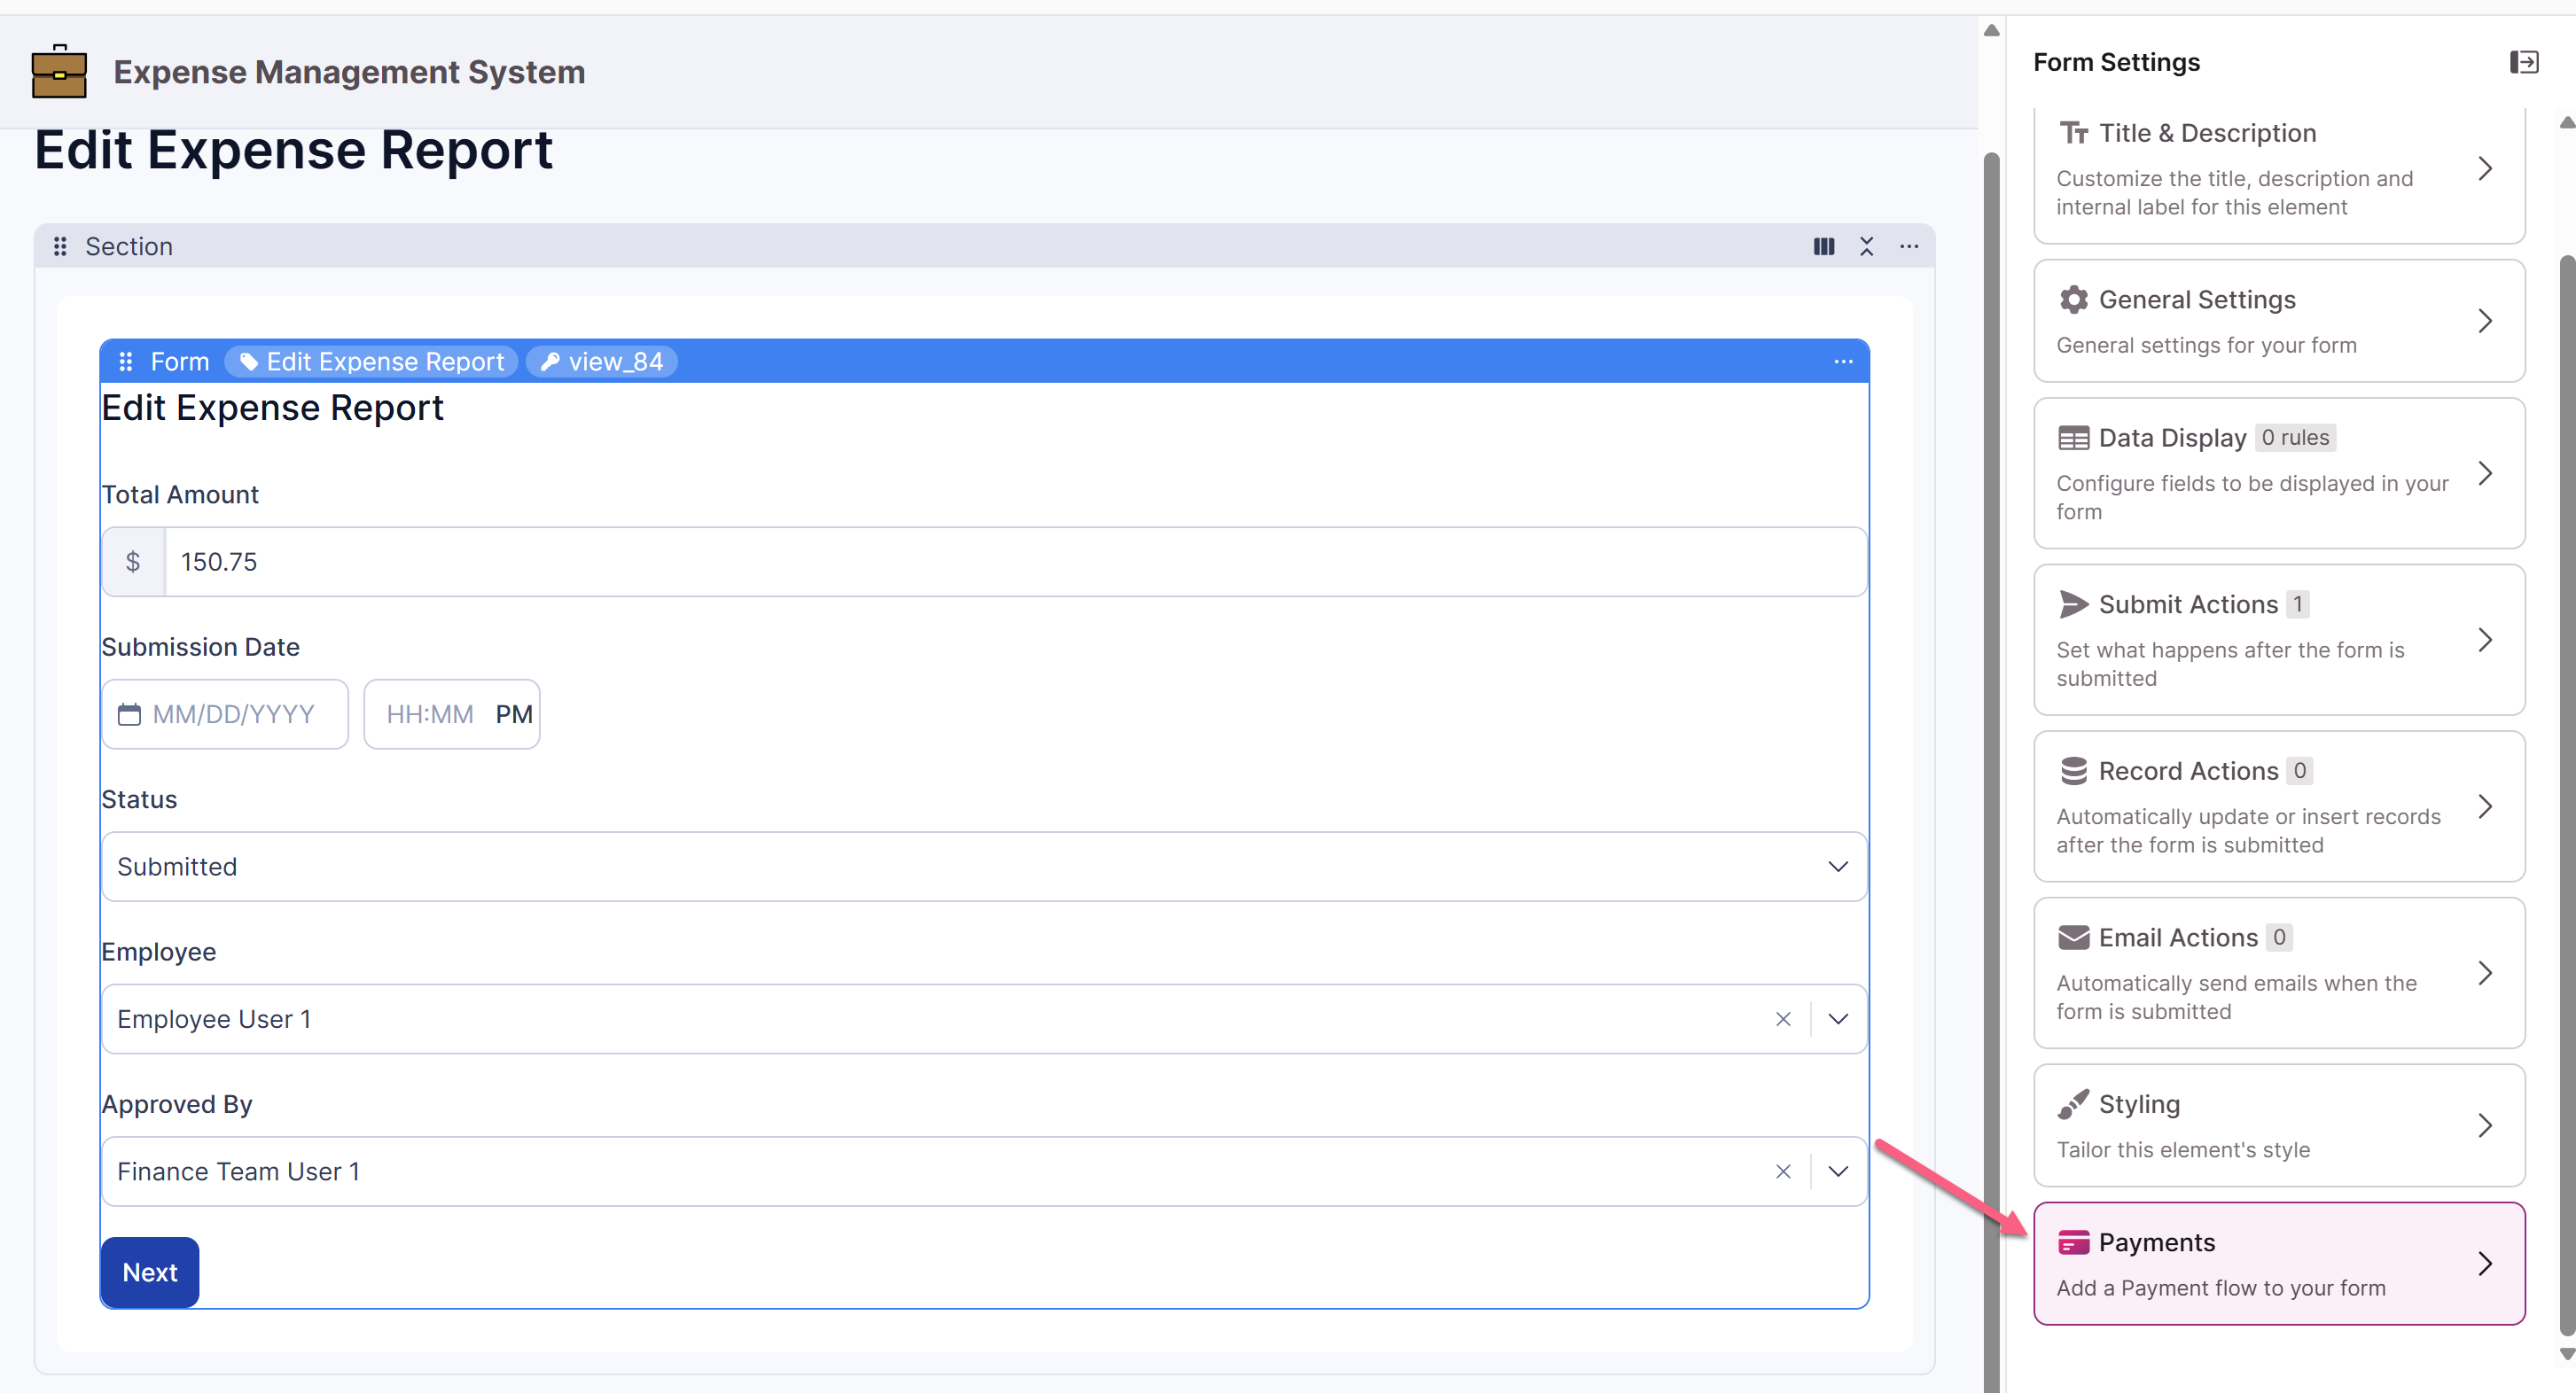
Tip: Adding a payment from a form is ideal for "submit, then pay" flows, like creating an order and immediately collecting payment for it.
Configuring the element
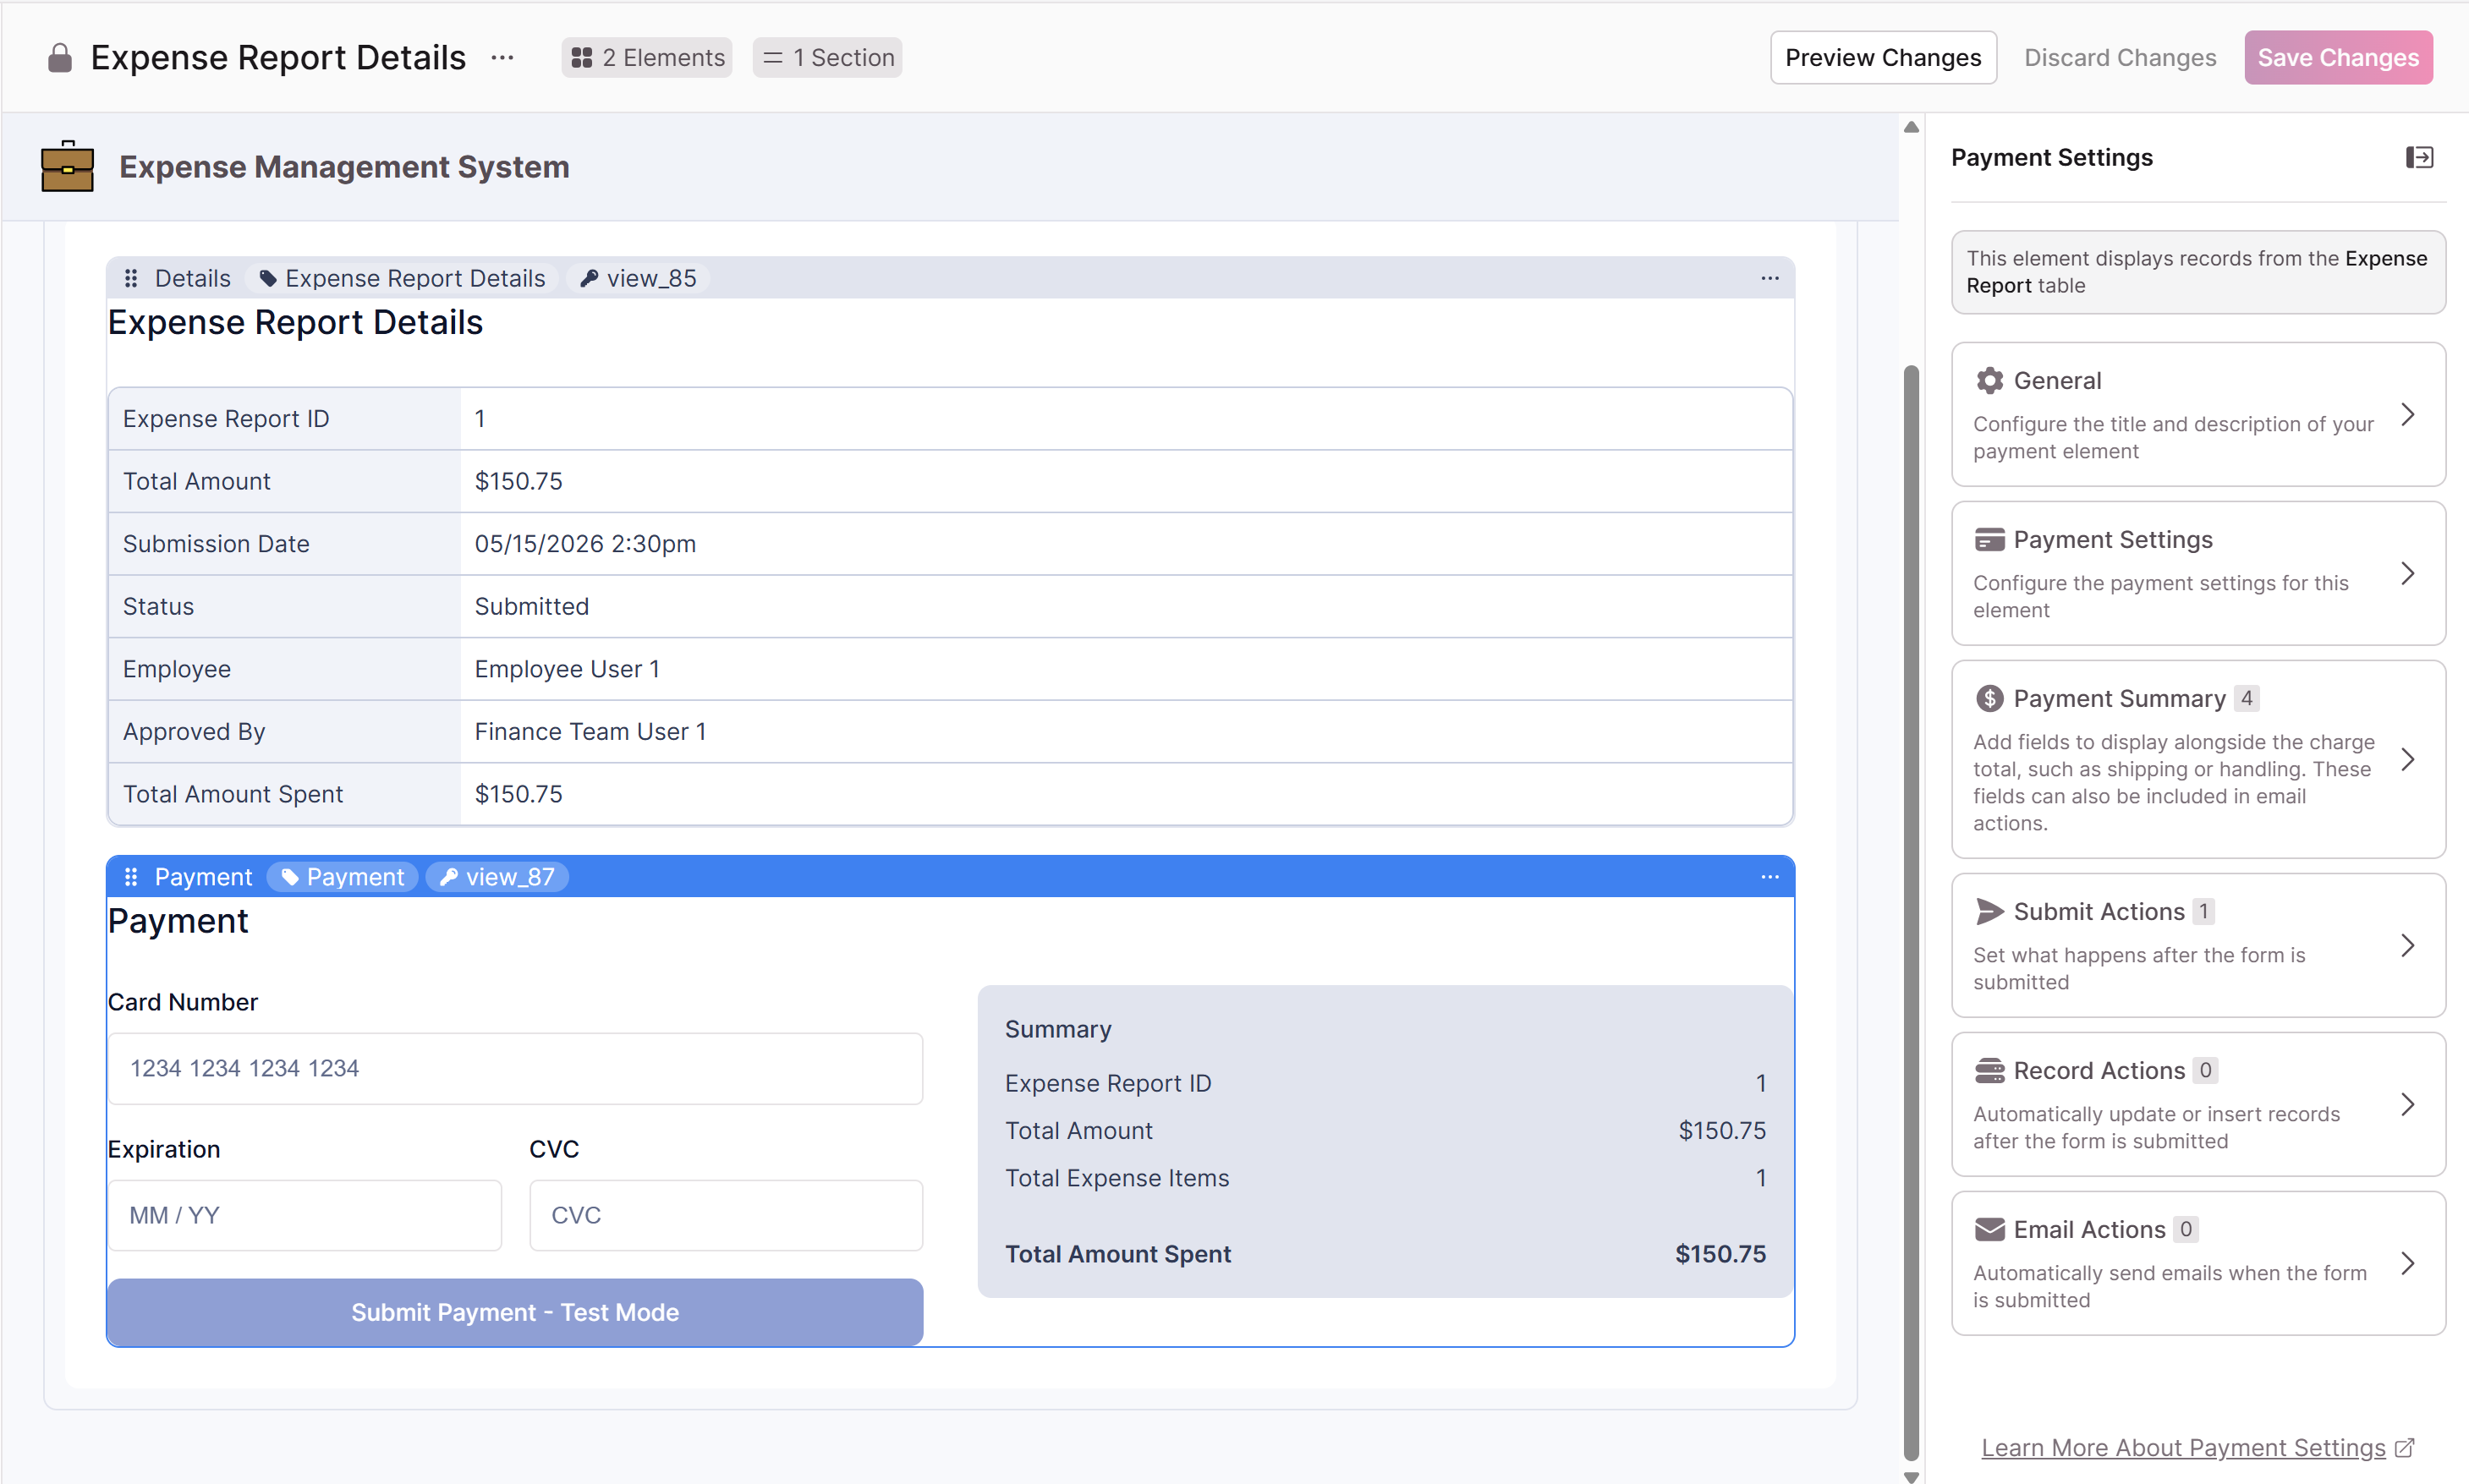
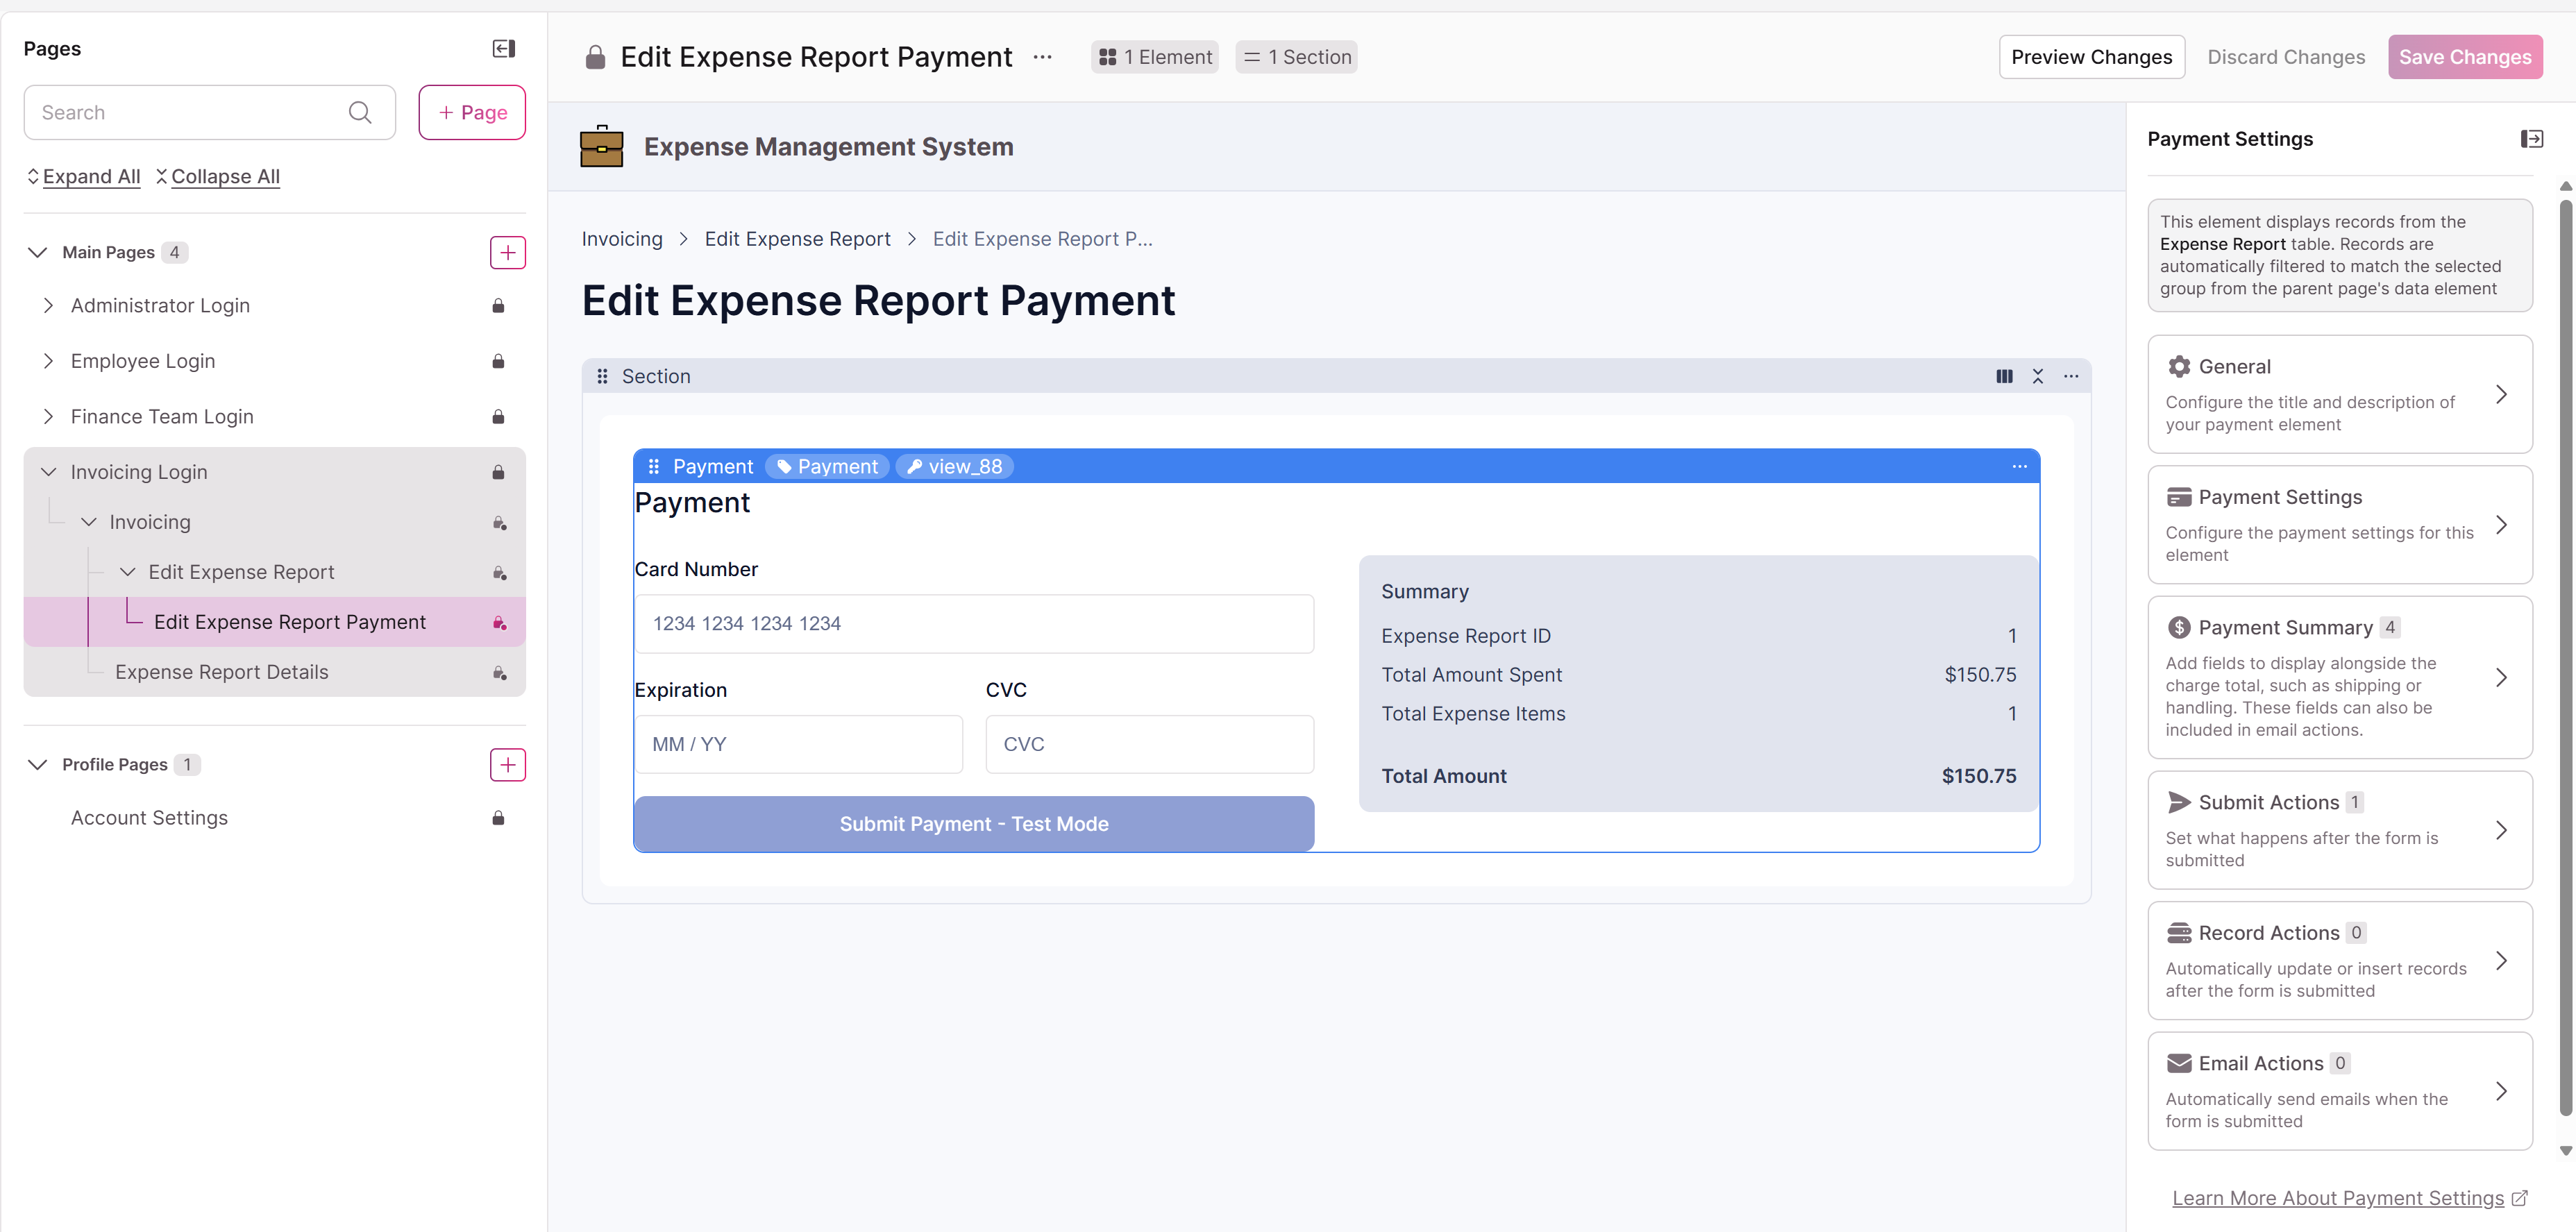
The Accept Payment element's settings are grouped into a few areas: Payment Settings, Payment Summary, and rules.
Payment Settings
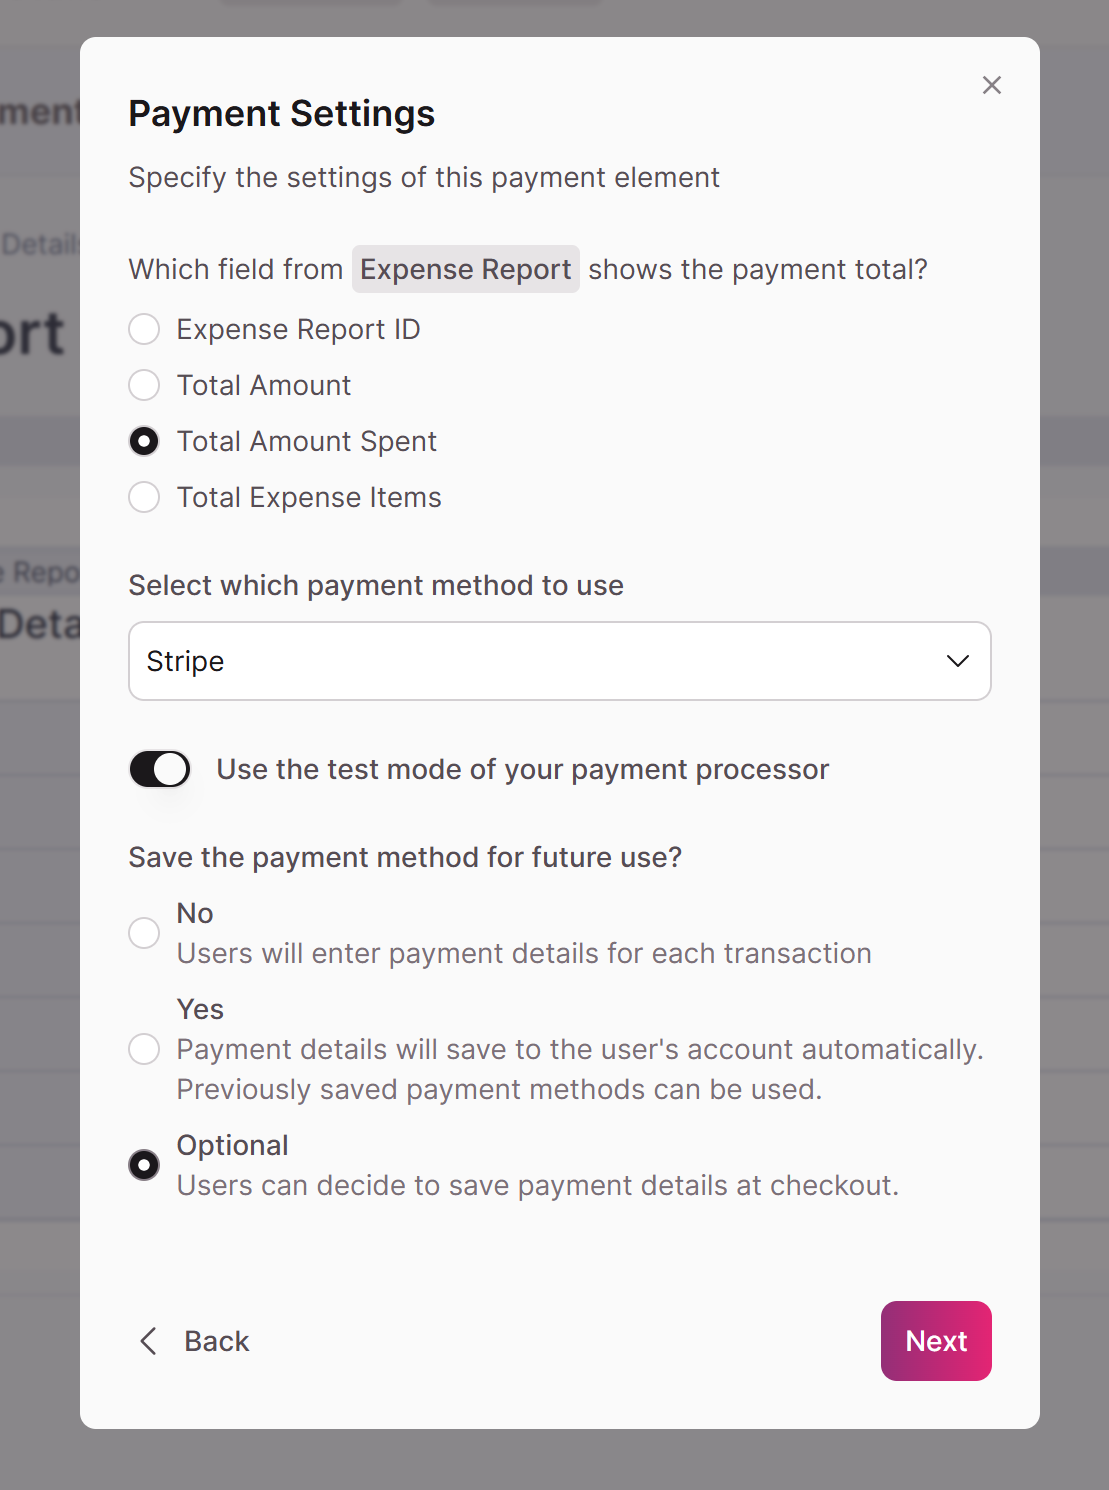
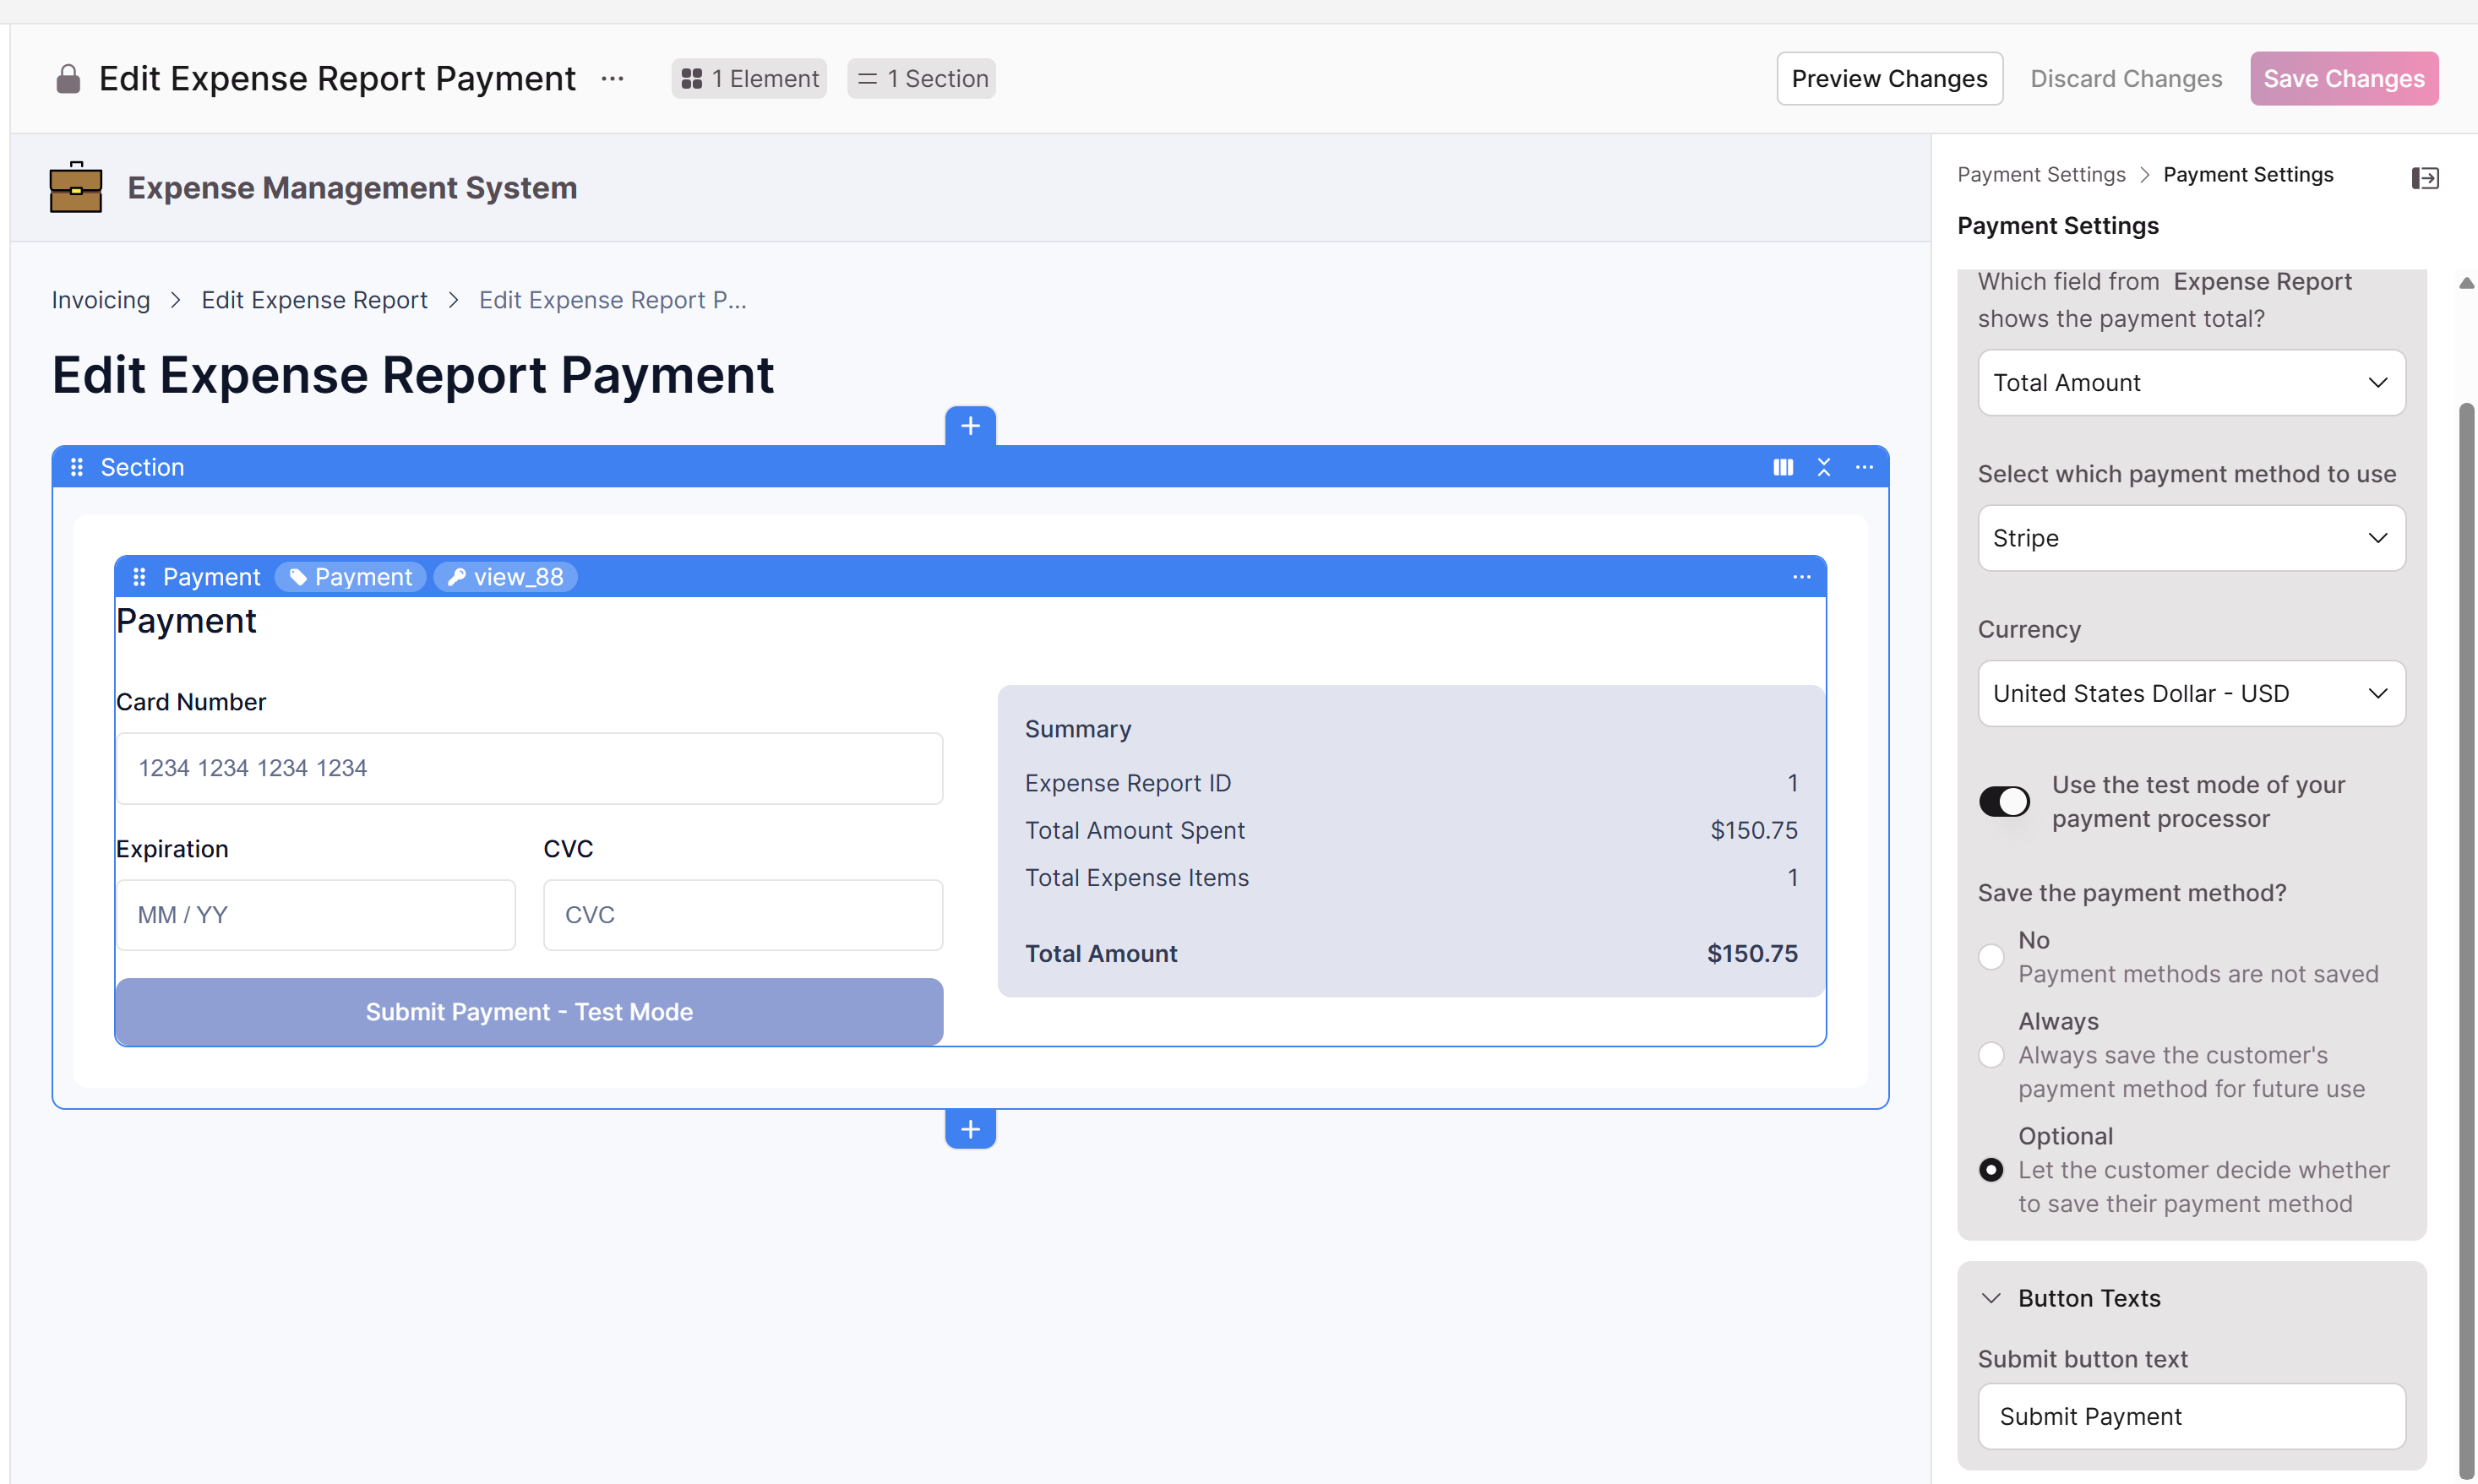
Payment Settings control how the payment is processed:
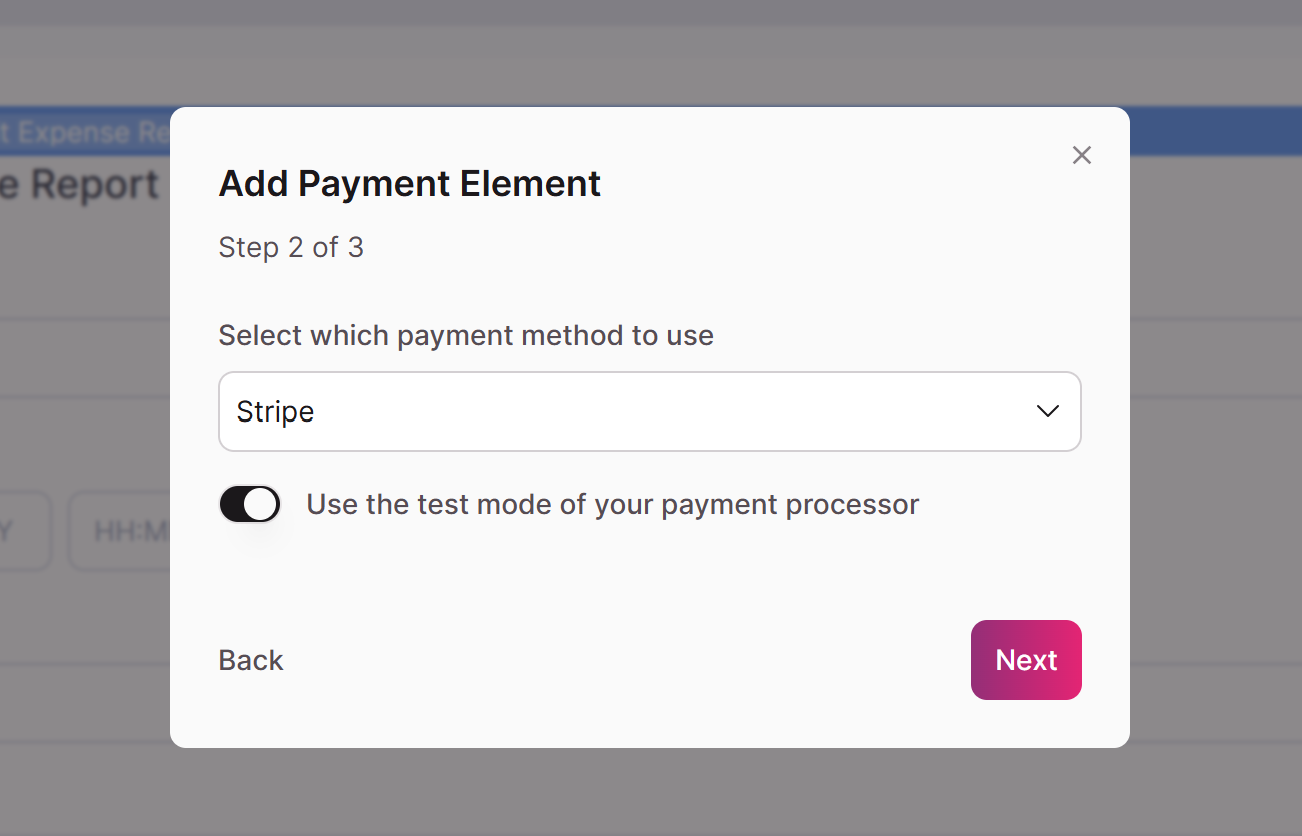
- Processor and mode — Shows the active processor (Stripe) and whether it's in Test or Live Mode. (Only Test Mode is available on Trial and Starter plans, or if only Test keys were entered.)
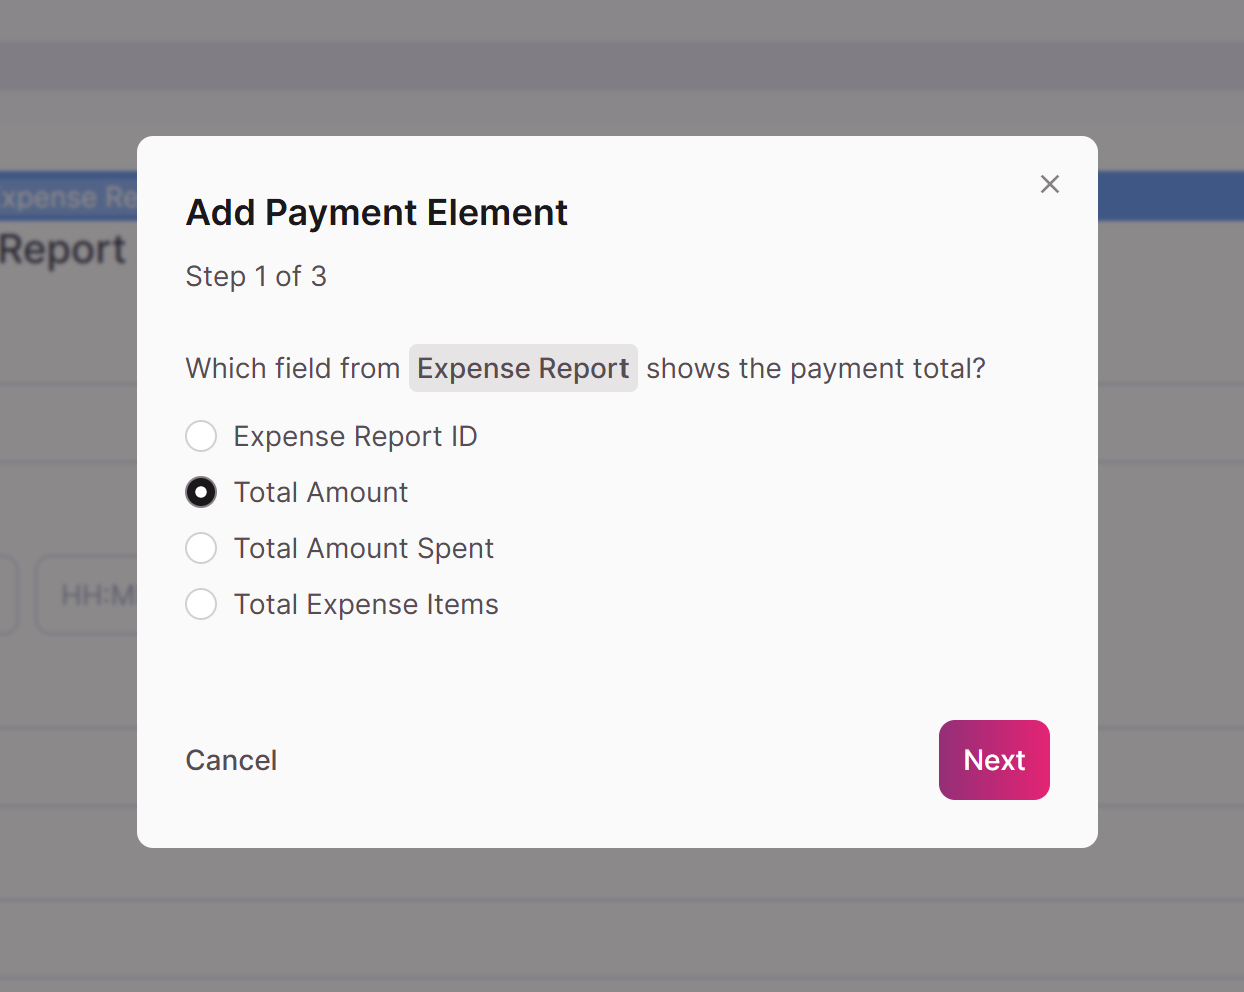
- Payment total field — The numeric or currency field used as the amount due. You can switch it to another available number or currency field.
- Currency — Change the currency from the default if needed.
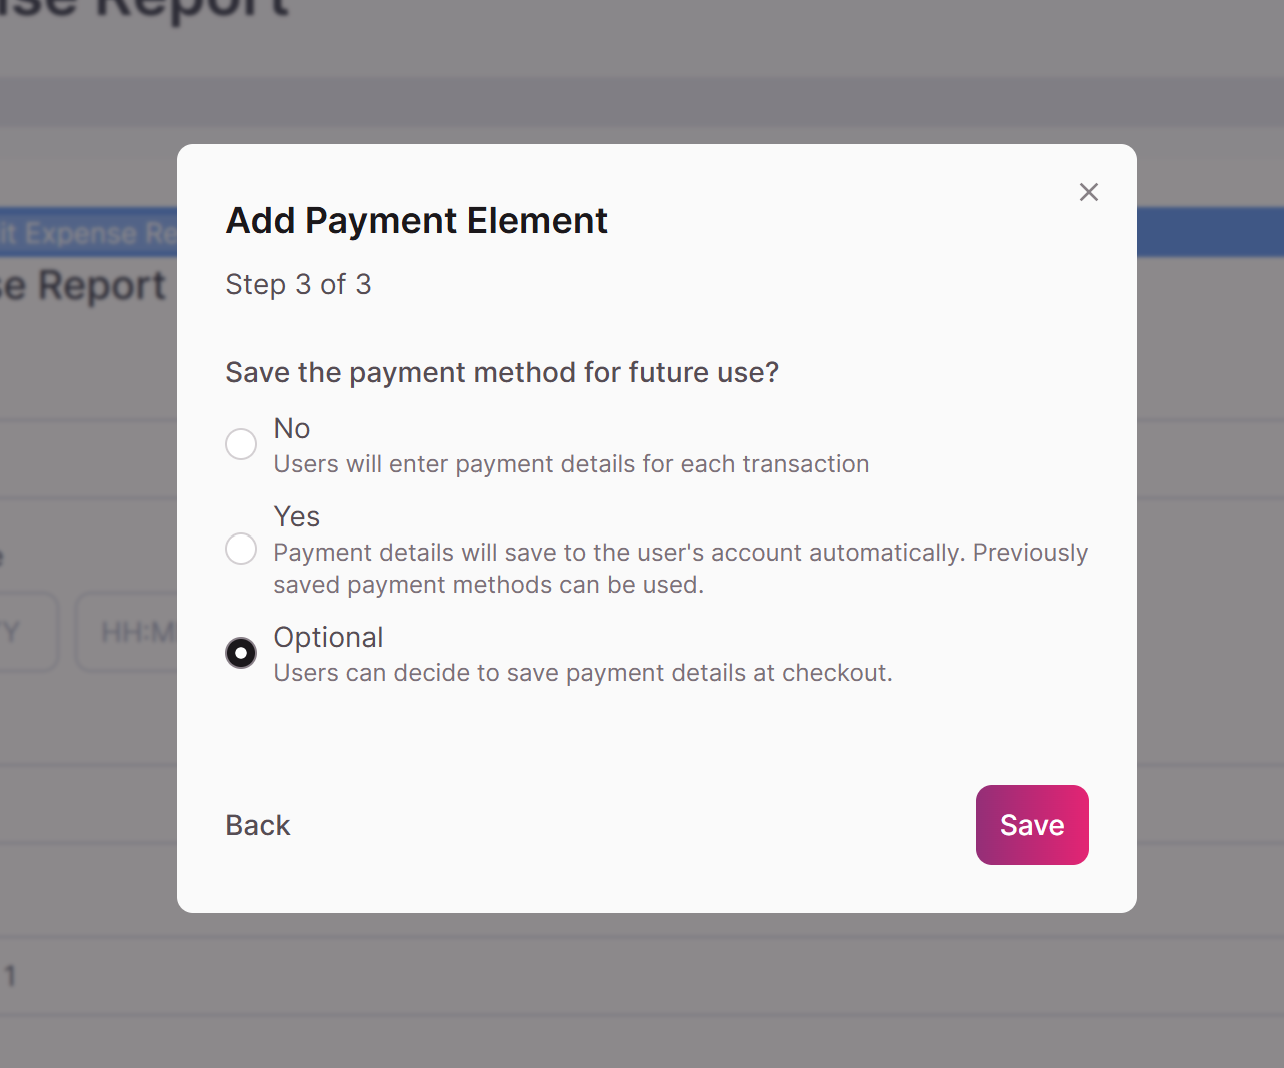
- Save Payment Method — Choose whether users can save their card for future use:
- No — No save option is offered.
- Yes — Users save their card as part of checkout.
- Optional — Users choose whether to save their card.
Note: The Save Payment Method option (Yes or Optional) is only available on login-protected pages, since a saved card has to belong to a logged-in user. When set to Yes or Optional, the save-and-edit payment UI is surfaced automatically at checkout.
Important: The payment total is read-only for your users. It's pulled from the source record and can't be changed at checkout, so the amount charged always matches your data.
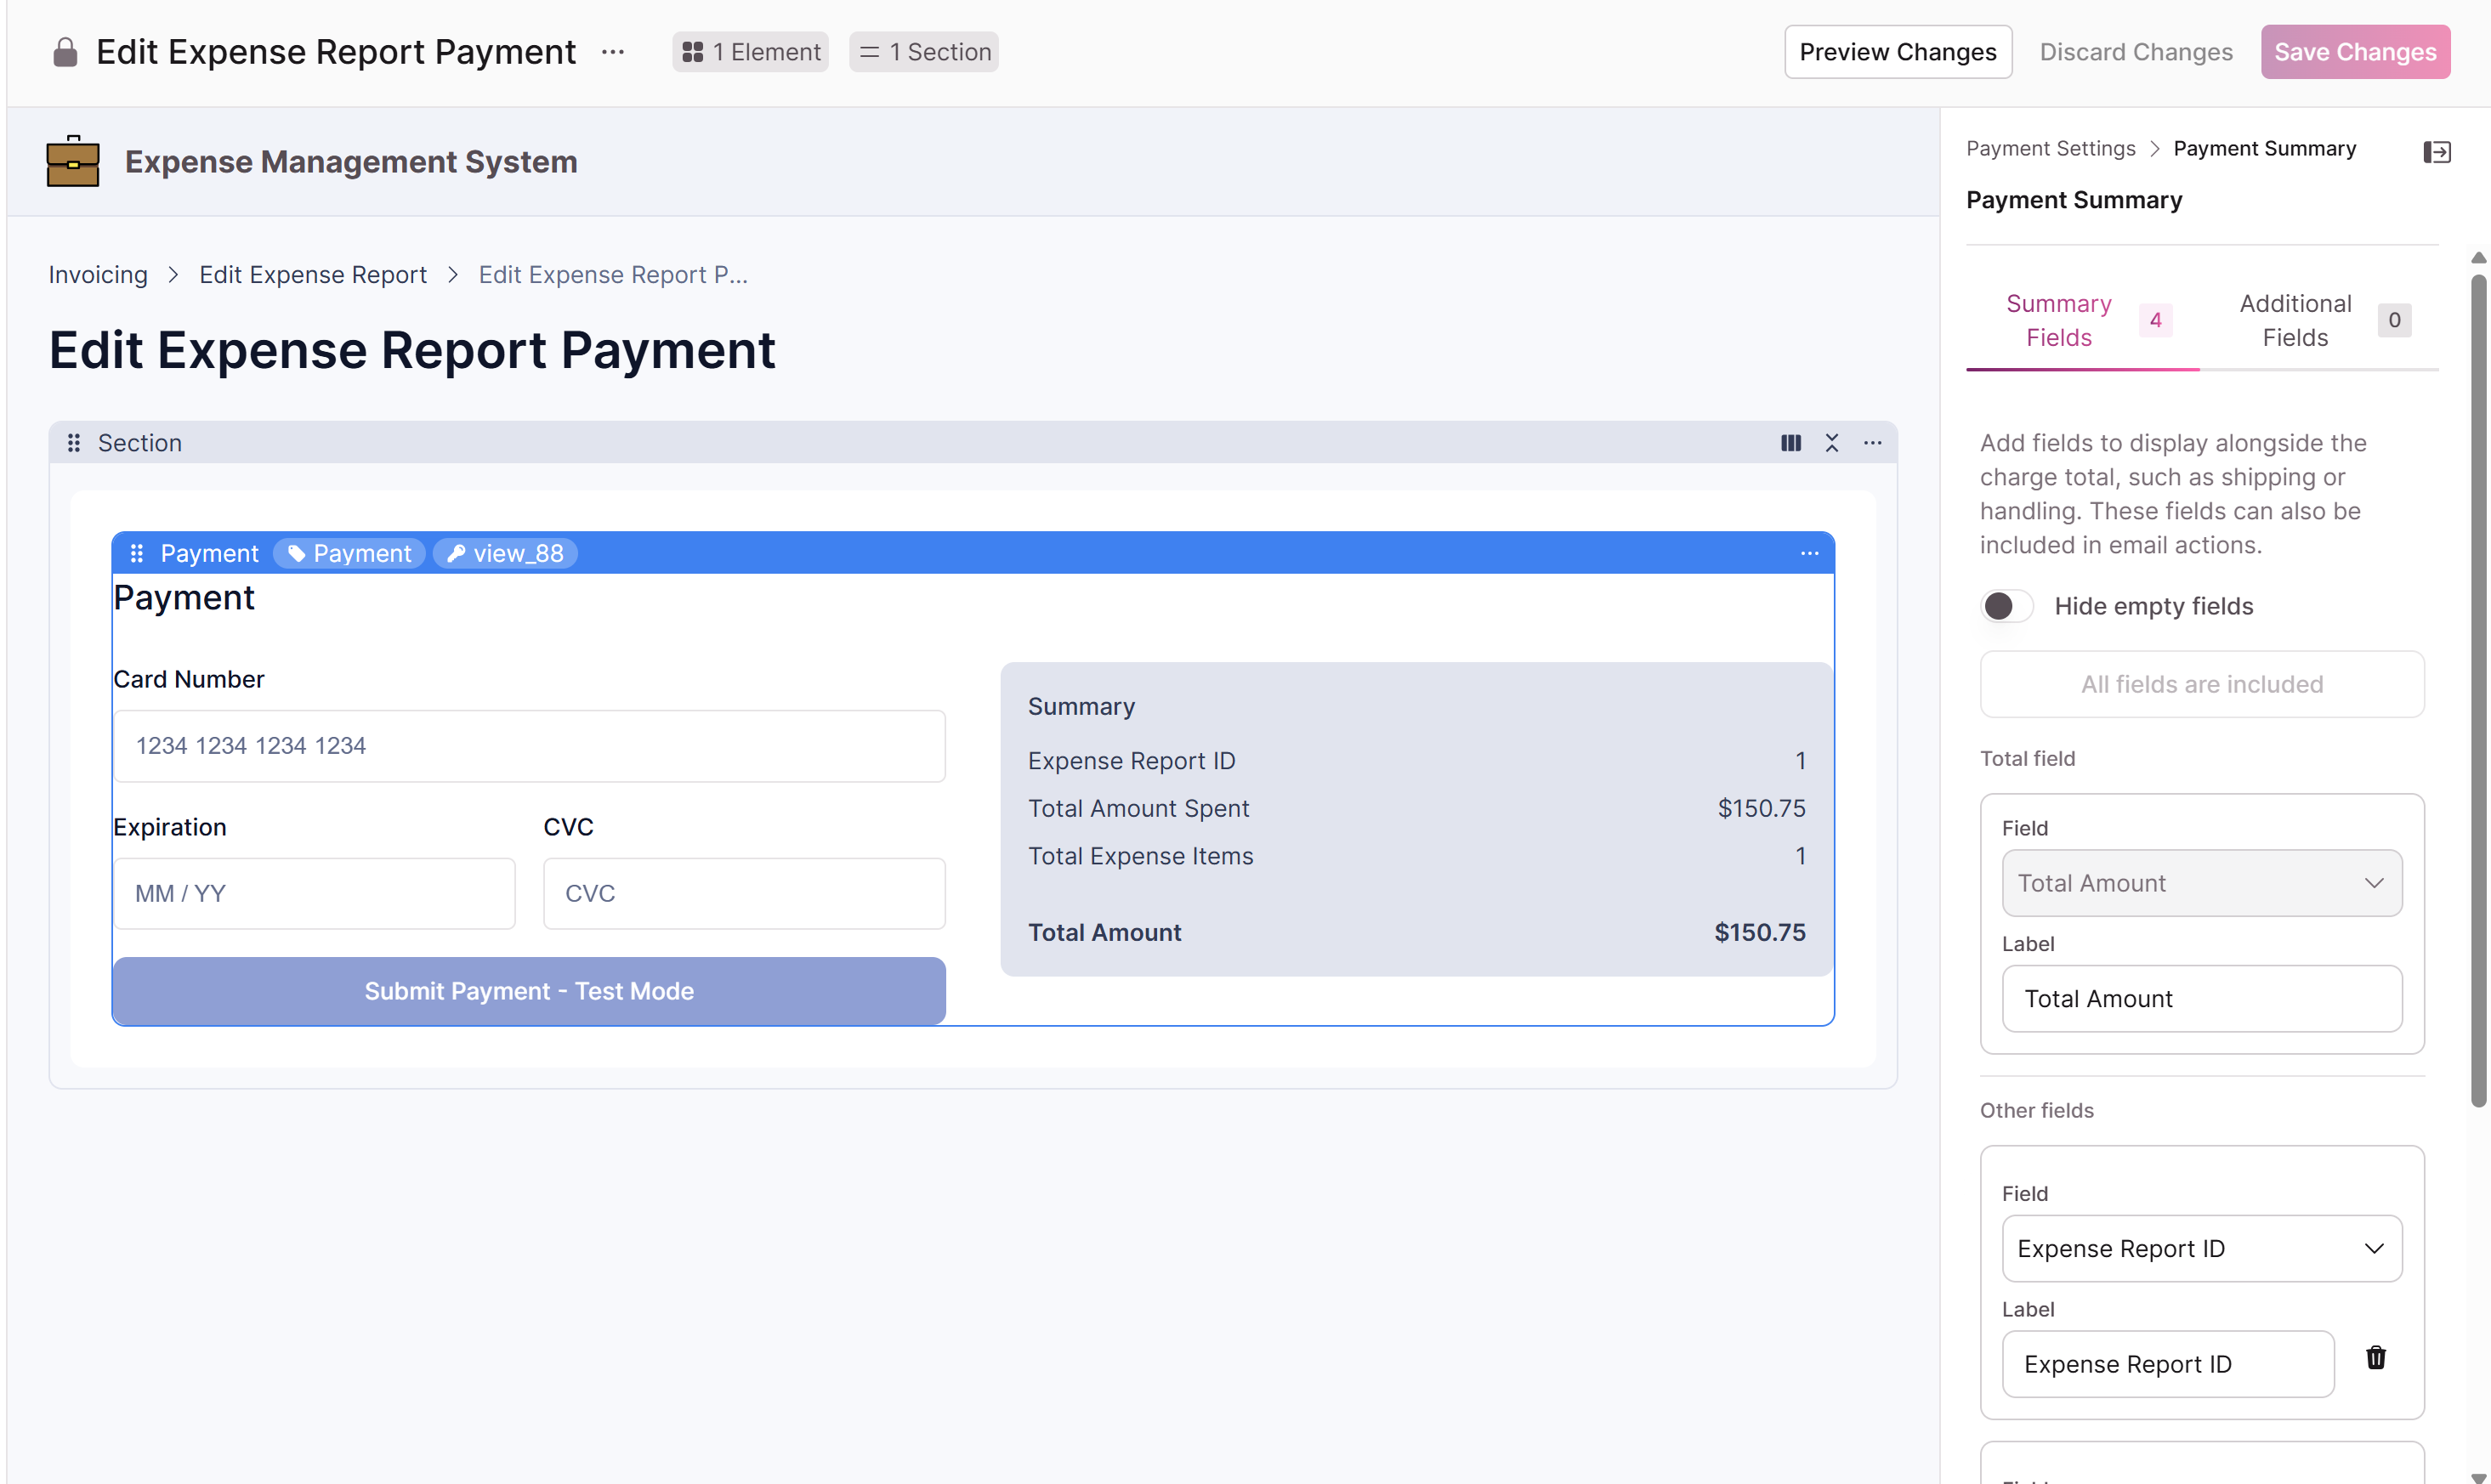
Payment Summary
The Payment Summary lets you show charges alongside the total, such as shipping or handling. These fields can also be included in email actions.
- Add one or more line items using a Number or Currency field. Each line item has a label (for example, "Shipping," "Handling," "Tax") and a value source mapped from a field on the record.
- Line items appear in the checkout as read-only amounts next to the total.
- Reorder or delete line items as needed.
- Turn on Hide Empty Fields so line items with no value don't show as blank rows to your users.
Each line item is also available as a placeholder in your email rules (for example, {payment_summary_shipping}), so you can include the breakdown in confirmation emails.
Important: Line items are for display and email purposes. The charge total remains the primary amount sent to Stripe.
Additional Fields
Use the Additional Fields tab to add non-numeric context to the summary, such as:
- Customer name
- Product
- Description
- Connections
- Action links
This keeps your financial line items (numeric only) separate from descriptive details, while still surfacing helpful context to your users.
Automating what happens after a payment
Like other forms in the Builder, the Accept Payment element supports rules that run when a payment is submitted.
Record rules
Automatically update or insert records after a payment is processed:
- Update this record
- Update connected records
- Insert a connected record
Submission rules
Control what happens on screen after submission:
- Show a confirmation message
- Show a link to reload the form (default)
- Automatically reload the form
- Redirect to the parent page, an existing page, another website, or a new child page
Email rules
Trigger emails when a payment is submitted, following the standard Builder email rule pattern:
- Trigger on any field or condition on the form.
- Use merged fields (including from connected records and Payment Summary line items) in the subject and body.
- Emails fire for both Test Mode and Live Mode payments, based on your plan.
- A View email history link is available, based on your plan.
A note on the Page Editor
While you're building, the payment element in the Page Editor is for layout and configuration only. The card fields aren't editable and the submit button won't process a payment from inside the editor. To test a real checkout, open the page in your live app (using Test Mode).
Troubleshooting
- The Accept Payment option is unavailable on my page. The page must display a single record and include a numeric field for the total. Hover over the option for the requirement tooltip.
- I only see Test Mode. Live Mode requires a paid plan above Starter and Live keys entered for the processor.
- My Save Payment Method options are missing. Saving a card requires a login-protected page. Add a login requirement in the page's access settings.
Updated about 1 month ago