How to Allow Users to Access Records Without Logging In
Learn how to use a search view with a unique ID field to let users look up their own records in a Knack app without requiring a login or user account.
Users can search for and view their own records in a Knack app without a login by using a search element with a unique ID field. This approach is useful when you want to give people access to specific records — like bills, orders, or case files — without requiring them to create an account.
NoteThis method is an alternative to true user logins and is best suited for simple, read-only access scenarios. In most cases, Knack recommends using user roles for apps that require login-based access. If you're unsure which approach fits your needs, open a ticket with our support team.
Before You Begin
This article assumes familiarity with adding tables, fields, pages, and views in the Knack Builder. If you're new to Knack, review these resources first:
You'll also need to create a unique ID field for your table. See Text Formulas and How to Set a Random ID (Coming Soon) for guidance.
Steps
1. Add a Table and Create a Unique ID Field
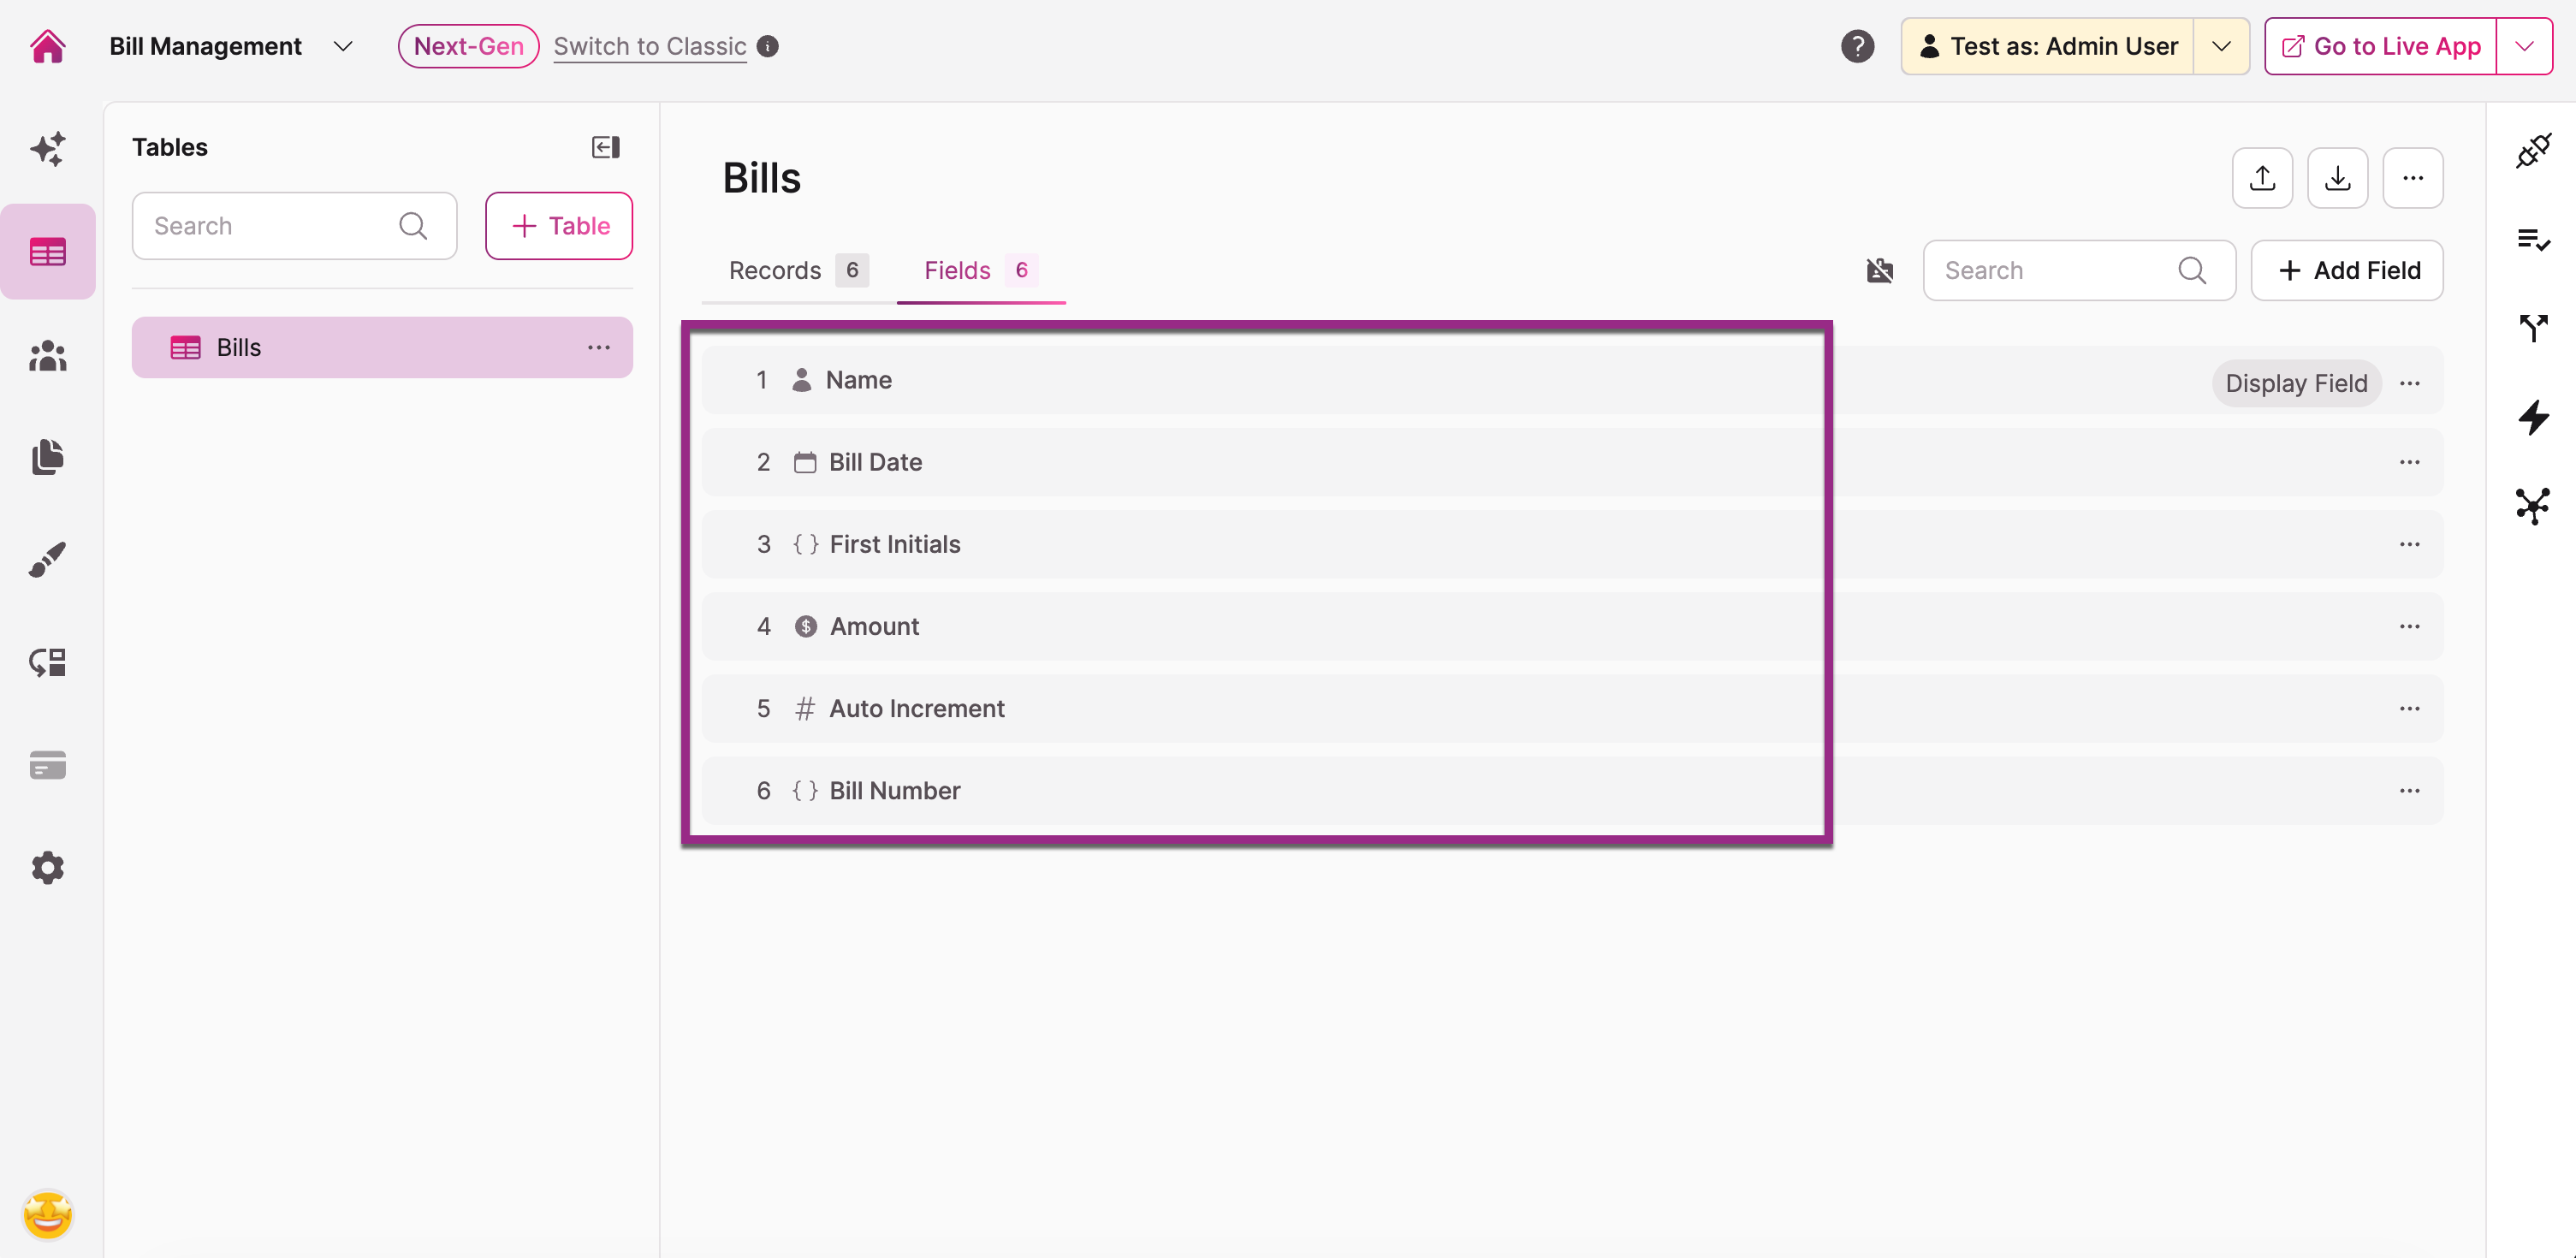
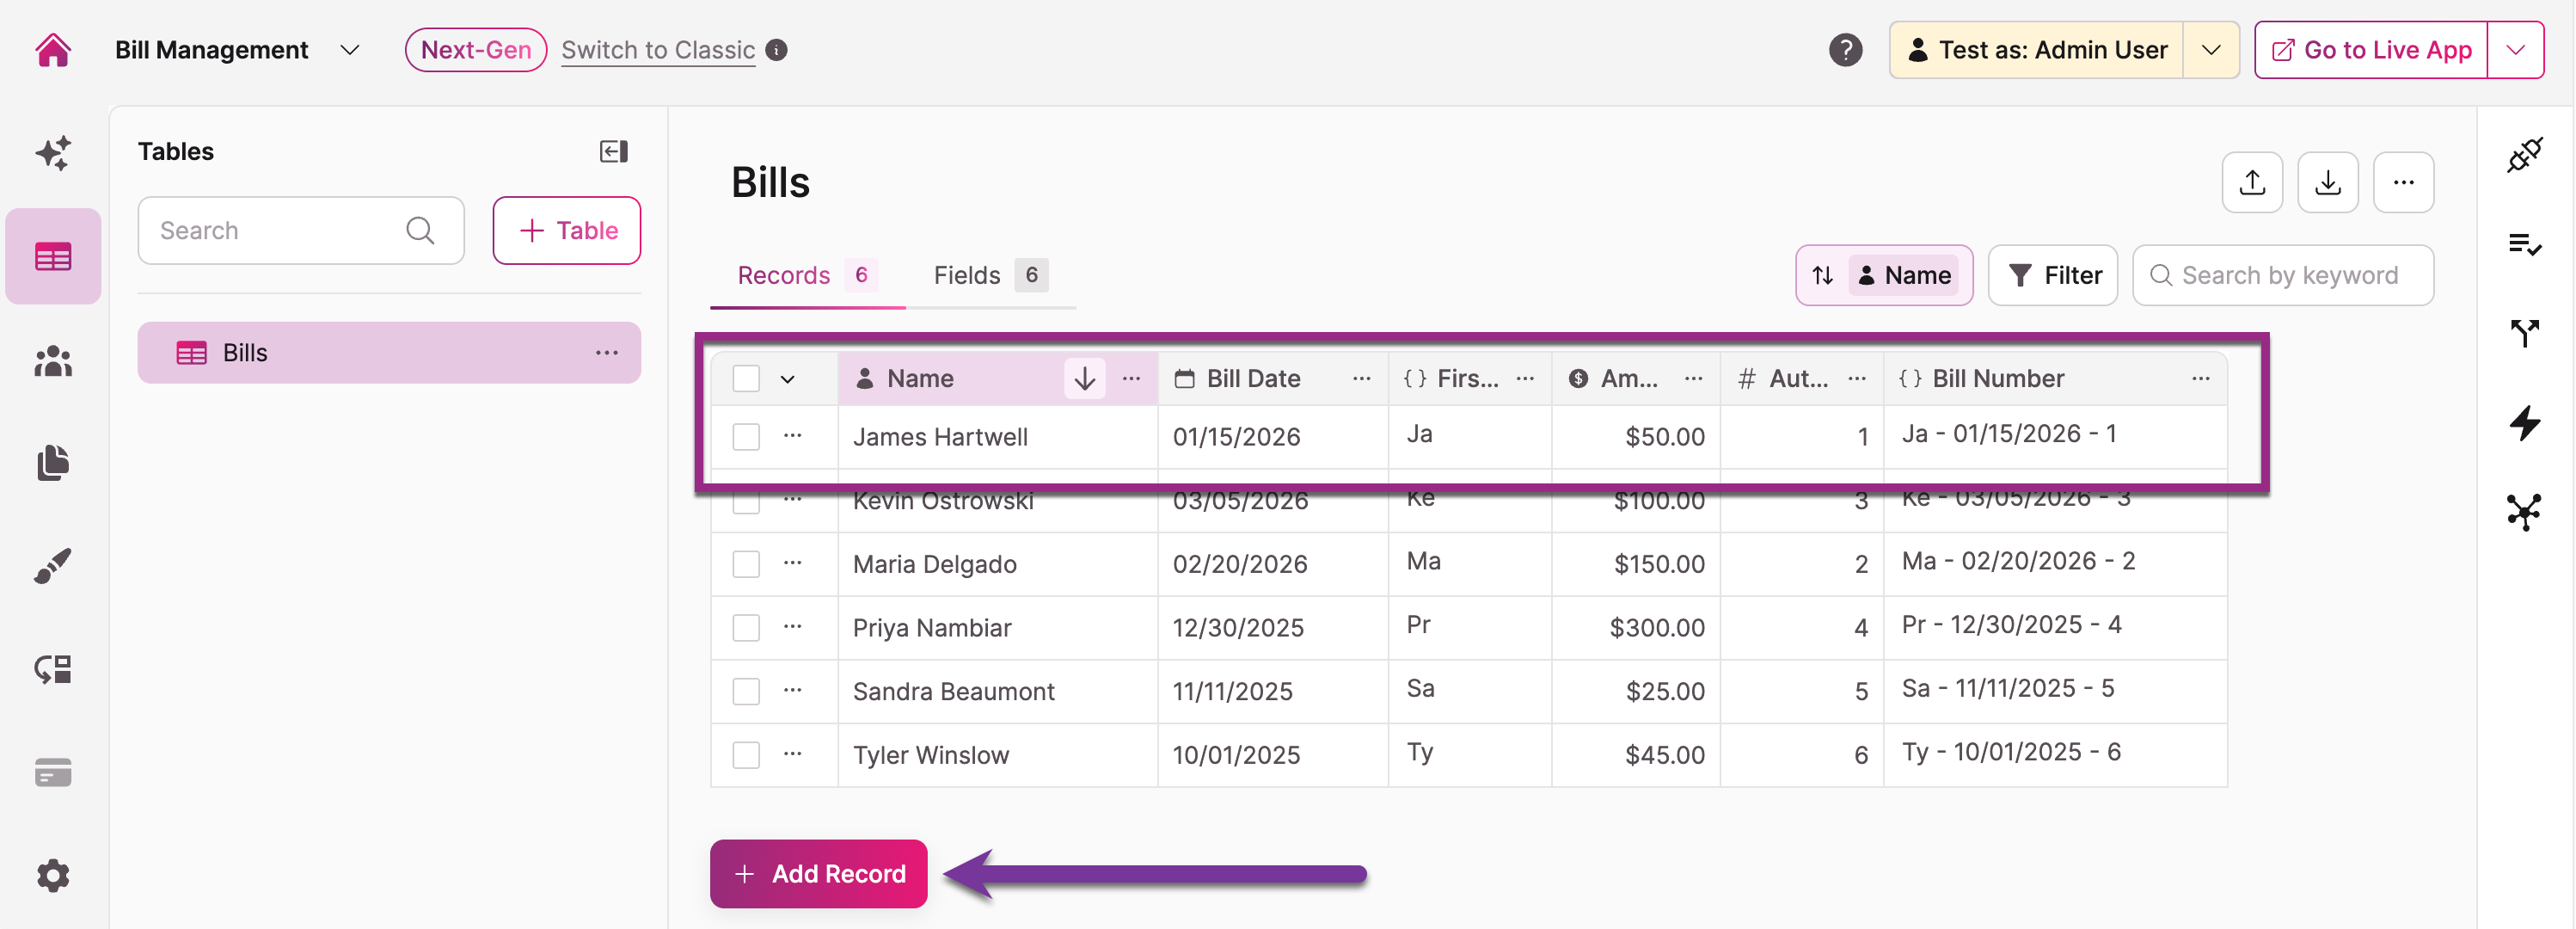
In the Data section of the Builder, create a table to store the records users will search for. This example uses a table called Bills.
To make records searchable by a unique ID, you'll combine multiple fields into a single Bill Number field using a text formula. Add the following fields to your table:
- Name — Name field for the bill recipient
- Bill Date — Date field
- First Initials — Text formula field that extracts the first two letters of the first name from the Name field
- Amount — Currency field for the bill amount
- Auto Increment — Auto increment field
- Bill Number — Text formula field that creates a unique bill number that includes the first two letters of first name, the date, and the auto incrementing number
For the First Initials text formula, enter:
left({Name}, 2)Then create a Bill Number text formula field that combines three fields:
(First Initials) - (Bill Date) - (Auto Increment)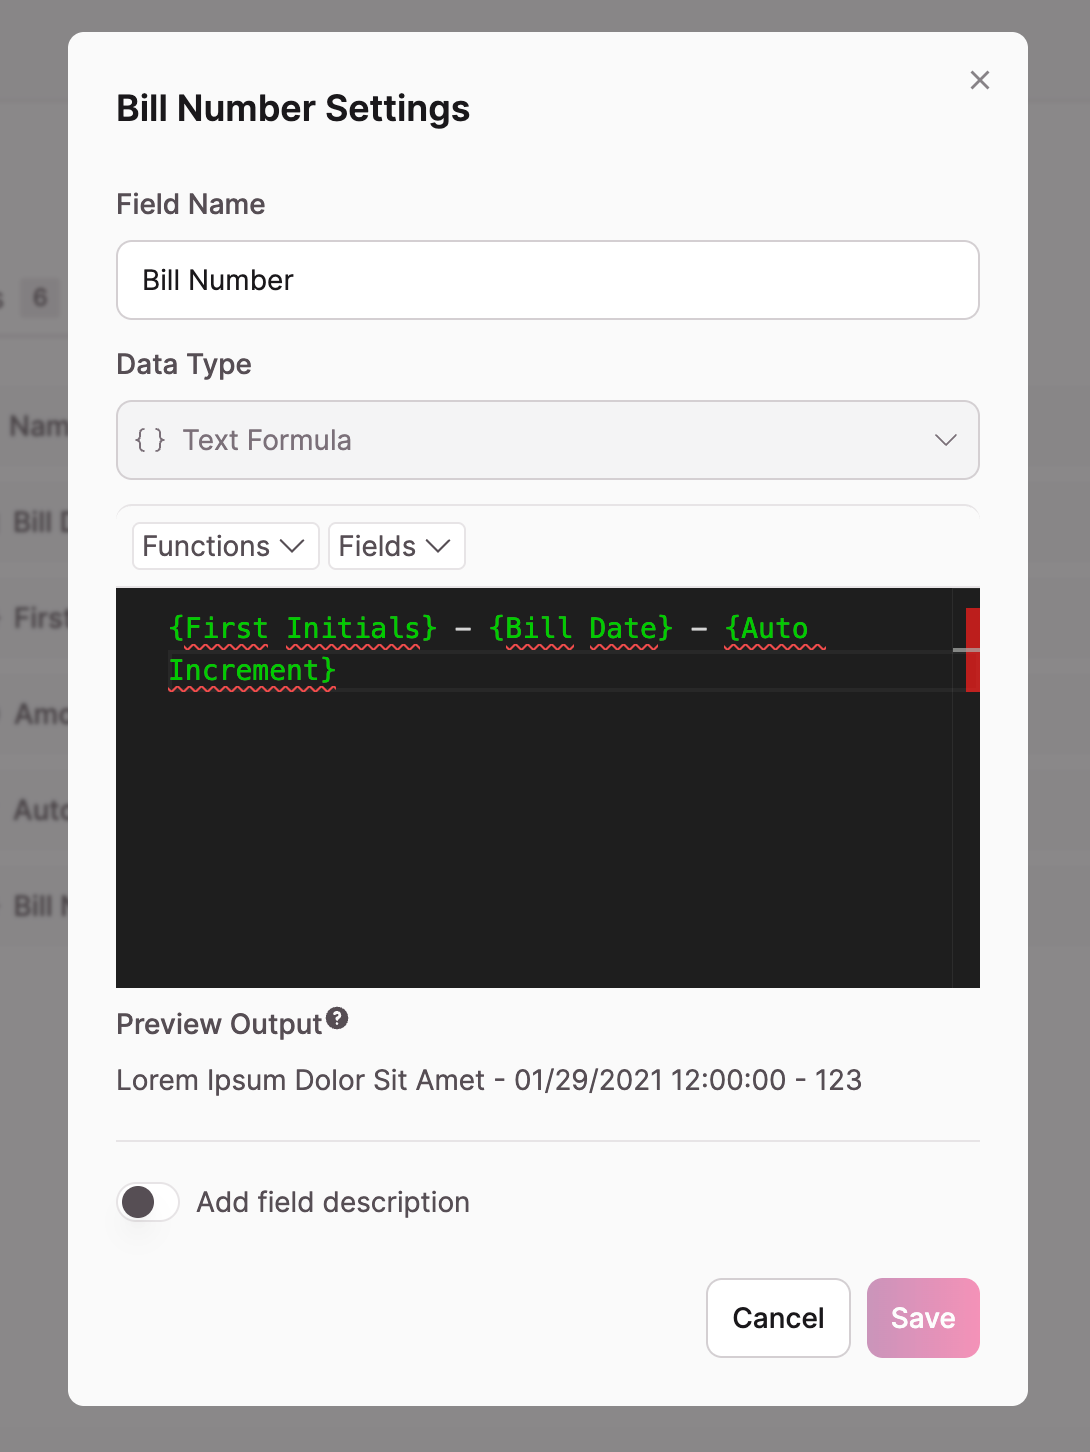
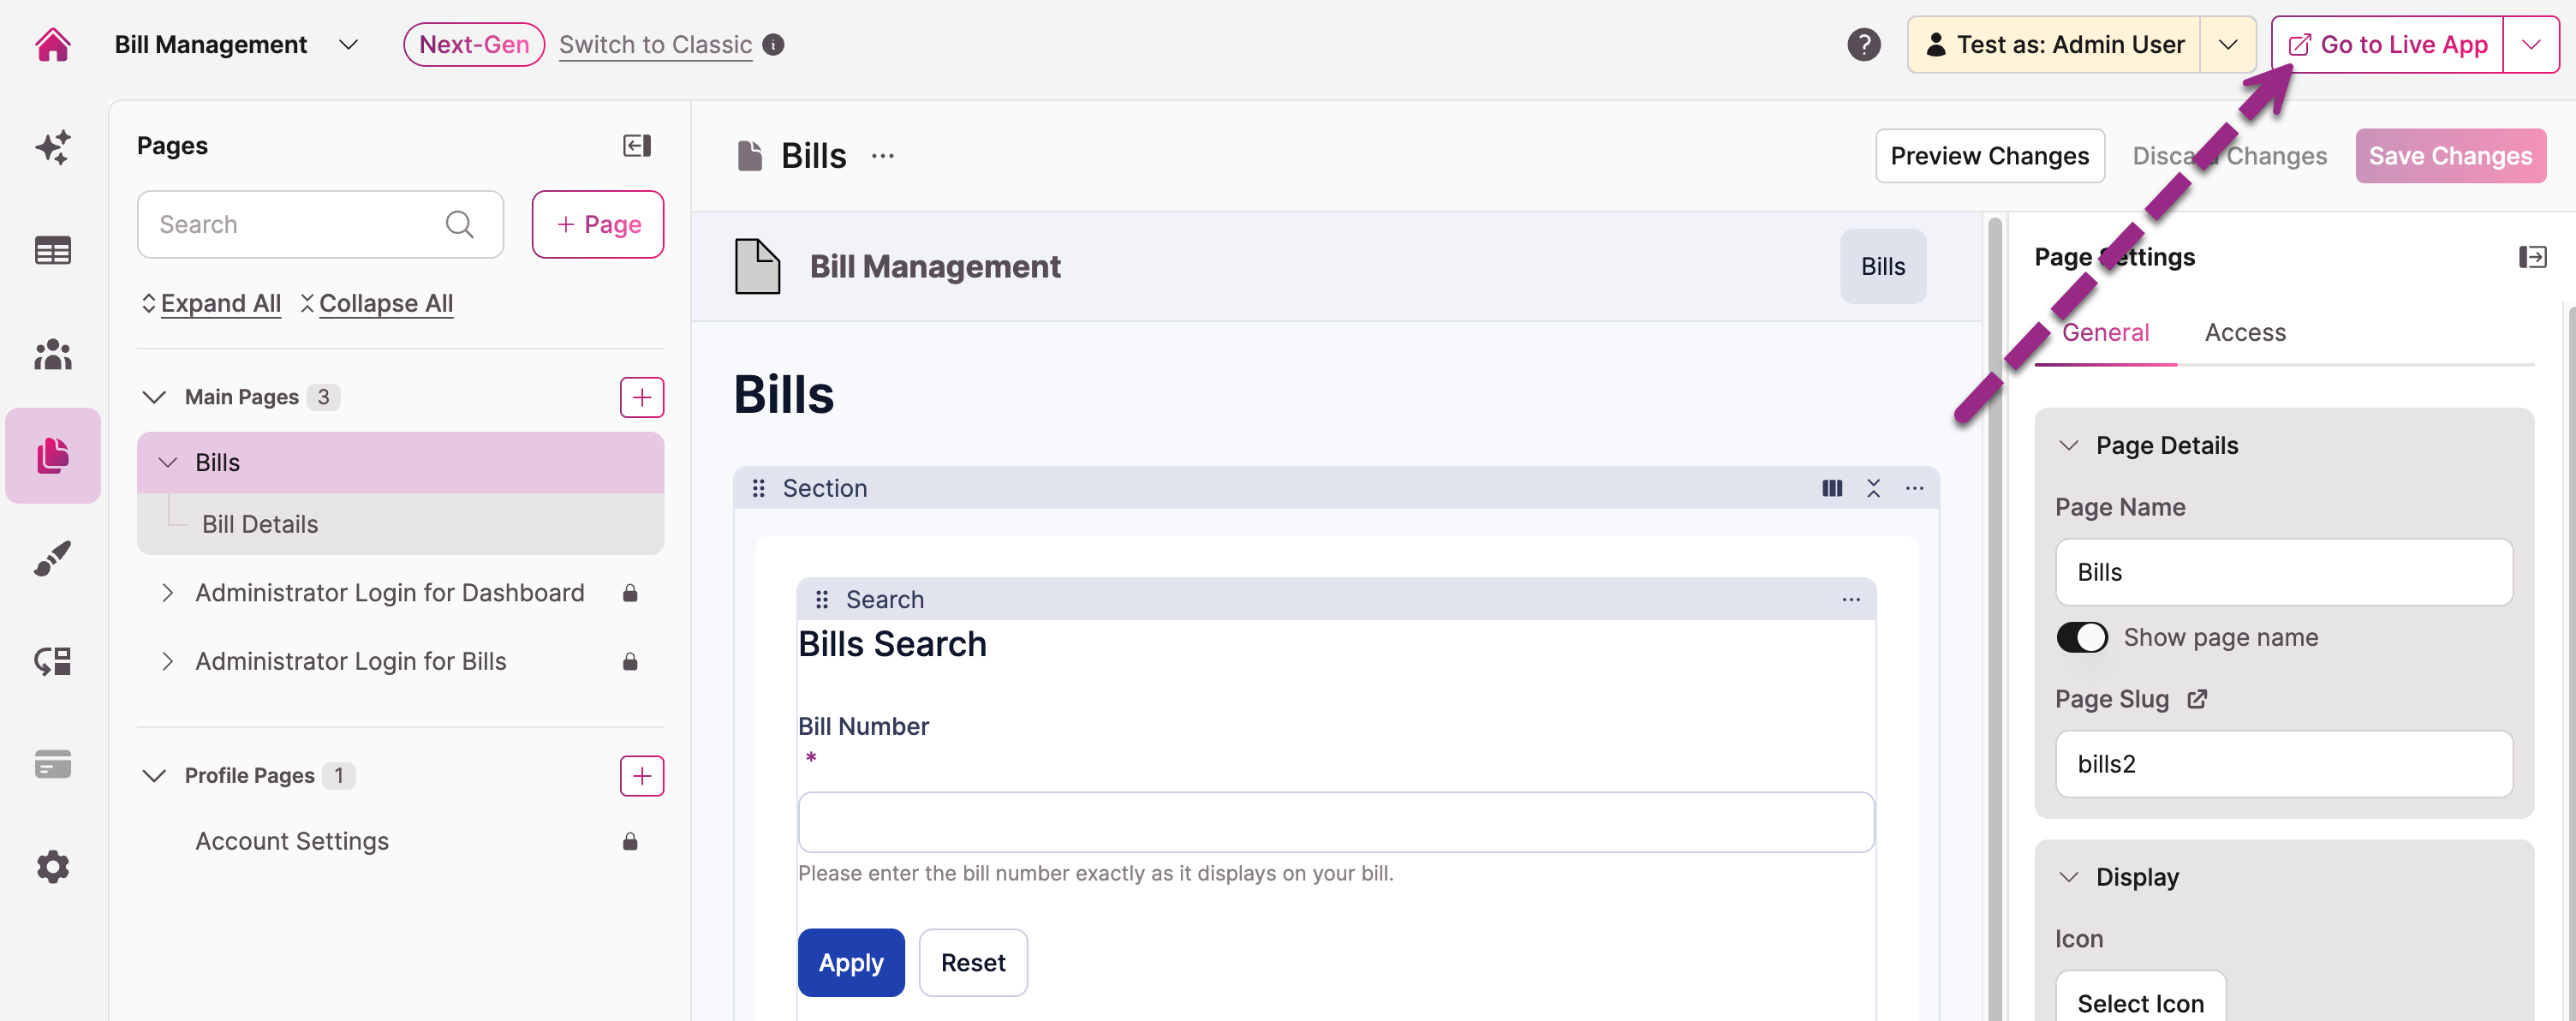
2. Add a New Page with a Search Element
In the Pages section of the Builder, add a new page. When prompted to add a view, go to the Records View section and select Search View.
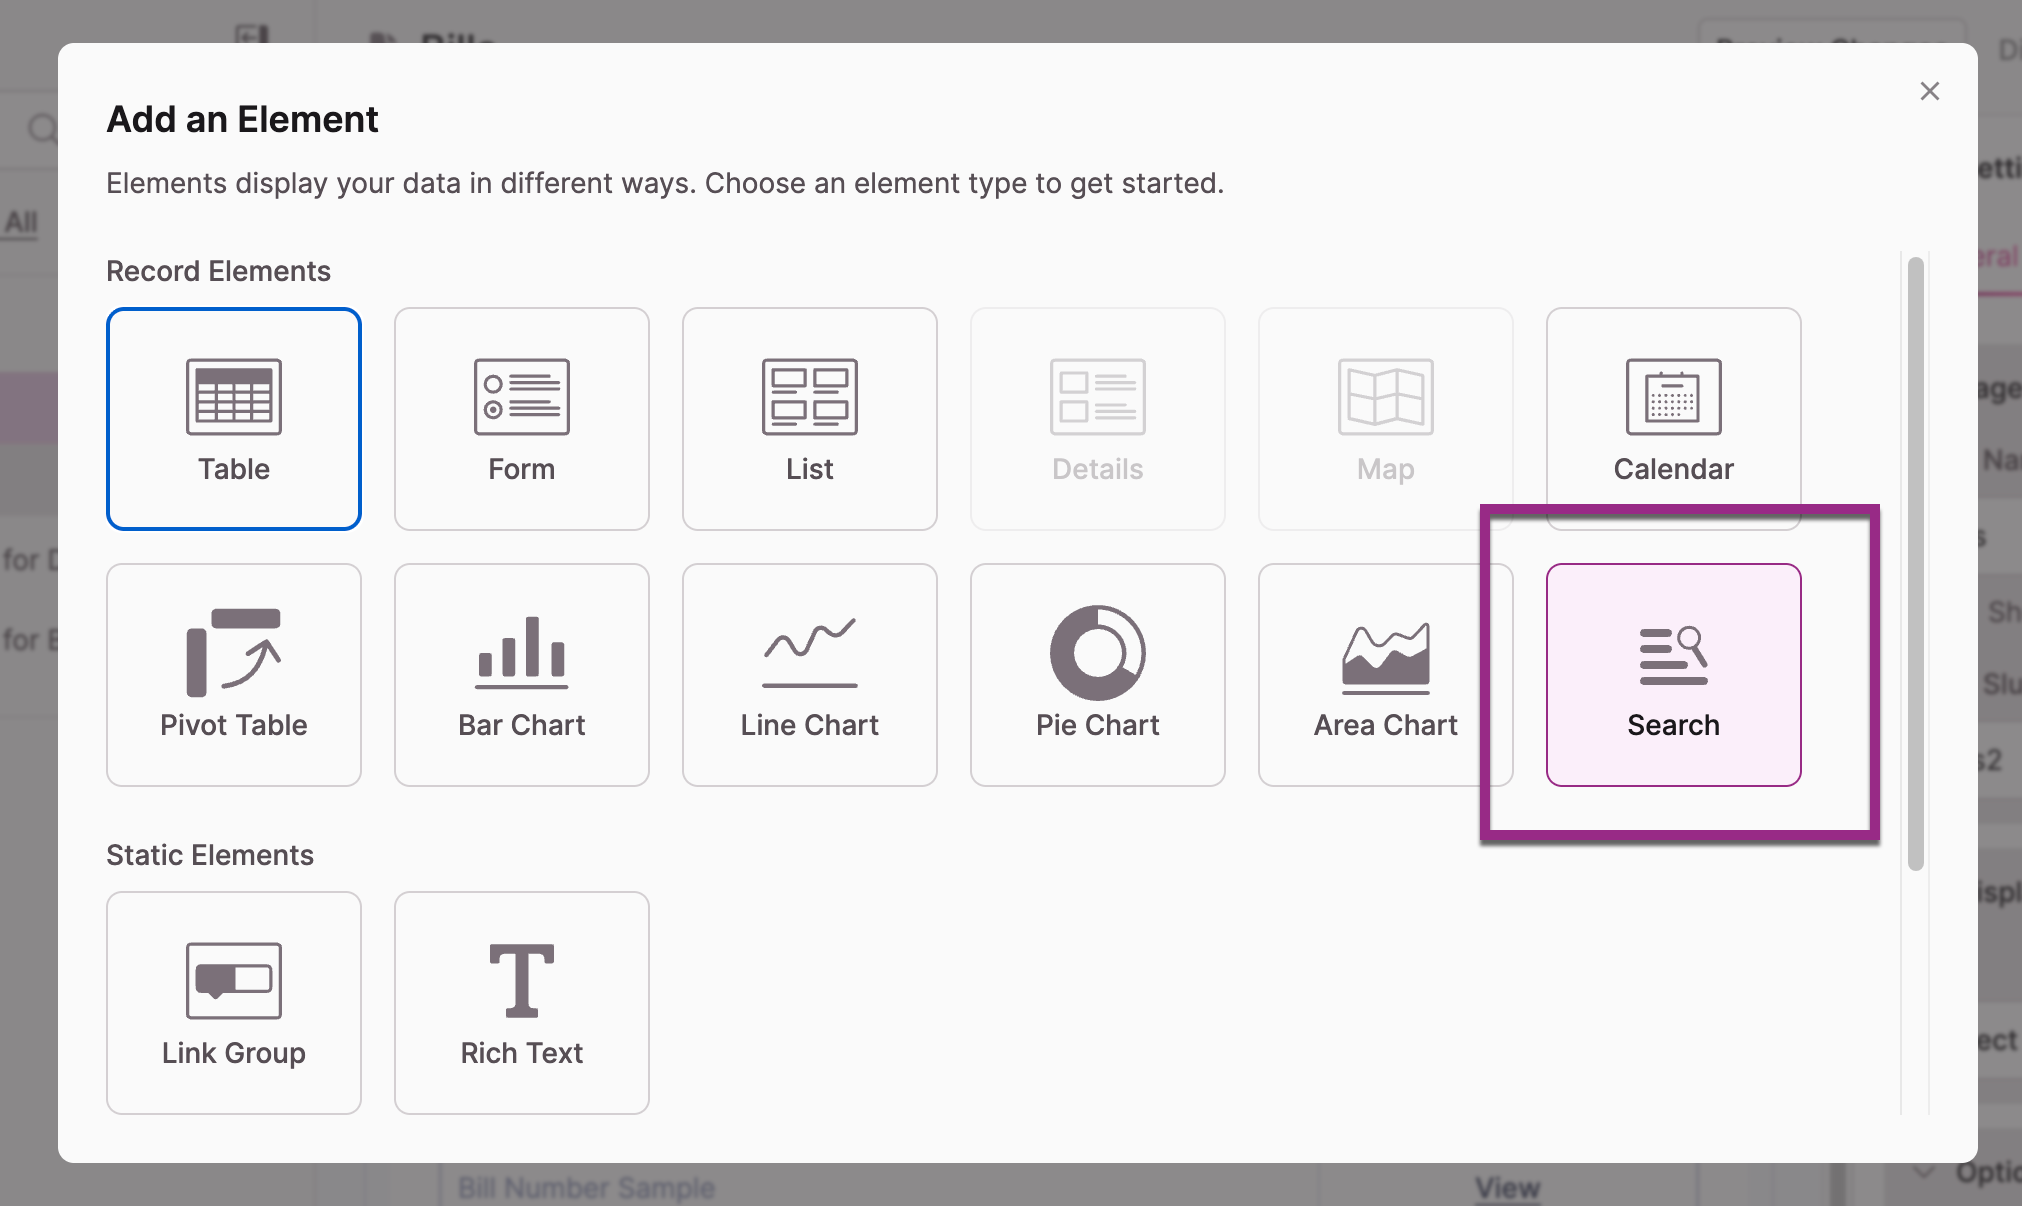
If your app has multiple tables, select the correct table — in this example, Bills.

3. Configure the Search Element
Click the search element to open the view editor in the right panel.
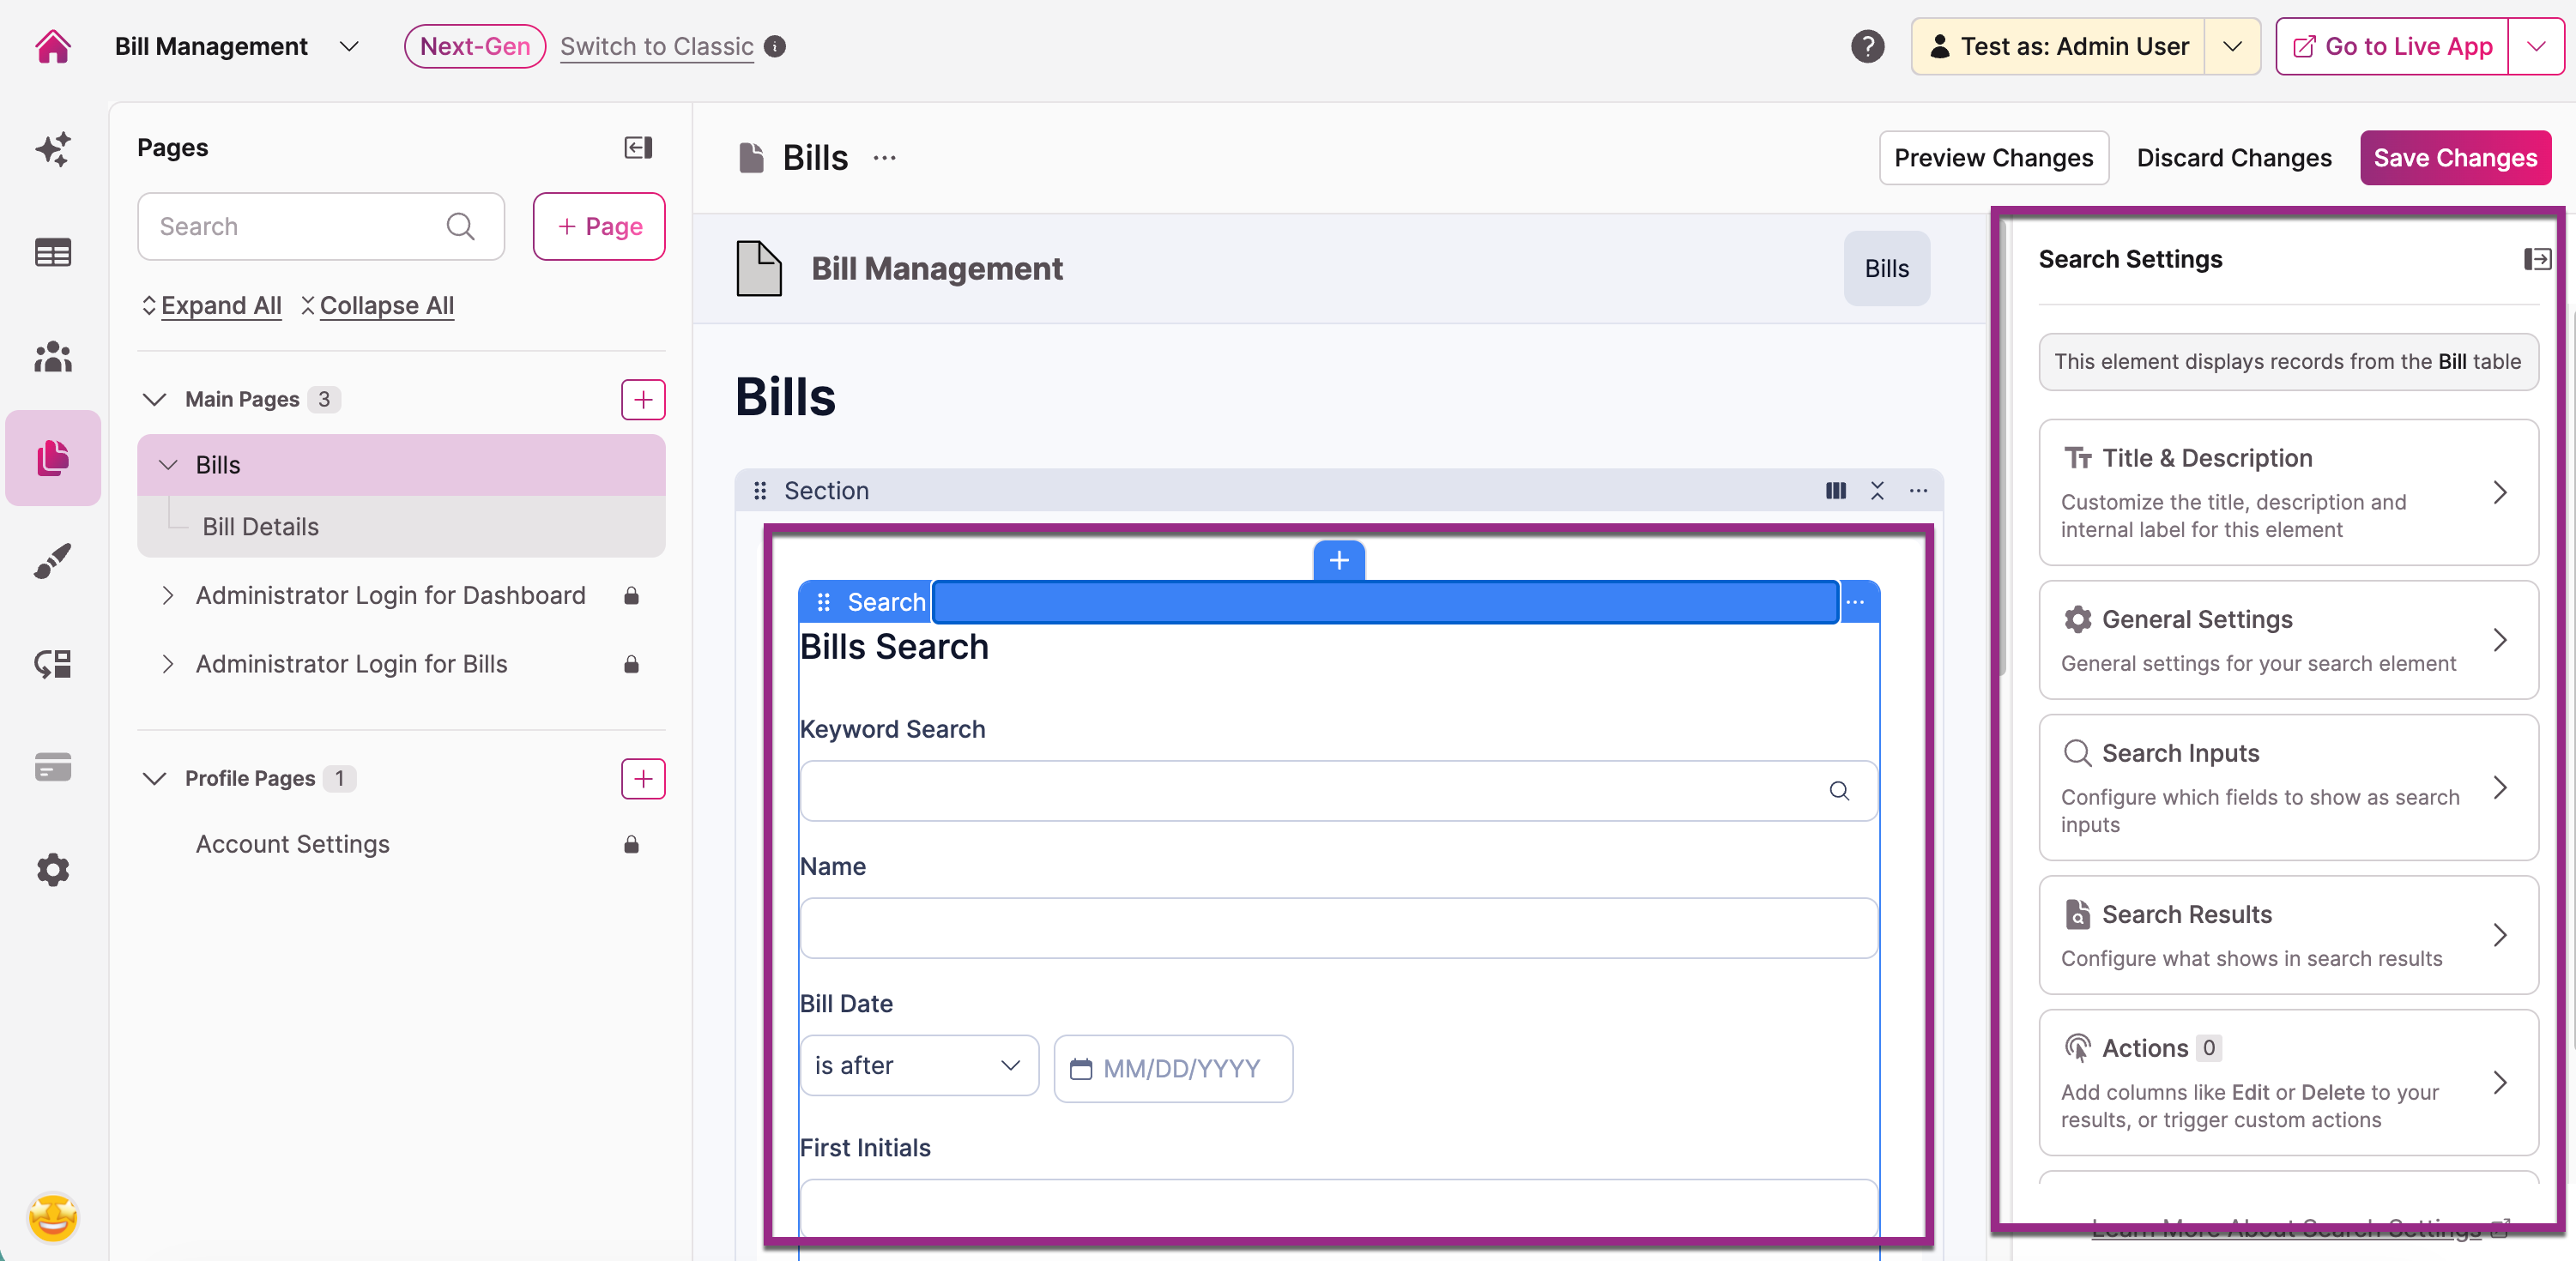
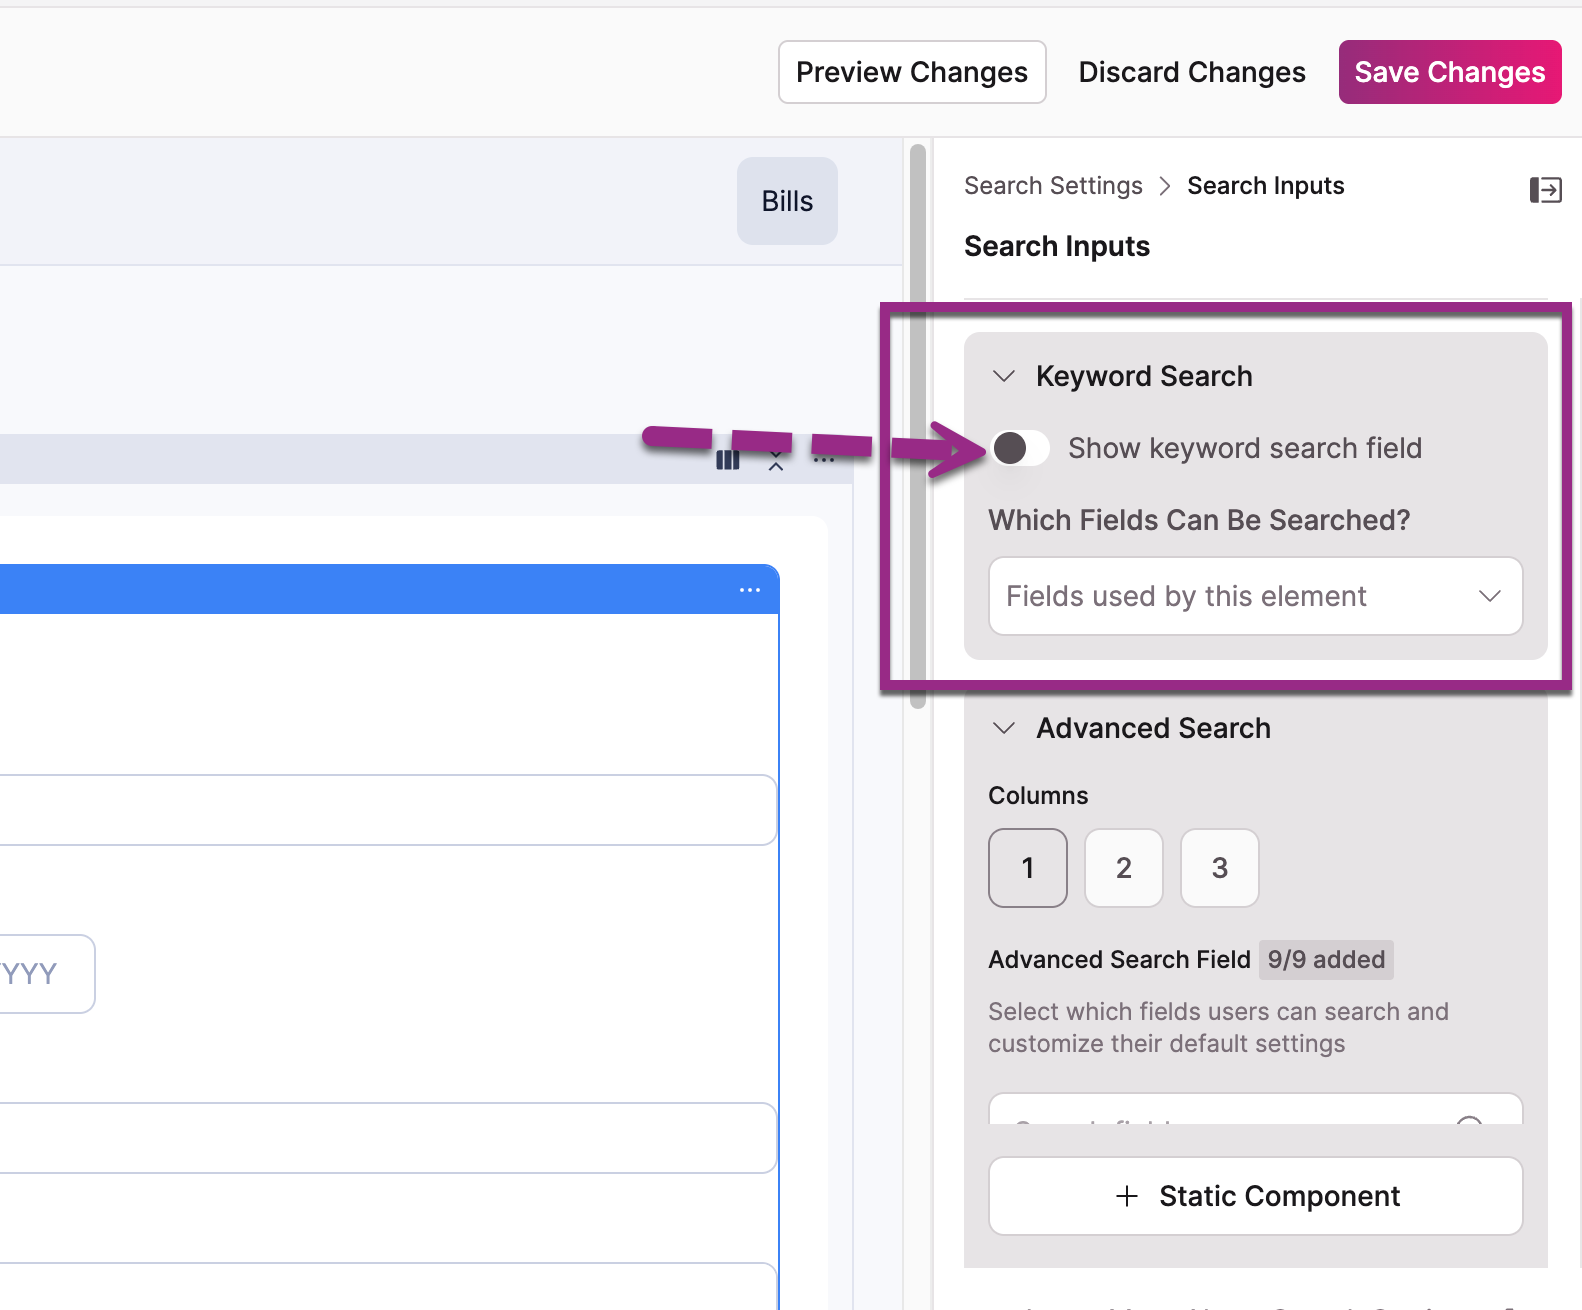
Select Search Inputs in the right panel and toggle 'Show keyword search field' off.
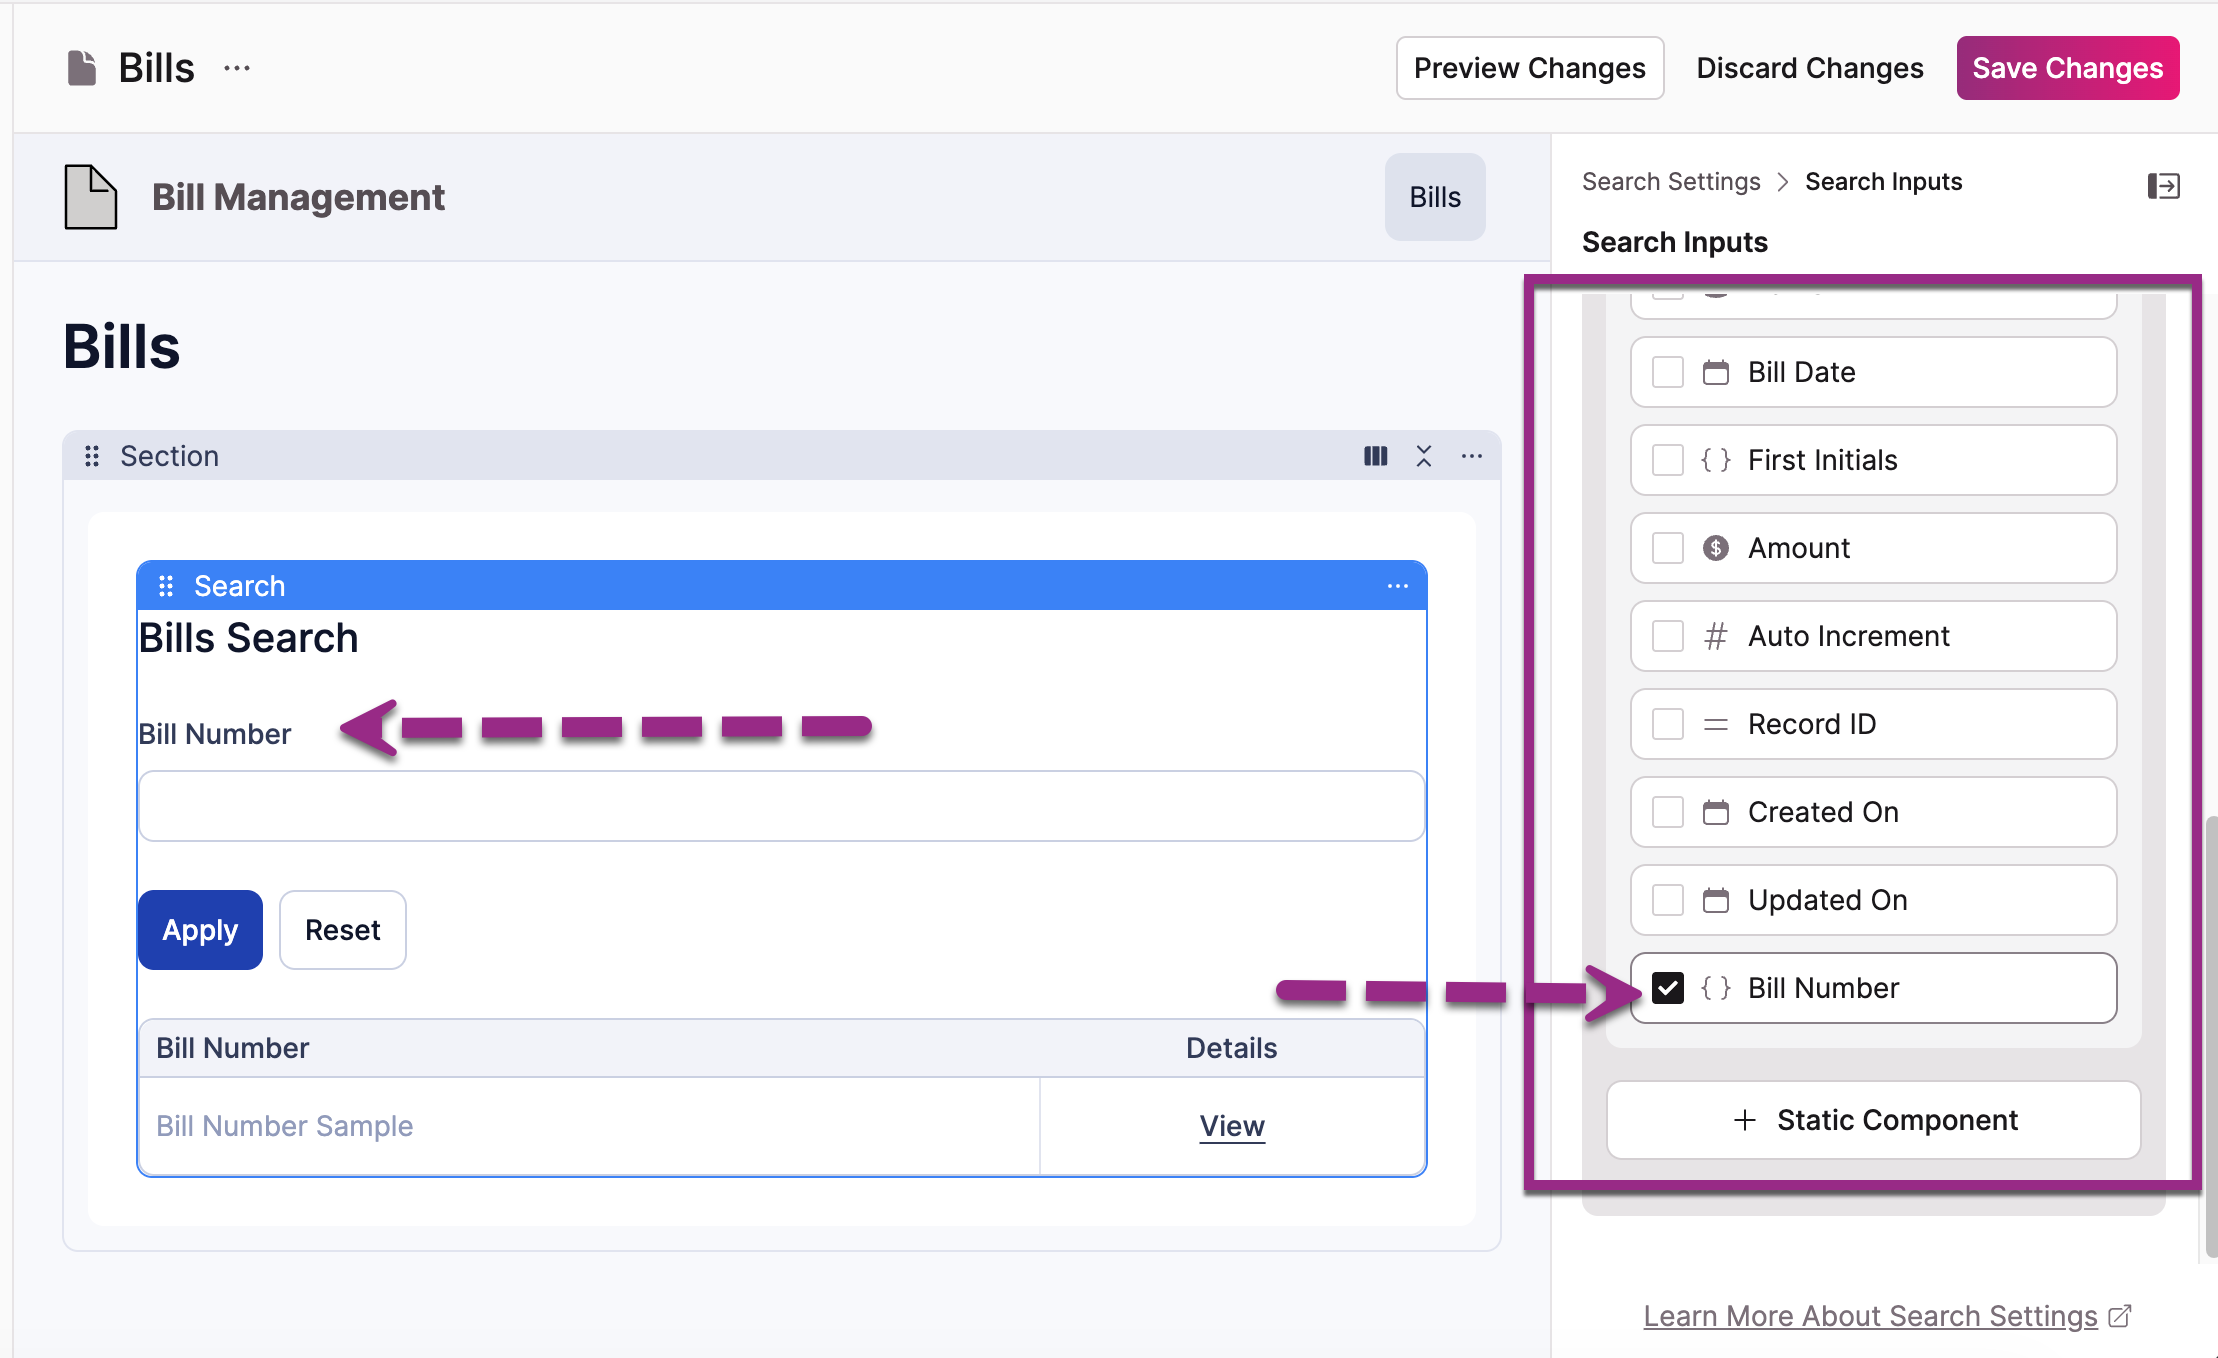
Scroll down and remove all fields from the search element except for the unique ID field (Bill Number) you created in Step 1.
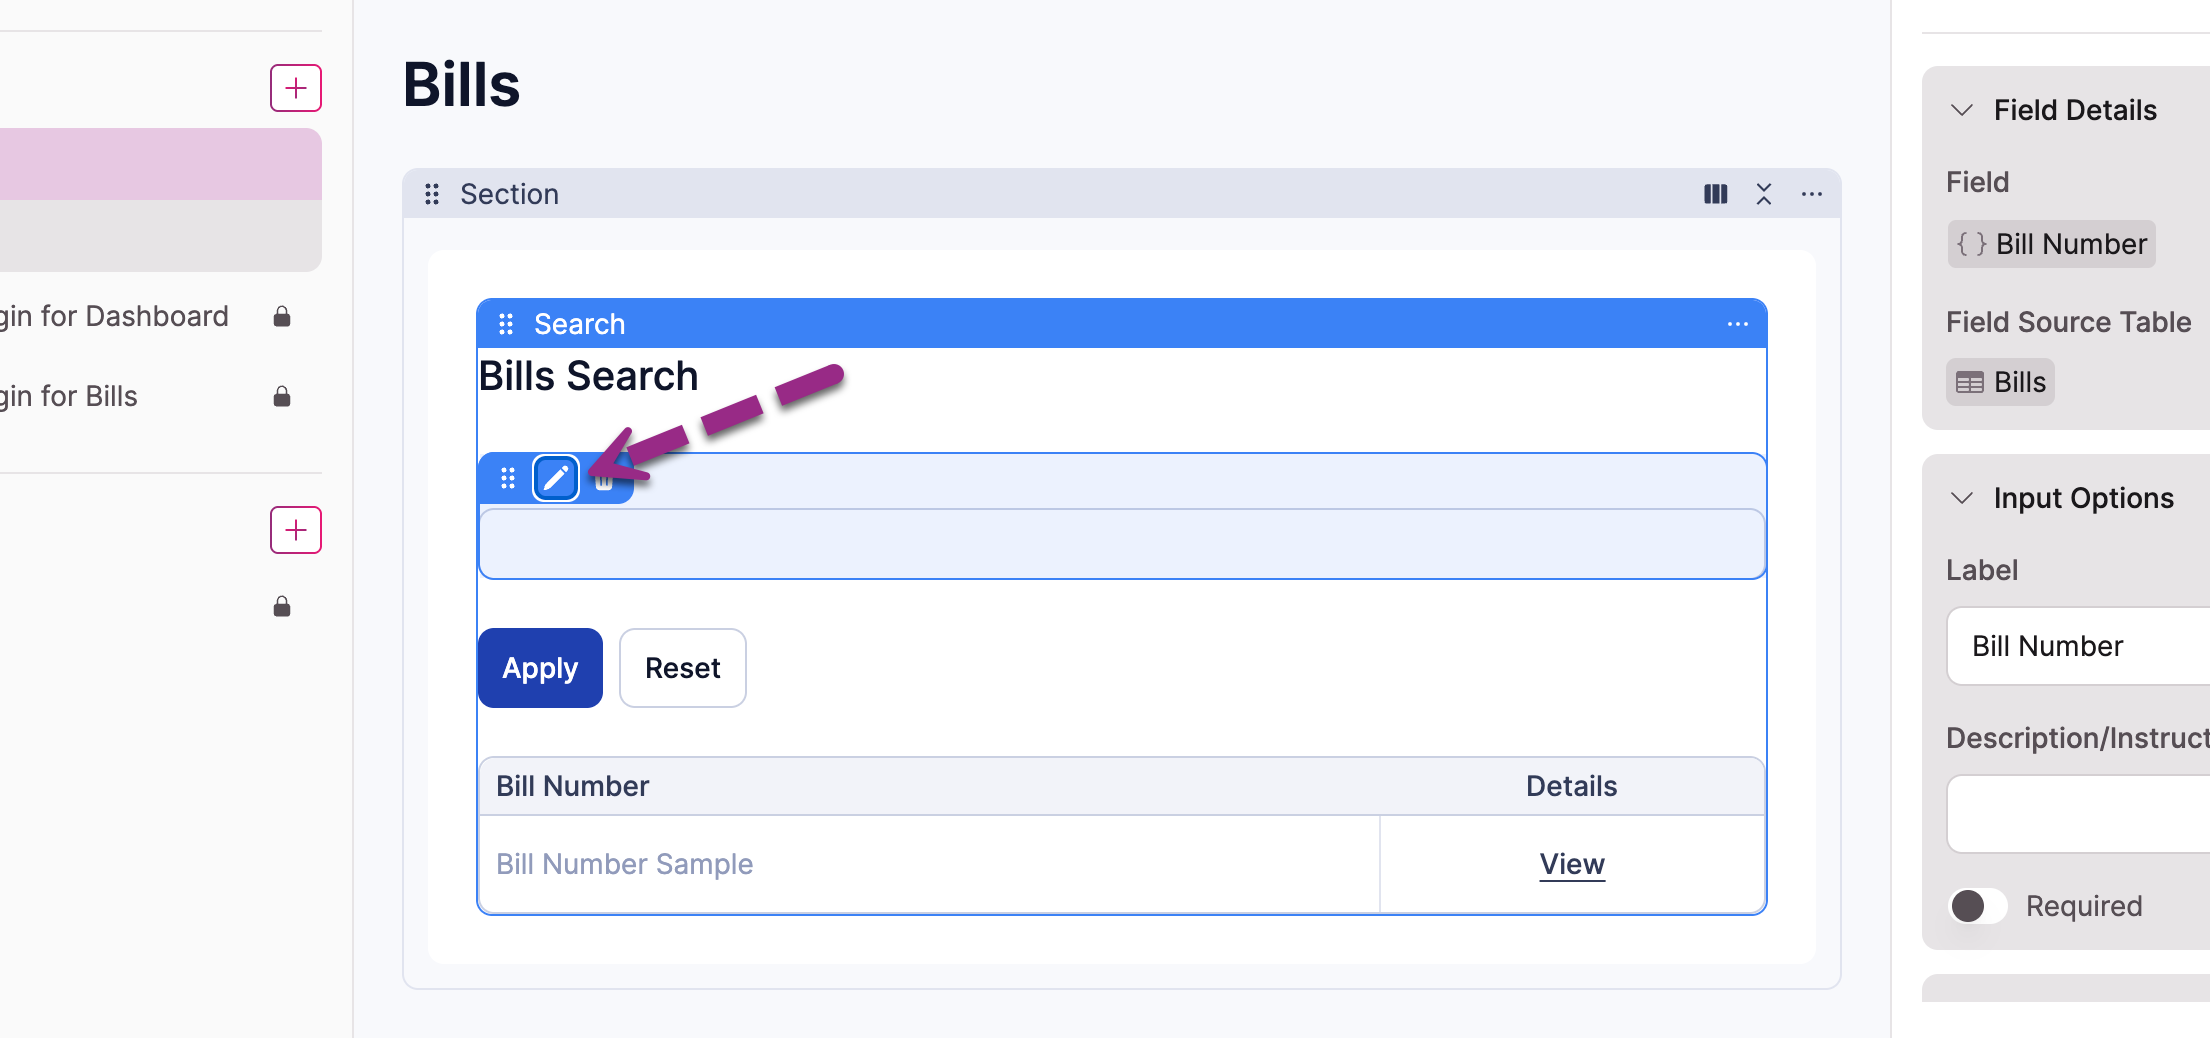
Click the pen icon next to the Bill Number field to edit its input properties in the right panel.
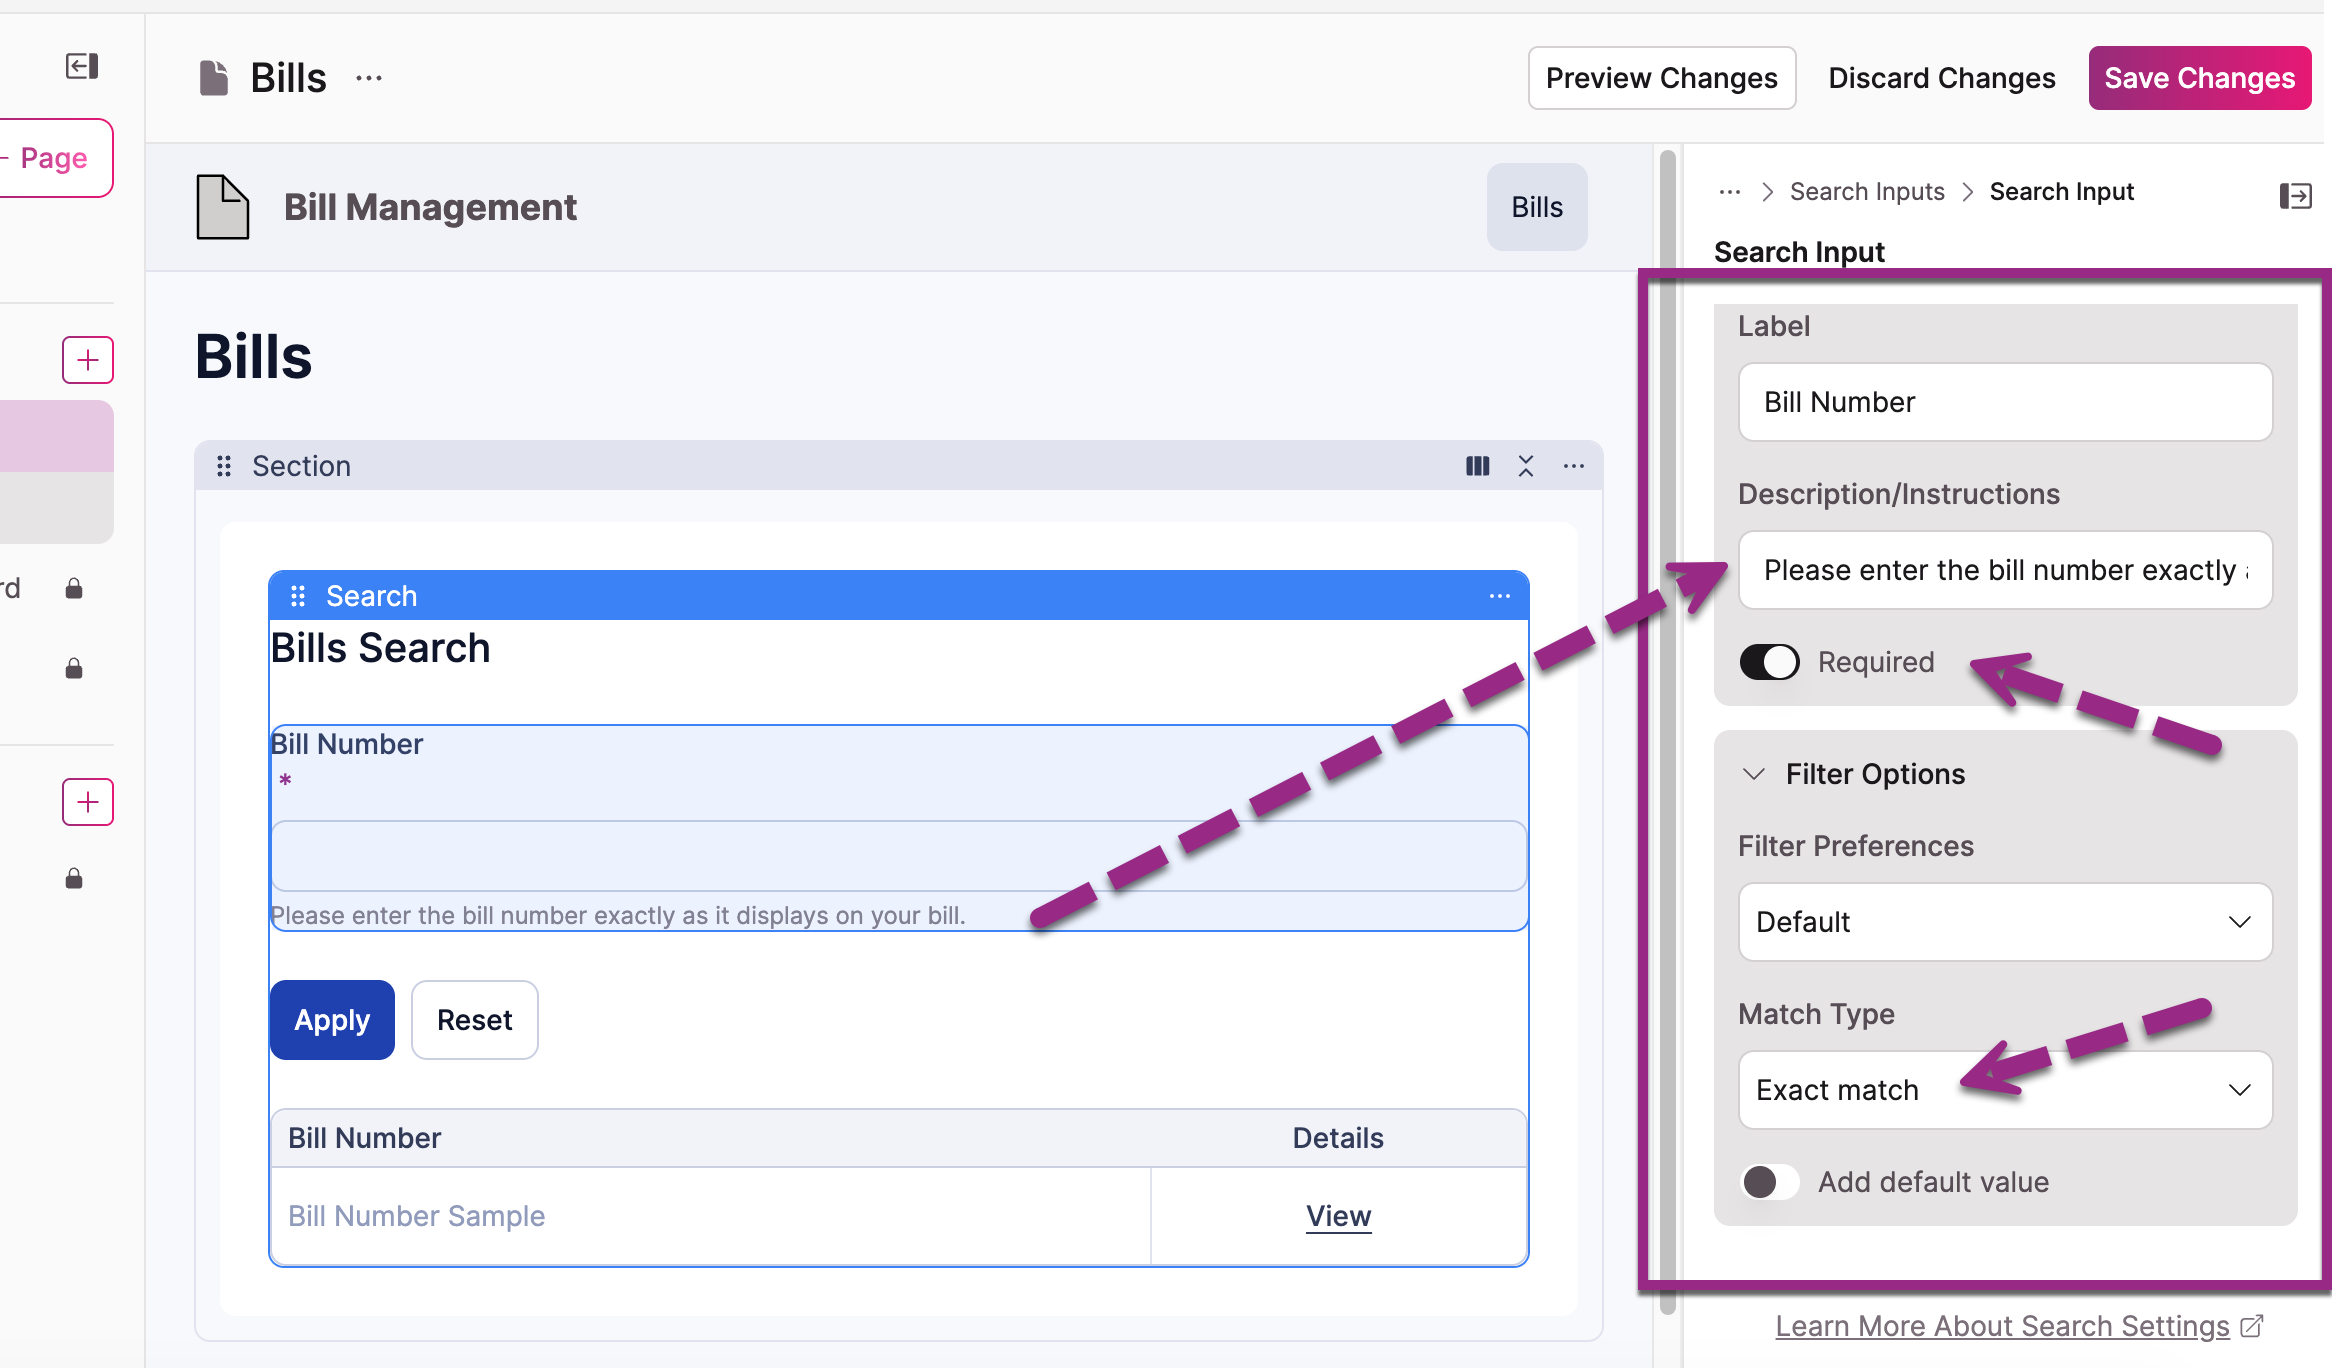
Configure the field with these settings:
- Input Options: Toggle on the 'Required' option
- Filter Options: Under Match Type, set to 'Exact Match'
You can also add instructional text to help users know what to enter.
Save Changes!
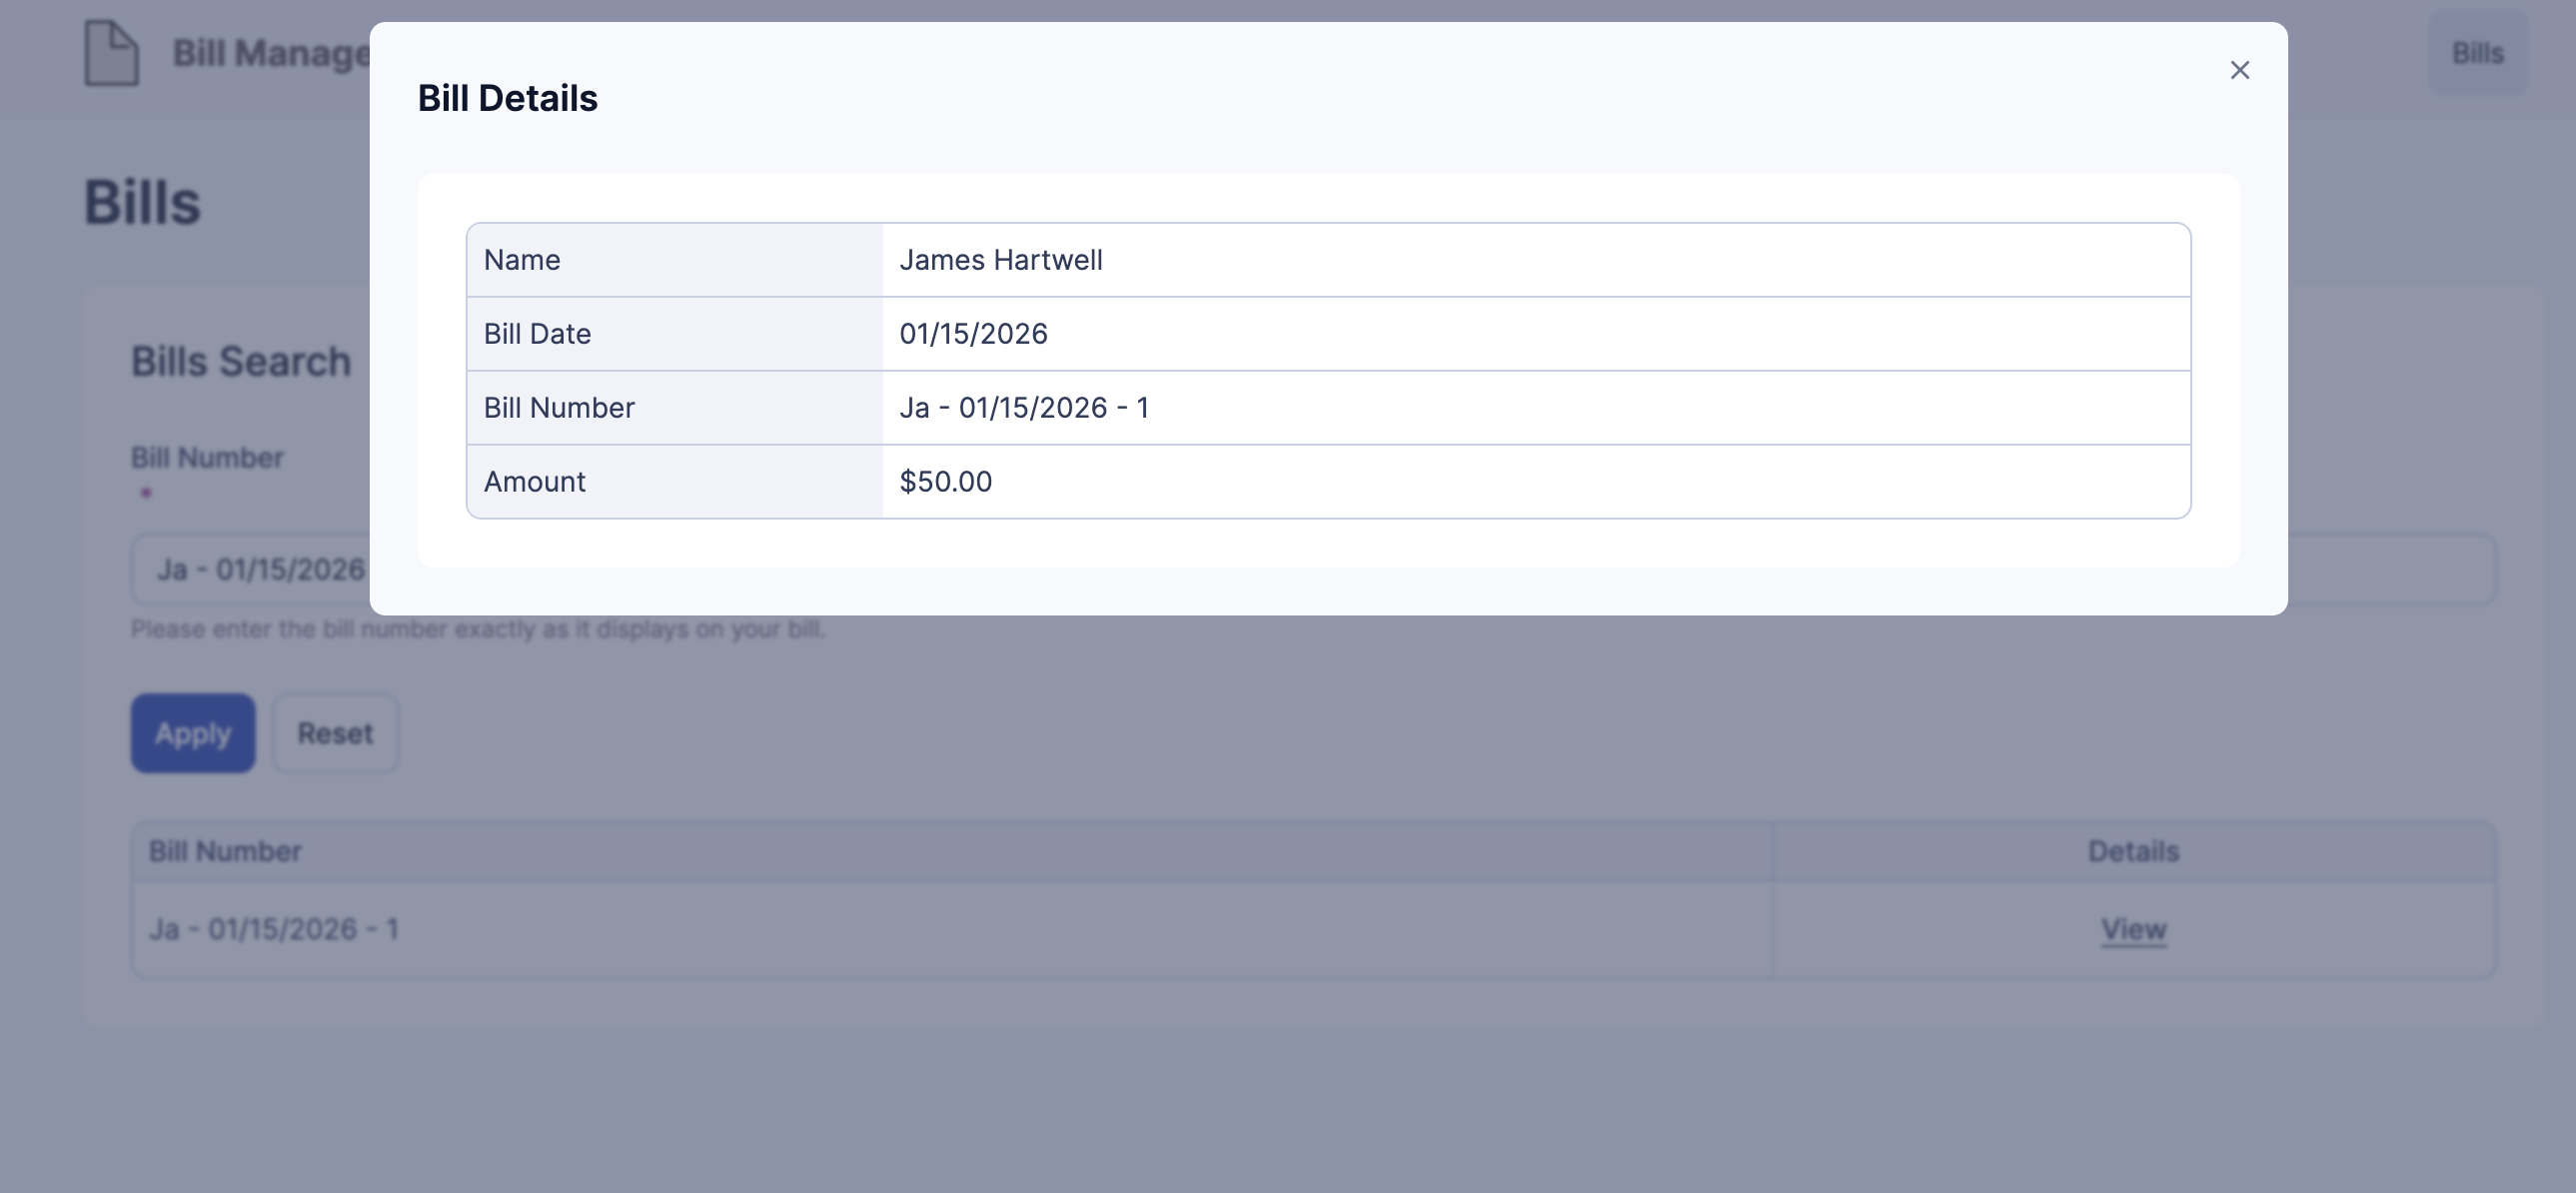
4. Test Your Page
Add one or two test records under Tables and on the Records tab of the Builder.
Navigate to the page you created, then click Go to Live App.
Enter a Bill Number in the search bar and click Submit to verify the correct record appears.
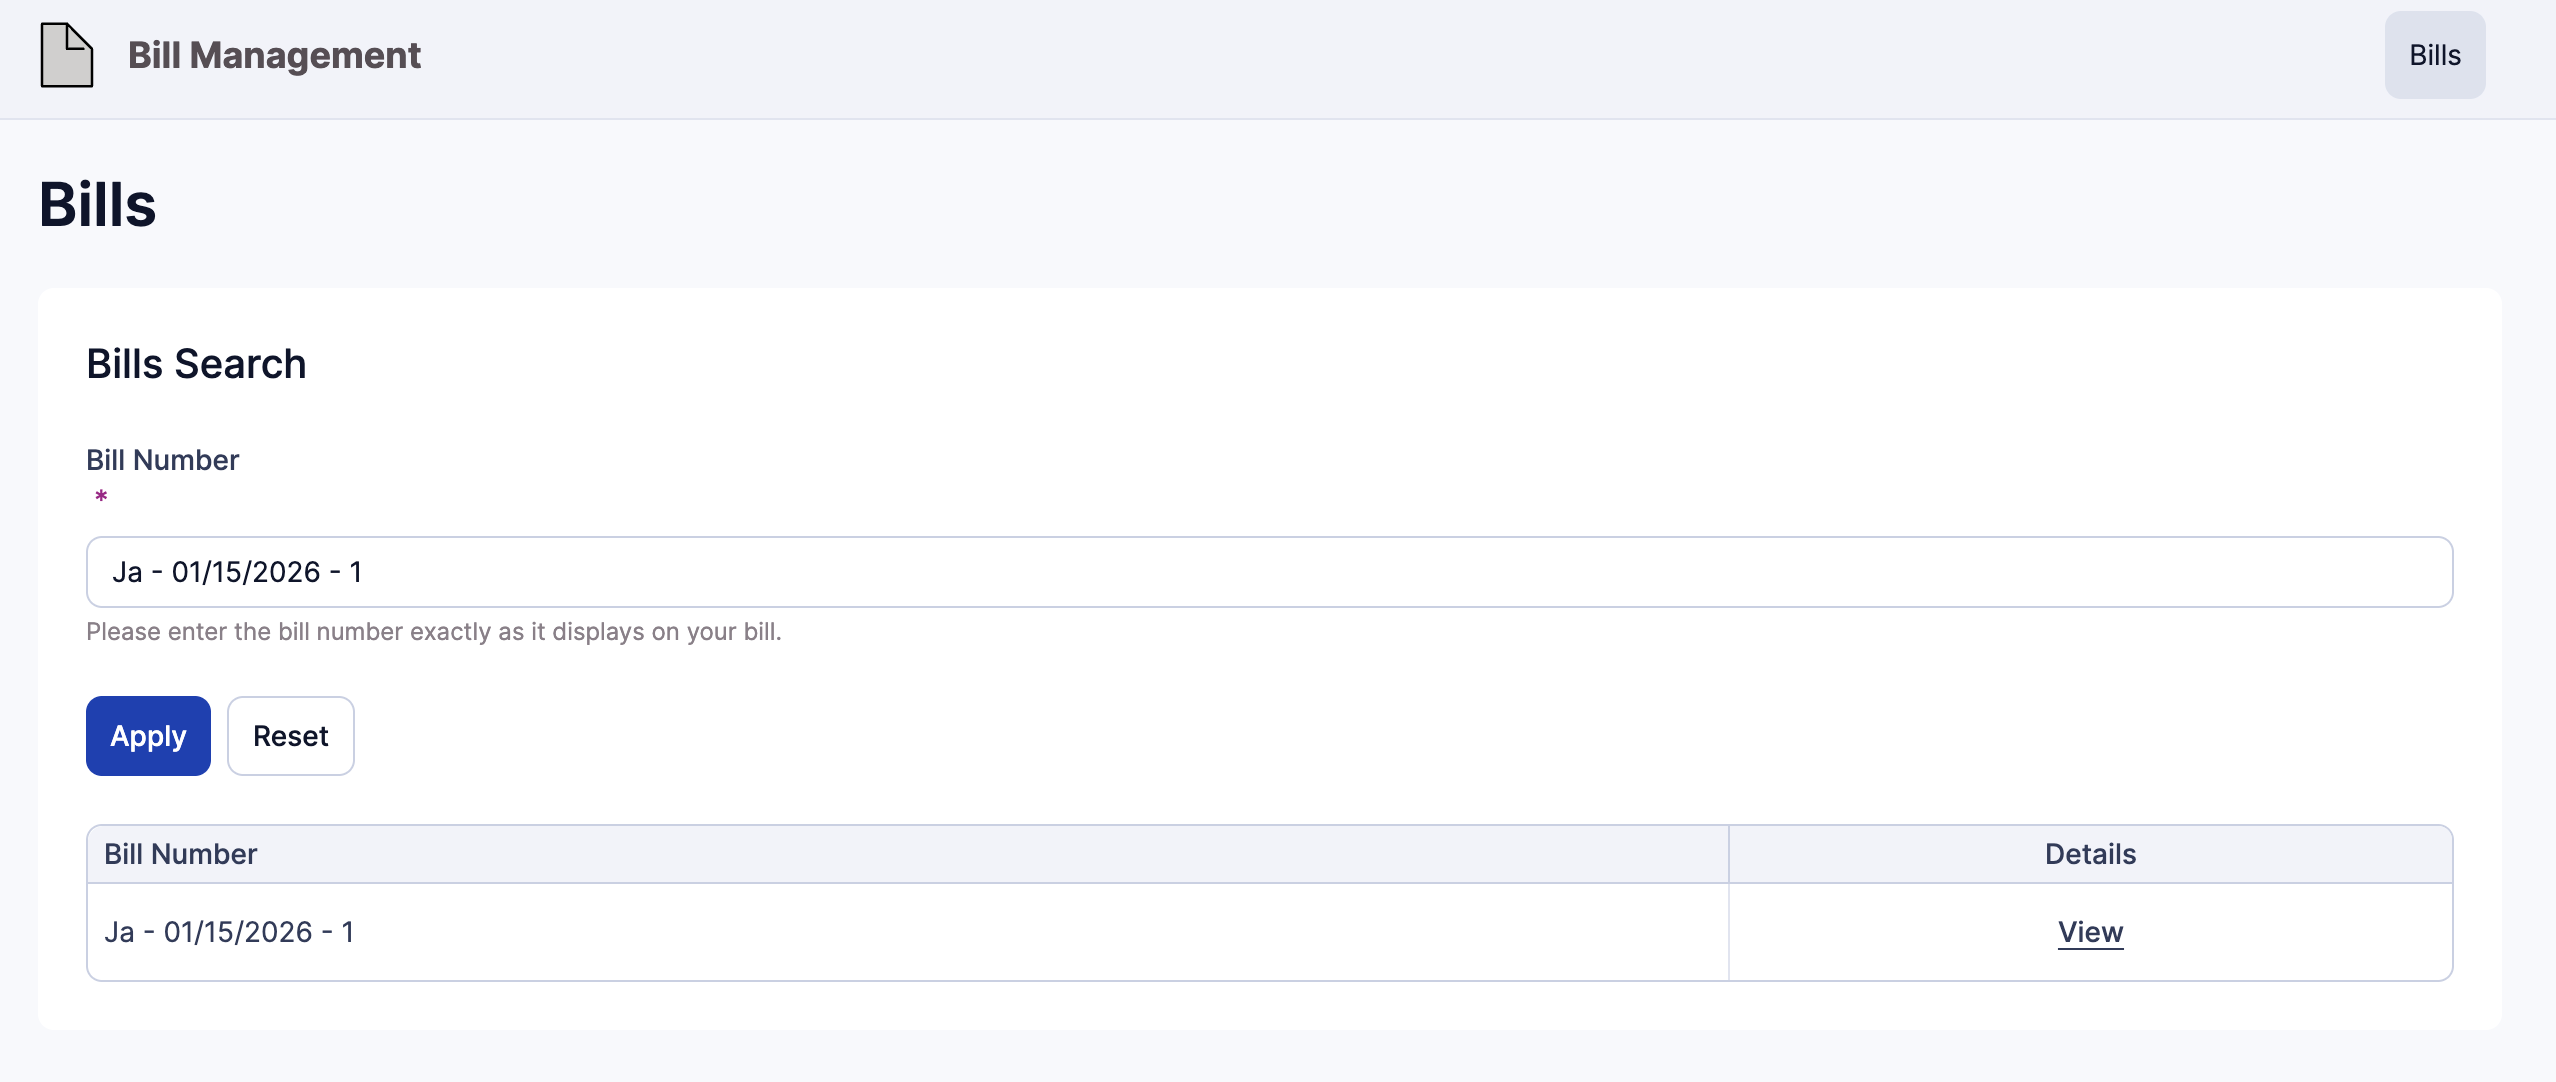
NoteThe ID must match an existing record exactly. A missing character, extra character, or accidental space will return no results.
Updated 5 months ago