Enabling Payments and Connecting Stripe/PayPal
Turn on Payments for your app and connect your Stripe account so you can start accepting payments.
What you'll learn:
- How to enable Payments and enter your Stripe or PayPal API keys
- The difference between Test/Sandbox Mode and Live Mode, and what your plan allows
- How to name, add, and disconnect payment processors
Before you begin
Stripe: To accept payments, you'll need a Stripe account and your Stripe API keys. You can find your keys in your Stripe dashboard.
PayPal: To accept payments, you'll need a PayPal account and your PayPal API Username, API Password, and API Signature. You can find these in your PayPal account.
Enabling Payments
When you first open the Payments section, you'll see an empty state explaining what Payments does.
- Go to the Payments section in your app's settings.
- Select Enable Payments.
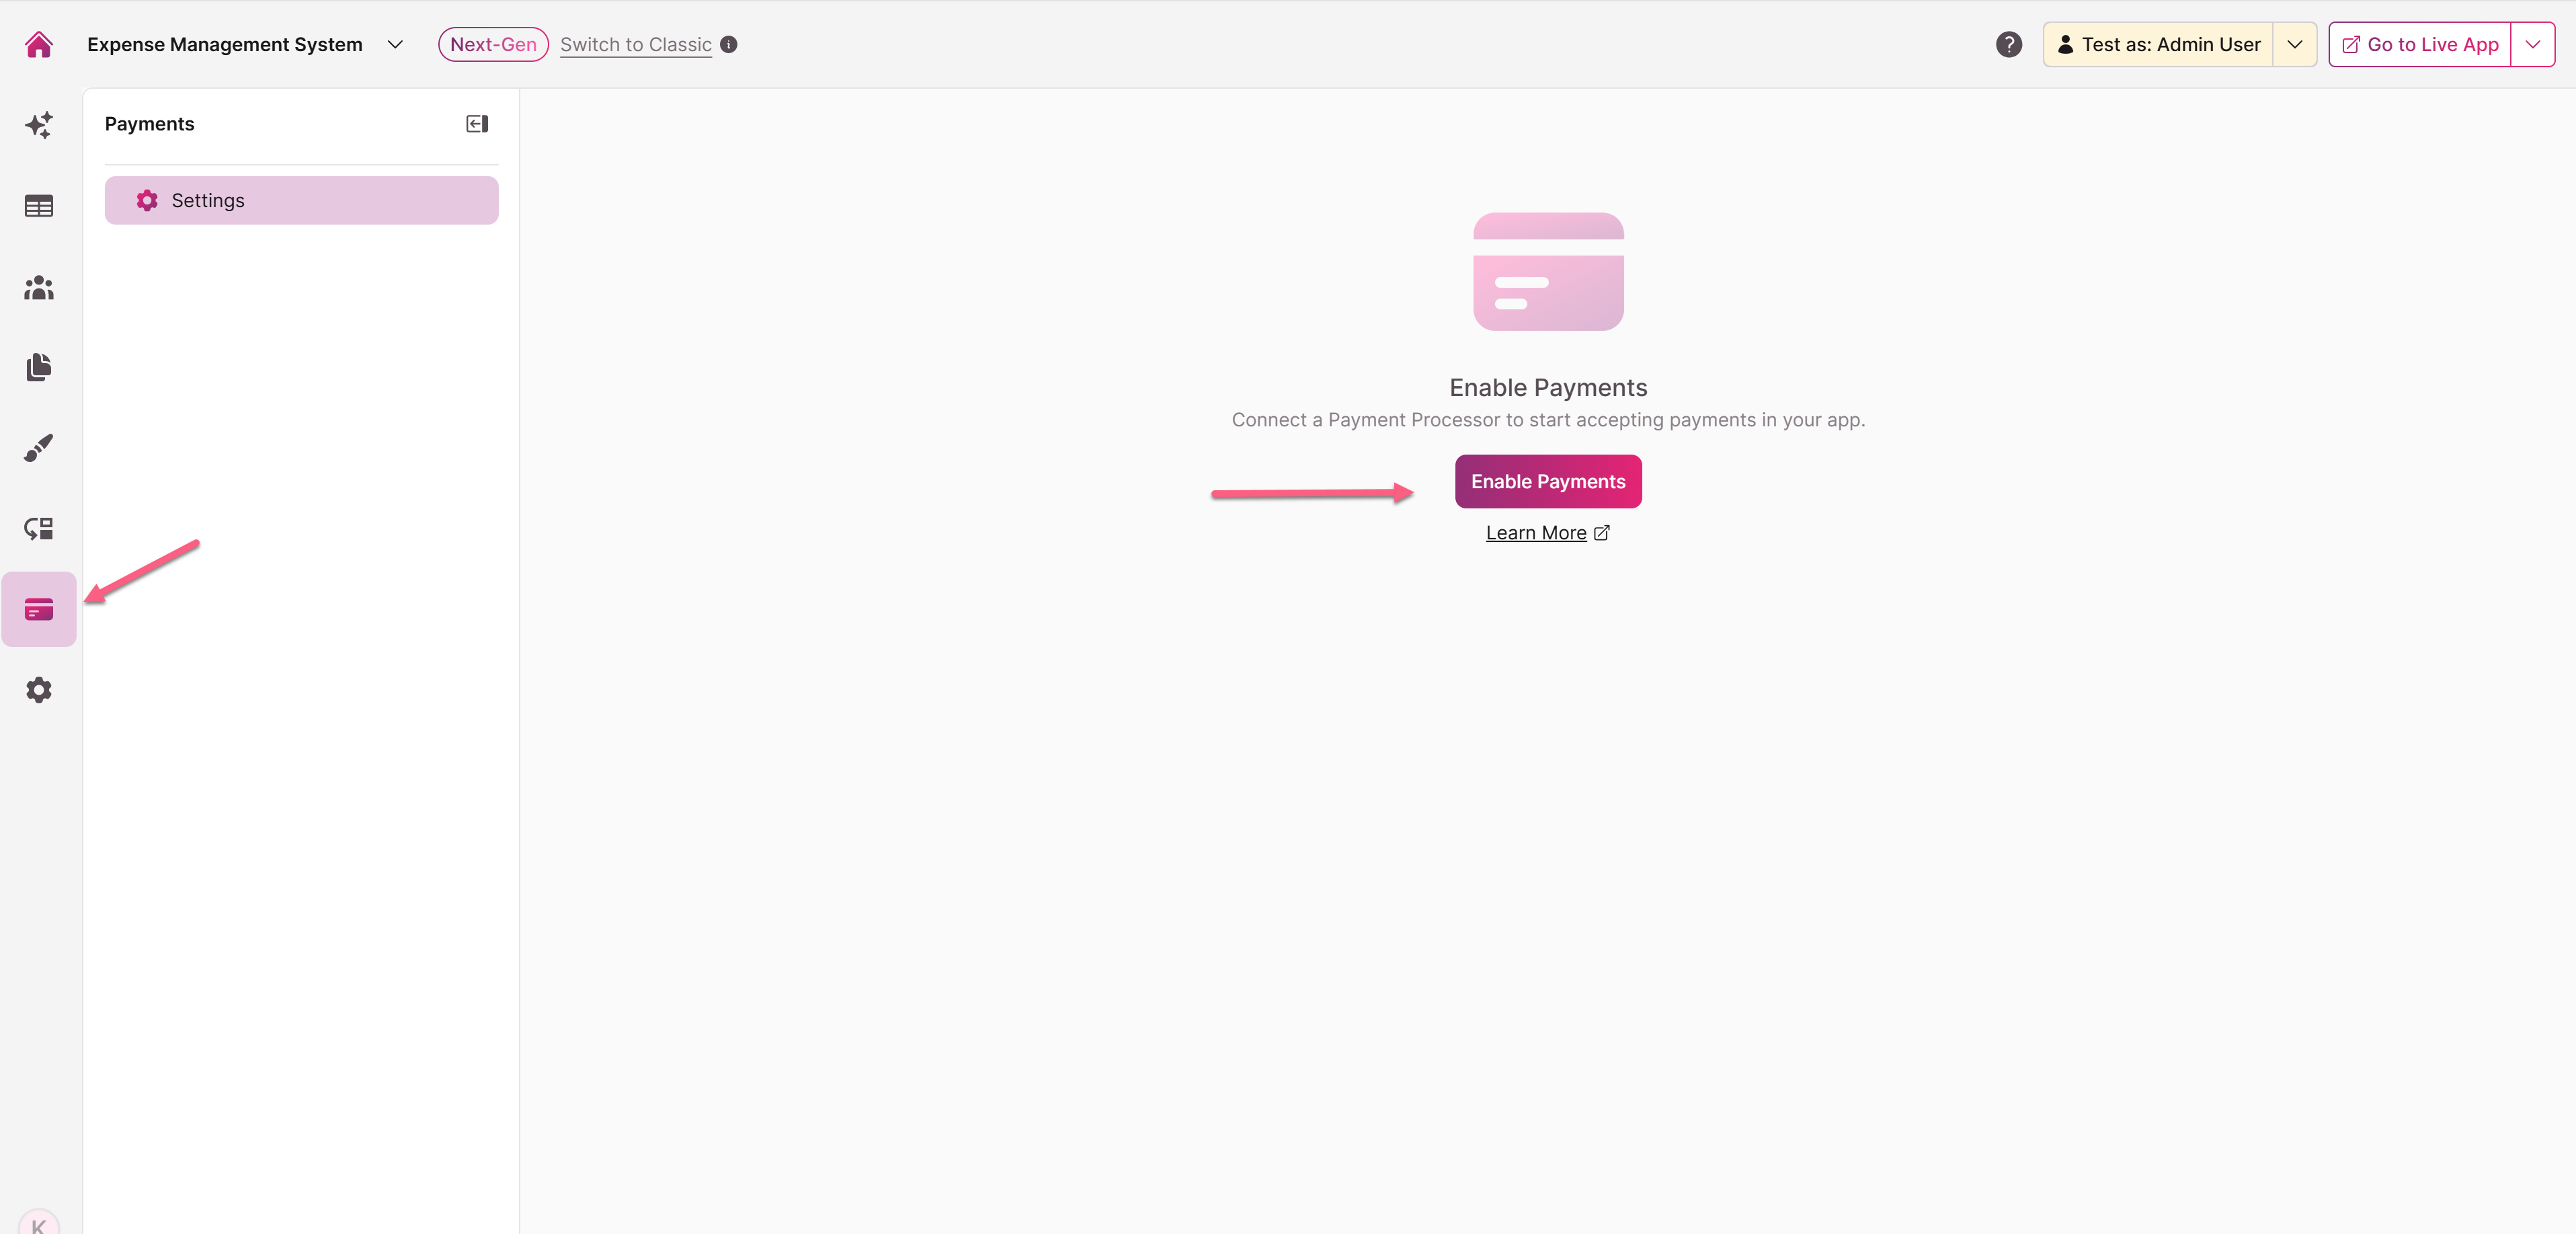
The Enable Payments modal opens, where you'll enter your Stripe or PayPal keys.
Tip: Not sure where your API keys are? The modal also includes a Learn More link that opens the Stripe or PayPal documentation in a new tab.
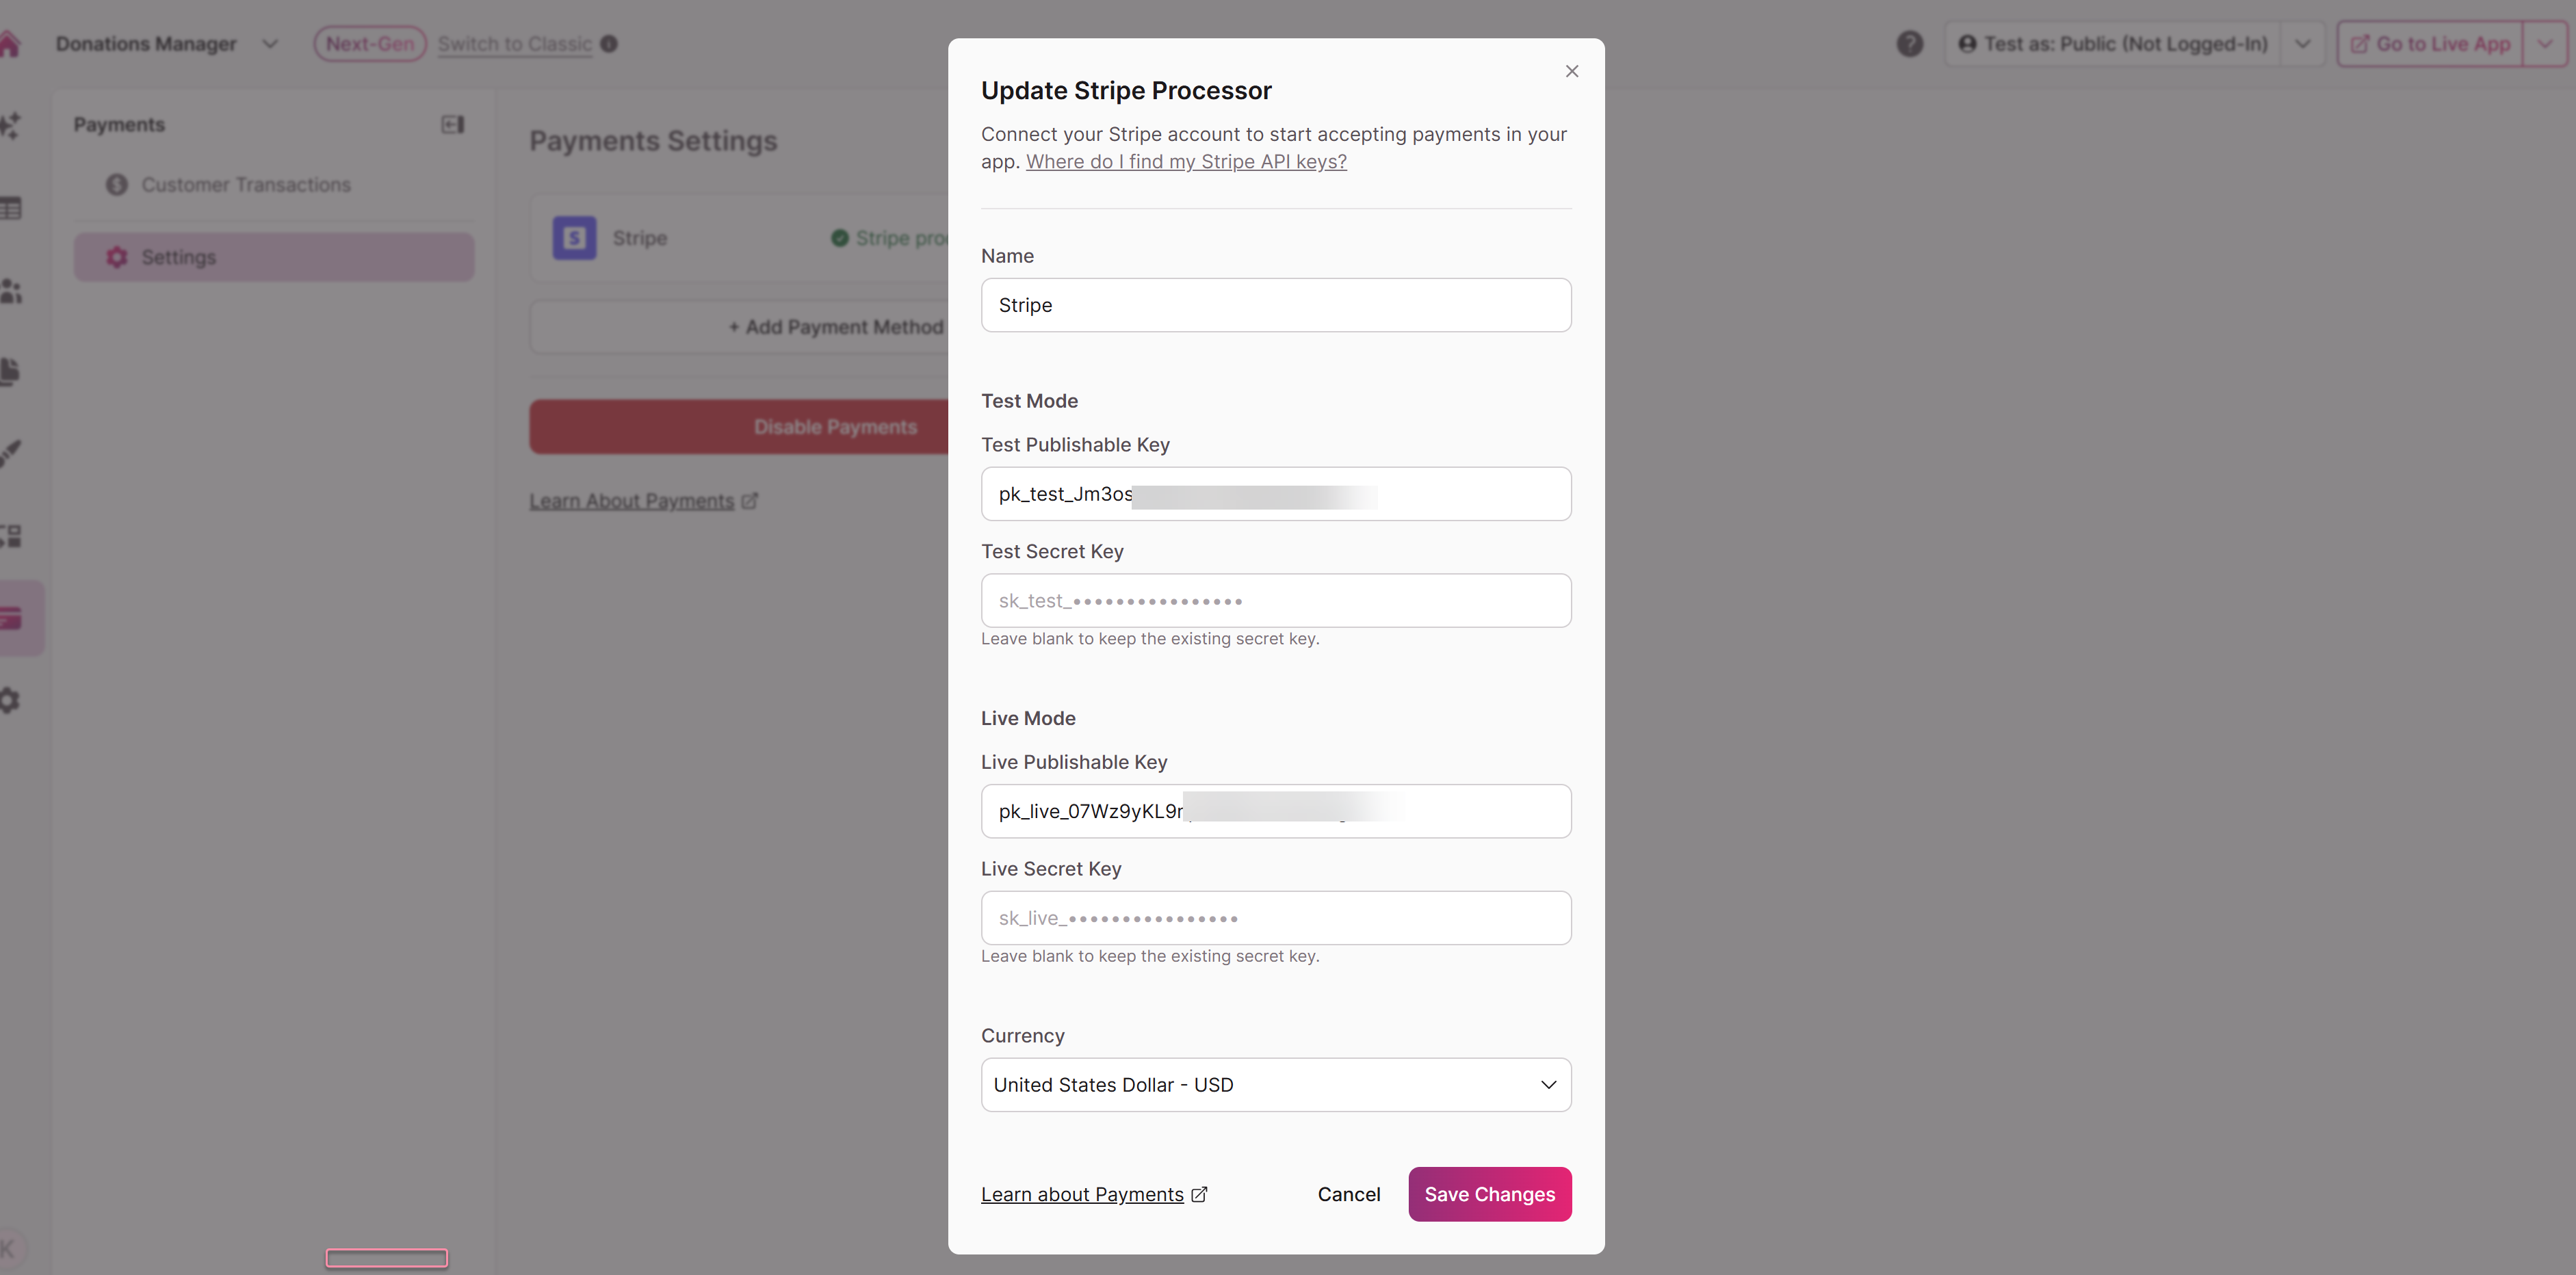
Entering your Stripe keys
The Enable Payments modal includes four key fields and a currency selector:
- Test Publishable Key
- Test Secret Key
- Live Publishable Key
- Live Secret Key
- Currency — The default currency for payments on this processor.
Enter your keys, choose your currency, and select Enable Payments. Select Cancel to close the modal without saving.
When you save, Knack validates your keys against Stripe before confirming the connection. If a key is invalid (for example, an incorrect format or a revoked key), you'll see an inline error and the connection won't be created.
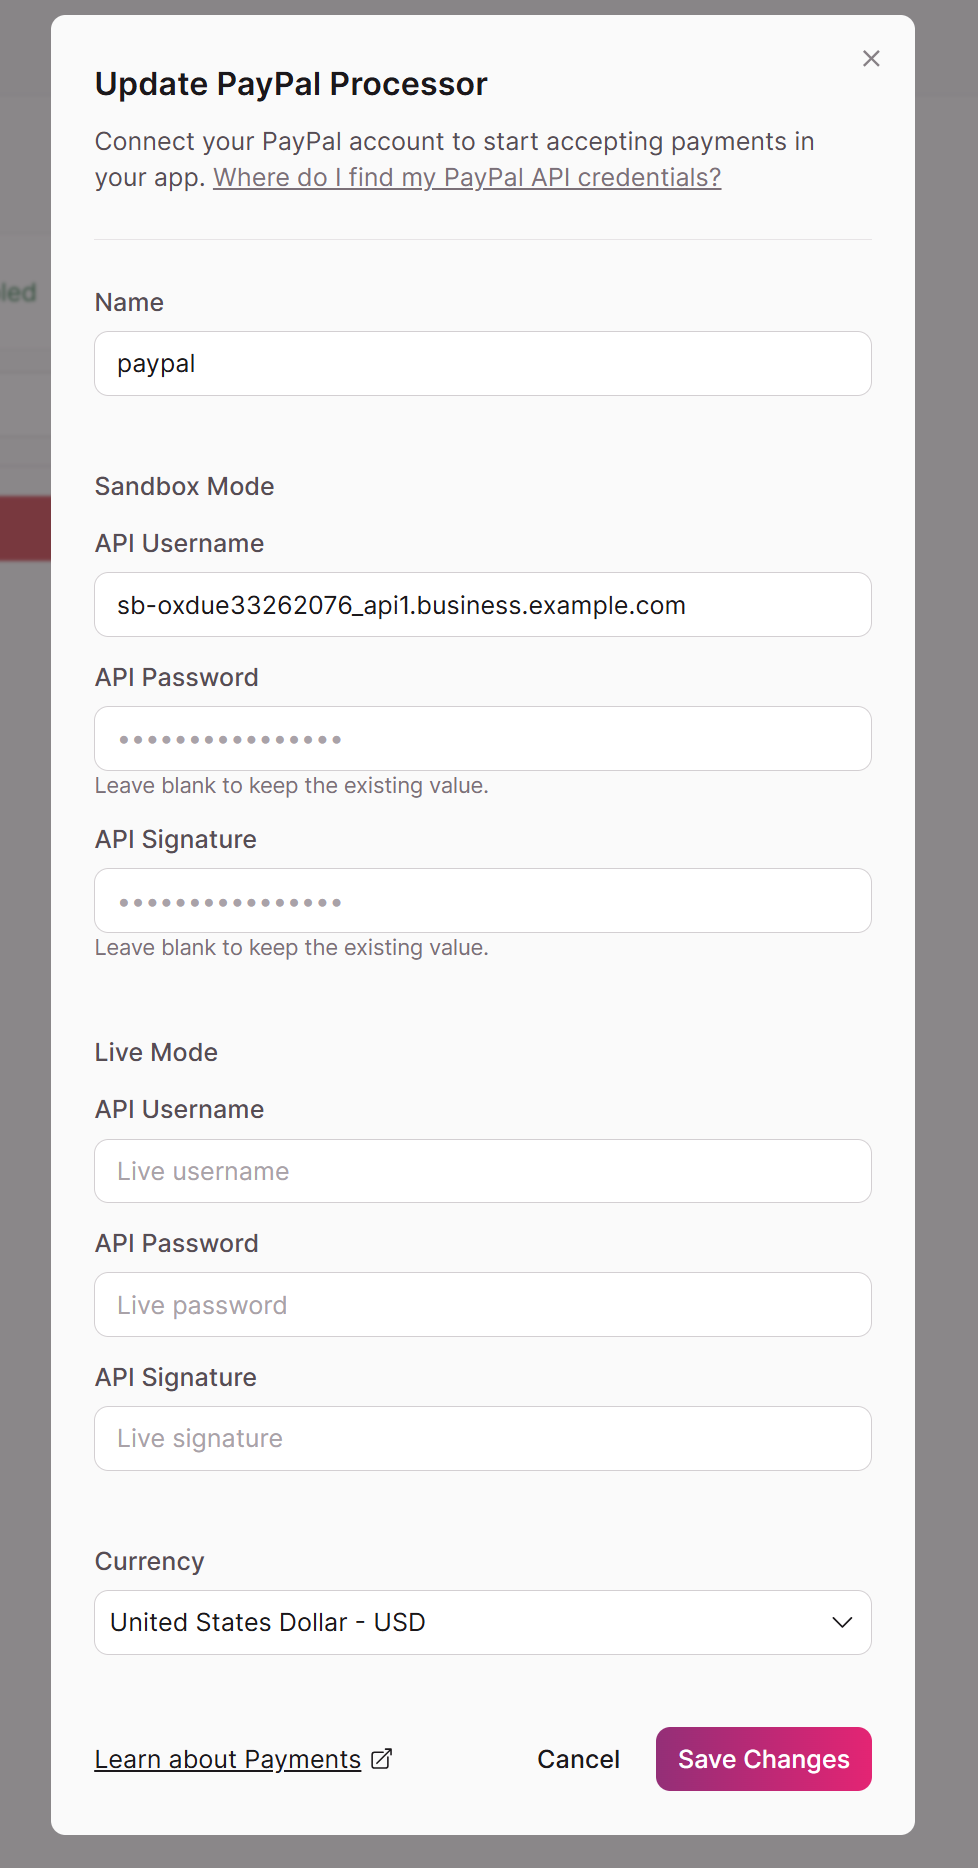
Entering your PayPal keys
The Enable Payments modal includes six key fields and a currency selector:
- Sandbox API Username
- Sandbox API Password
- Sandbox API Signature
- Live API Username
- Live API Password
- Live API Signature
- Currency — The default currency for payments on this processor.
Enter your keys, choose your currency, and select Enable Payments. Select Cancel to close the modal without saving.
When you save, Knack validates your keys against PayPal before confirming the connection. If a key is invalid (for example, an incorrect format or a revoked key), you'll see an inline error and the connection won't be created.
Test Mode/Sandbox Mode vs. Live Mode
- Test Mode (Stripe) and Sandbox Mode (PayPal) lets you build and try out your checkout using the processor's test cards, with no real charges.
- Live Mode processes real payments using your live keys.
What's available depends on your plan:
- Trial and Starter plans can use Test Mode/Sandbox Mode only. The Live Key fields are disabled, with a message explaining that a plan upgrade is required for Live Mode.
- Paid plans above Starter can use all fields and switch between Test and Live Mode.
Important: Always confirm you're in the correct mode before going live. Charges made in Live Mode are real transactions.
What happens when you connect
A successful connection does two things automatically:
- The processor switches to a connected state and options to manage, delete, add a new payment method, or disable payments.
- Knack creates at least one table for your payment data: Customer Transactions.
- A Saved Customer Payments table is created when a user stores their payment information.
- You don't need to set these up yourself.

Naming and managing processors
You can give each payment processor a name when you set it up or edit it later. Naming is especially helpful if you connect more than one processor, so you can tell them apart at a glance.
To add another processor after your initial setup, return to Payments Settings and add it there.
Disconnecting a processor
You can disconnect Stripe or PayPal at any time from Payments Settings.
Warning: Disconnecting a processor disables any existing Accept Payment and Save & Edit Payment Method elements that use it. Your existing payment records are preserved, but your live app pages will no longer be able to take payments until you reconnect.
Troubleshooting
- My keys won't validate. Double-check that you've copied the full key with no extra spaces, and that you're pasting Test keys into the Test fields and Live keys into the Live fields. Revoked keys will also fail validation.
- The Live key fields are disabled. Live Mode requires a paid plan above Starter. Upgrade your plan to enable Live Mode.
- No tables appeared after connecting. The Customer Transaction Table is only created on a successful connection. If your keys failed validation, fix them and reconnect.
- My Payment Settings are enabled on a new app. Some template apps are pre-configured with payments enabled. You'll still need to enter in your Stripe API keys.
Note: For security purposes and to meet PCI regulations, actual credit card information is never processed or stored in your Knack database.
Updated about 1 month ago