How to Create a Login-Protected Page
Watch
Goal
Use this guide when you want to restrict access to a page so that only authenticated users can view it. For example, creating a Customer Portal where customers must log in to view their orders, or an Employee Dashboard where staff access internal tools and resources.
Prerequisites
- You must have access to the Builder to create and configure pages
- For role-based access, you must have at least one User Role table set up in your app
Step-by-Step Instructions
Creating a New Protected Page
-
Navigate to the Pages section in the Builder.
-
Click the Page button or the pink + button to open the Add Page dialog.
-
In the Page Name field, enter a descriptive name for your page (e.g., "Customer Dashboard" or "Employee Portal").
-
Toggle the Protect page switch to ON. You'll see the description "Require a login to access this page."
-
Additional configuration options will appear. Configure the following:
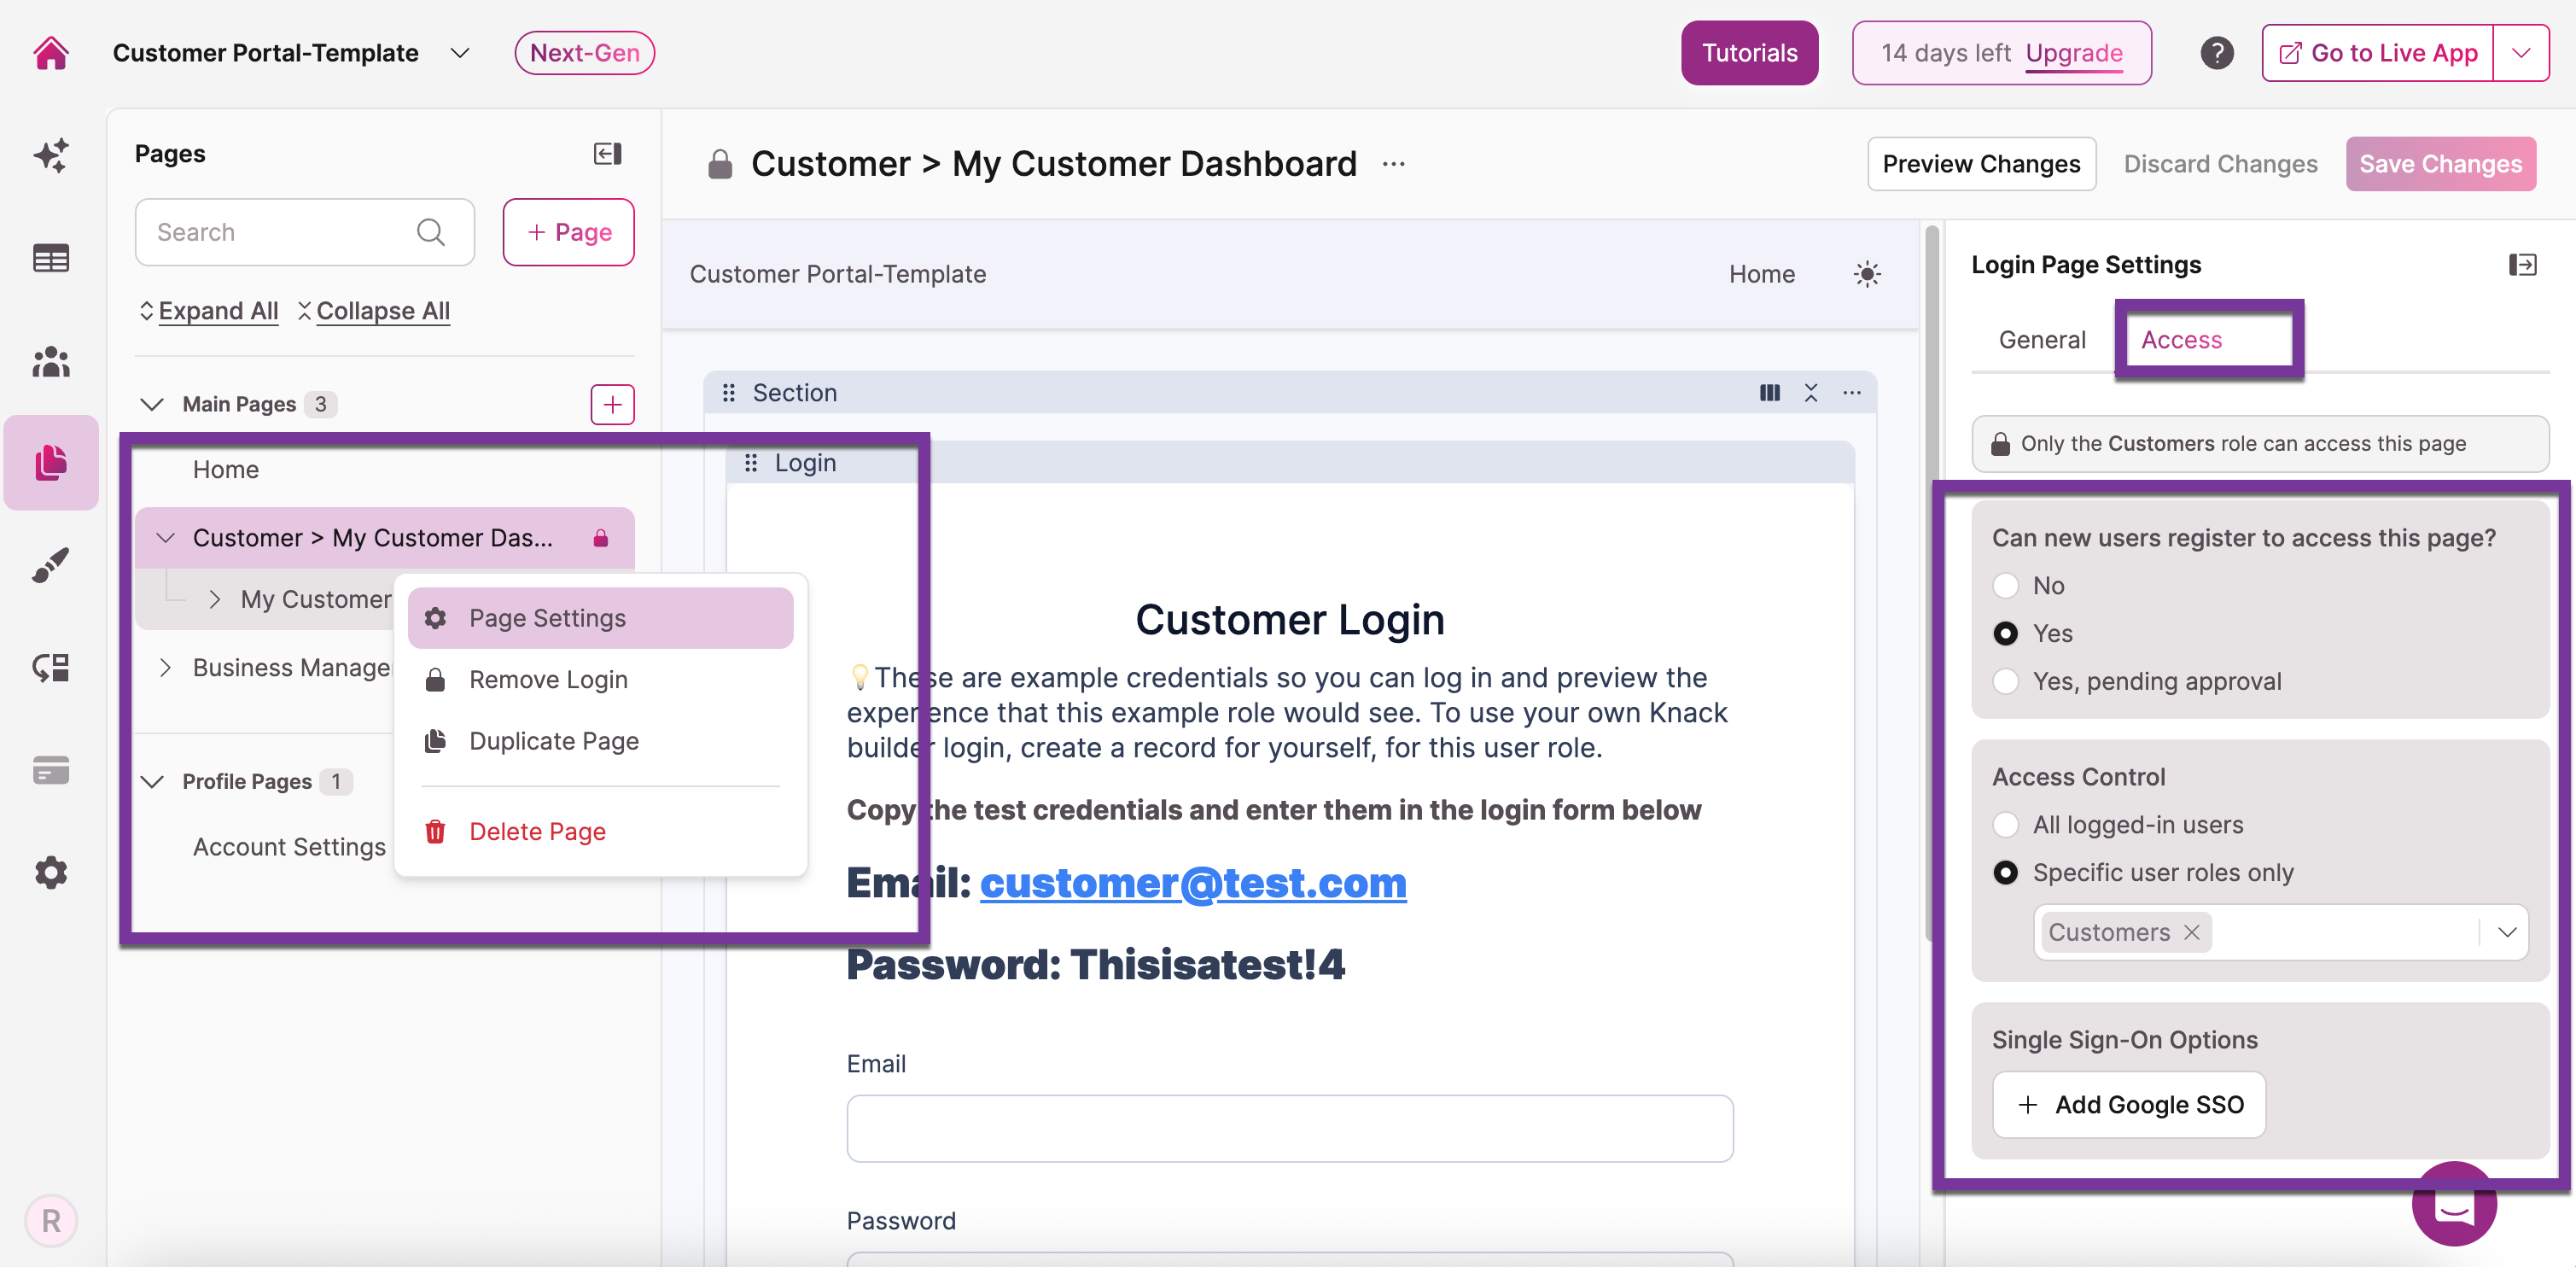
Registration Settings: In the "Can new users register to access this page?" section, choose No (default, prevents registration), Yes (allows immediate access after registration), or Yes, pending approval (requires administrator approval before access is granted).
Access Control: In the "Which logged-in users can access this page?" section, choose All logged-in users (default) or Specific user roles only. If you selected specific roles, check the box next to each role that should have access.
-
Click Add Page to create your protected page.
-
Add elements to your page by clicking Add Element and selecting the forms, tables, or other components you want to display.
-
Click Preview in the top-right corner to test your page in the Live App.
Adding Protection to an Existing Page
If you have an existing page that you want to protect:
-
In the Pages section, hover over the page name you want to protect.
-
Click the ellipses (...) that appear to the right of the page name.
-
Select Protect Page with Login from the dropdown menu.
-
A modal will appear with the same protection settings as creating a new protected page.
-
Configure the registration and access control settings as described above.
-
Click Save to apply protection to the existing page.
Viewing Access Settings
To check the current access settings for any page:
-
Click on the page name in the Pages panel.
-
Click the Access tab in the page settings panel.
-
For unprotected pages, you'll see "This page is publicly accessible."
-
For protected pages, you'll see the current login and role restrictions.
Result
Your page is now protected by login authentication. Users must log in with valid credentials to access the page. If you configured role-based access, only users with the specified roles will be able to view the page after logging in. The page will display a lock icon in the Pages panel, and all child pages underneath it will automatically inherit the same protection.
Next Steps
- How to Configure Registration Settings to control how new users can sign up
- How to Manage User Role Access to restrict pages to specific roles
- Protected Pages Best Practices for security and UX recommendations