

Knack MCP Server
Connect a Knack backend (data model and users/roles) to AI-powered development tools using the Knack Builder MCP Server.
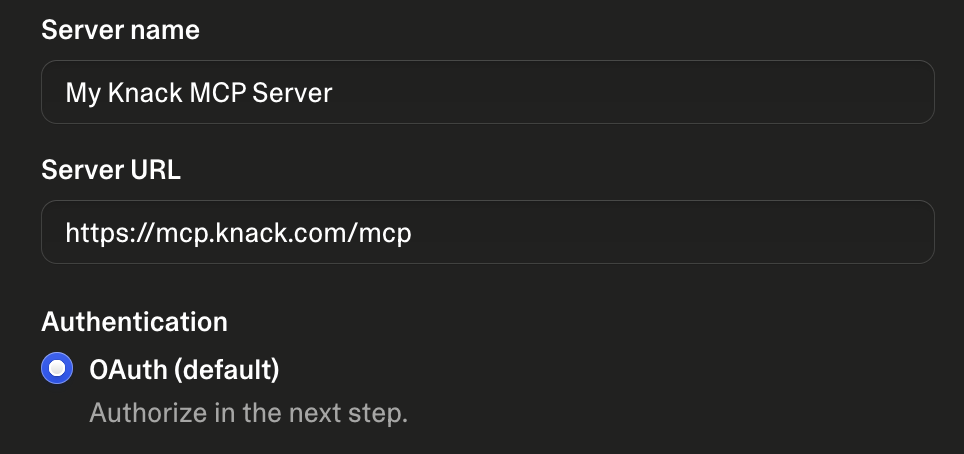
Knack's MCP Server URL is https://mcp.knack.com/mcp for most customers and uses OAuth to sign in with your Dashboard / Builder-area credentials
Table of Contents
- What is an MCP Server?
- Overview of Knack MCP Server
- Authentication
- Different MCP Server URL for GovCloud and FPCs
- Connecting in Specific Tools
- Sample Prompt
- Tool Reference
- Tips & Tricks when building Headless Knack apps
- Limitations & Important Notes
What is an MCP Server?
MCP (Model Context Protocol) is an open standard that lets AI assistants and coding tools connect directly to external services and take real actions on your behalf — not just generate code, but actually read data, create records, and modify app structure in real time.
When you connect an MCP server to an AI tool like Lovable, Claude Code, or Bolt, the AI gains a set of callable functions that go beyond its built-in knowledge. Instead of describing how to do something, it can just do it.
For Knack builders, this means:
- Describe your app in plain English and the AI creates your tables, fields, and relationships directly in your Knack application — no manual Builder clicks required.
- Ask the AI to inspect your existing schema, suggest changes, or fix structural issues, and it reads your Knack app's backend schema to give accurate, grounded answers.
- Use your preferred AI coding environment as the interface for building your Knack data model, then hand off to Knack's Builder or live app for the rest.
The Knack MCP server is the bridge that makes this possible. It handles authentication, translates the AI's intent into Knack API calls, and ensures everything it creates lands safely inside your Knack application.
Overview of Knack MCP Server
The Knack MCP server allows AI development tools to directly read and build your Knack application's data model — creating tables, defining fields, setting up relationships, and updating your app structure — all through natural language conversation.
All tables, fields, and data are created and stored inside your Knack application, hosted on Knack's cloud infrastructure. Nothing is stored locally or inside the AI tool — the AI acts as the interface, while Knack remains the system of record for your data model. You can verify and manage everything the AI creates at any time from the Knack Builder area by logging in through your Knack Dashboard.
Instead of manually configuring your Knack schema through the Builder interface, you describe what you need in plain English and the AI handles the data model construction, using the Knack MCP server as the secure bridge to your application.
Note: The Knack MCP Server is focused on building your app's backend data model and user model — tables, fields, relationships, data, user roles, user permissions. It does not support Knack-based frontend / Page / Theme building.
Authentication
Sign in with your Knack account credentials for dashboard.knack.com(Sign up for a free Knack account if you don't have an account yet)
The Knack MCP Server uses OAuth 2.1 with PKCE — the same secure standard used by modern web applications. You do not need to generate API keys or copy tokens manually.
- The Knack MCP Server URL is https://mcp.knack.com/mcp for most customers (see details for GovCloud and Fully Private Customers)
- You log in using your Knack Builder account credentials (the email and password you use to sign in to your Knack Dashboard at
dashboard.knack.com). - You approve the authorization — a consent screen confirms that the tool will be granted access to manage your app's schema.
- The tool receives a secure access token and stores it. The connection is established.
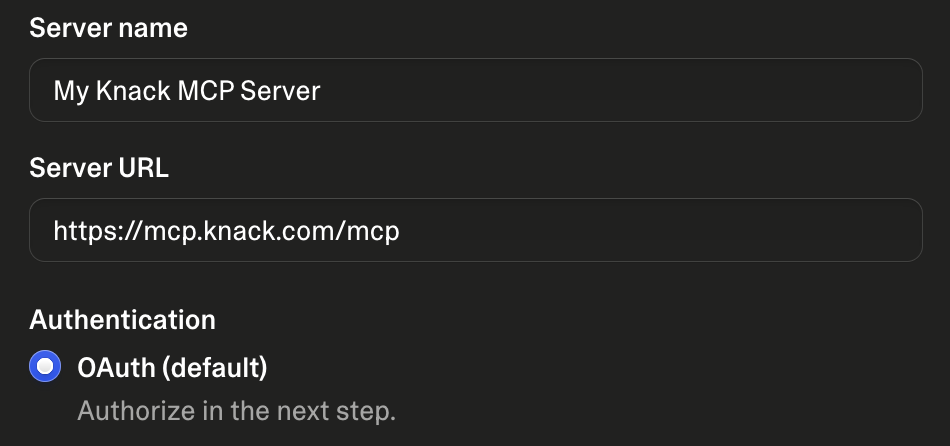
Different MCP Server URL for GovCloud and Fully Private Instance Customers
Customers located in the GovCloud-region must use a different MCP Server URL: https://knack-mcp-server.us-gov-west-1.gprd.knack.com/mcp. Additionally, Fully Private Instance Customers should contact support to find out their specific MCP Server URL.If you are unsure of your region, check the "Data Location" details in an app in your account or Contact our support team
Token lifetime
| Token | Lifetime |
|---|---|
| Access token | 1 hour |
| Refresh token | 30 days |
The AI tool handles token refresh automatically. If your session expires after 30 days, you will be prompted to log in again.
Two-factor authentication (2FA)
If your Knack account has 2FA enabled, you will be prompted to enter your TOTP code during the login step. This is the 6-digit code from your authenticator app (e.g. Google Authenticator, Authy).
Connecting in Specific Tools
The Knack MCP server uses the standard MCP protocol with OAuth 2.1, so it works with any MCP-compatible AI tool. Below are step-by-step instructions for the most popular platforms.
Claude (Desktop and Web)
- Claude Chat, Claude Cowork and Claude Code support connecting MCP servers by going into the "Customize" menu, then select the "Connectors" area, then click "Add > Add custom connector" in the upper right
If you can't see the "Add custom connector" option, the Administrator of your Claude account may not have enabled it. Please reach out to your Admin.
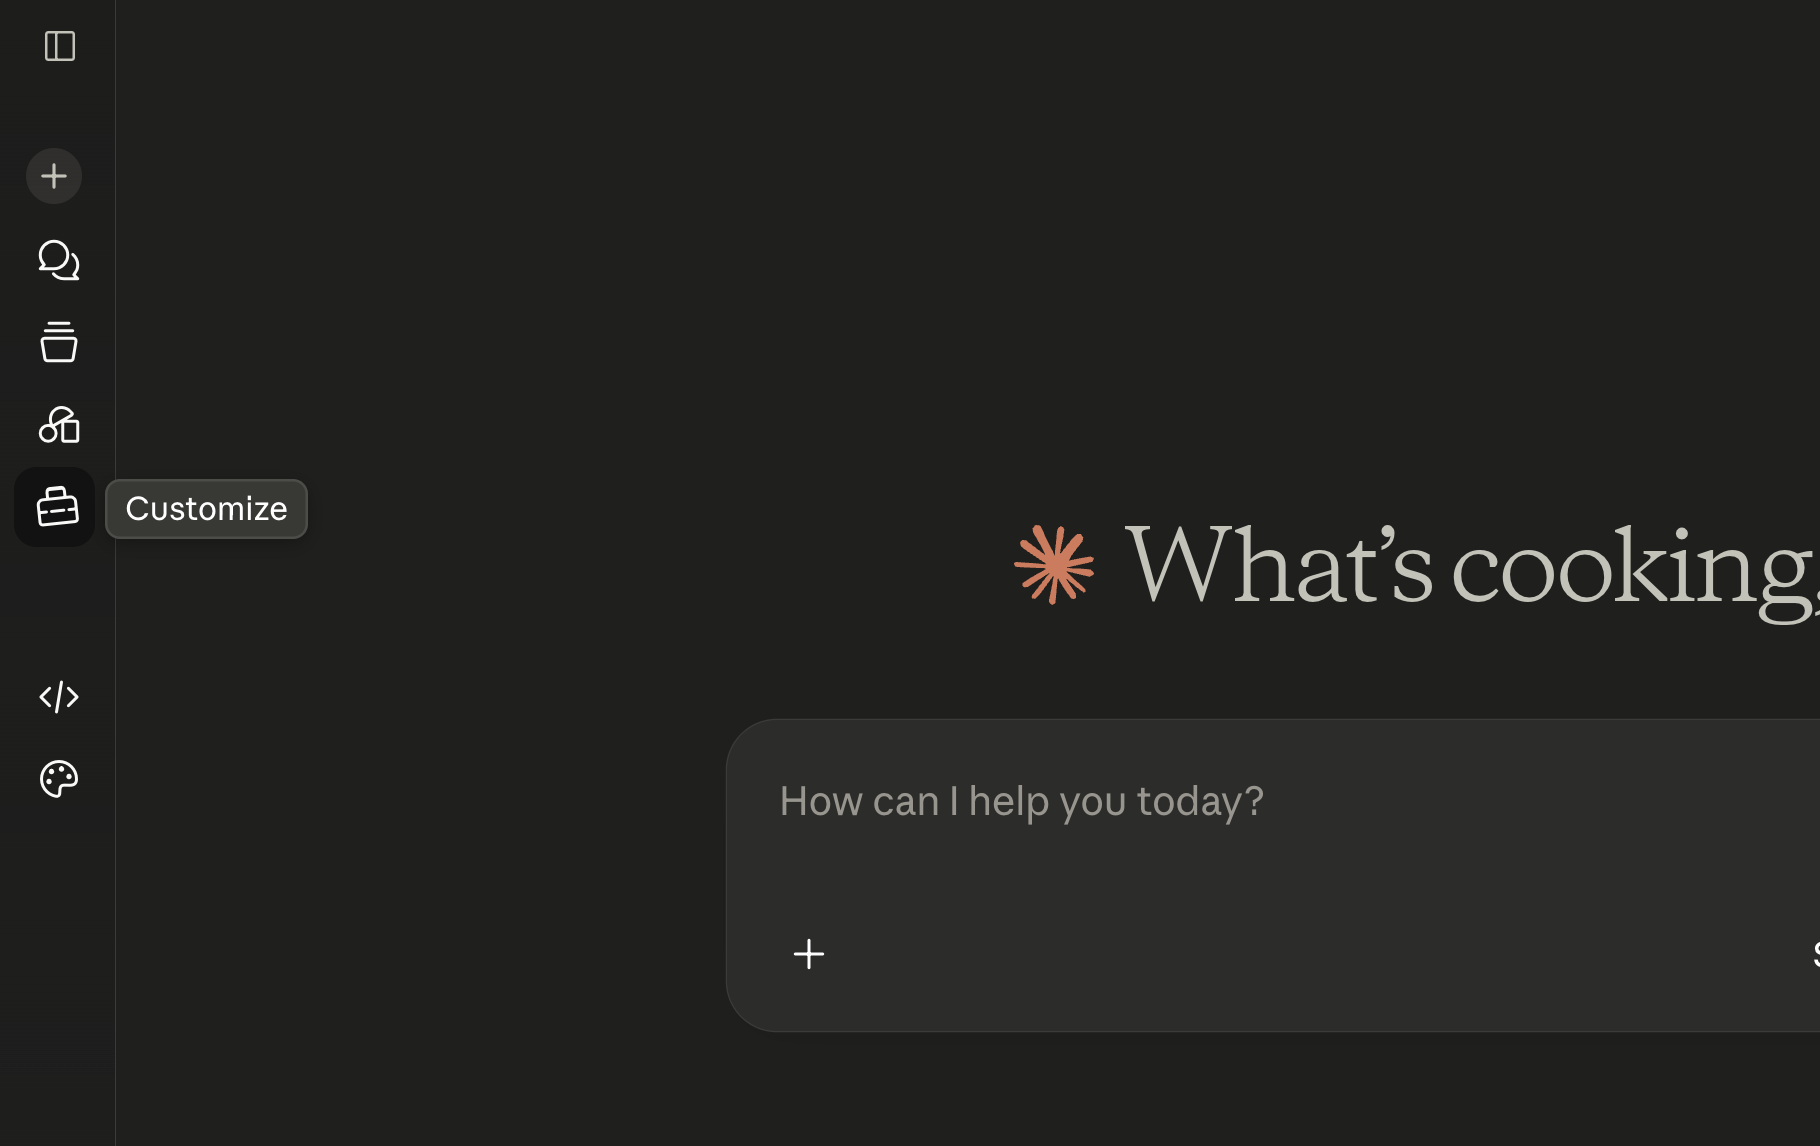
Start by going into the "Customize" area
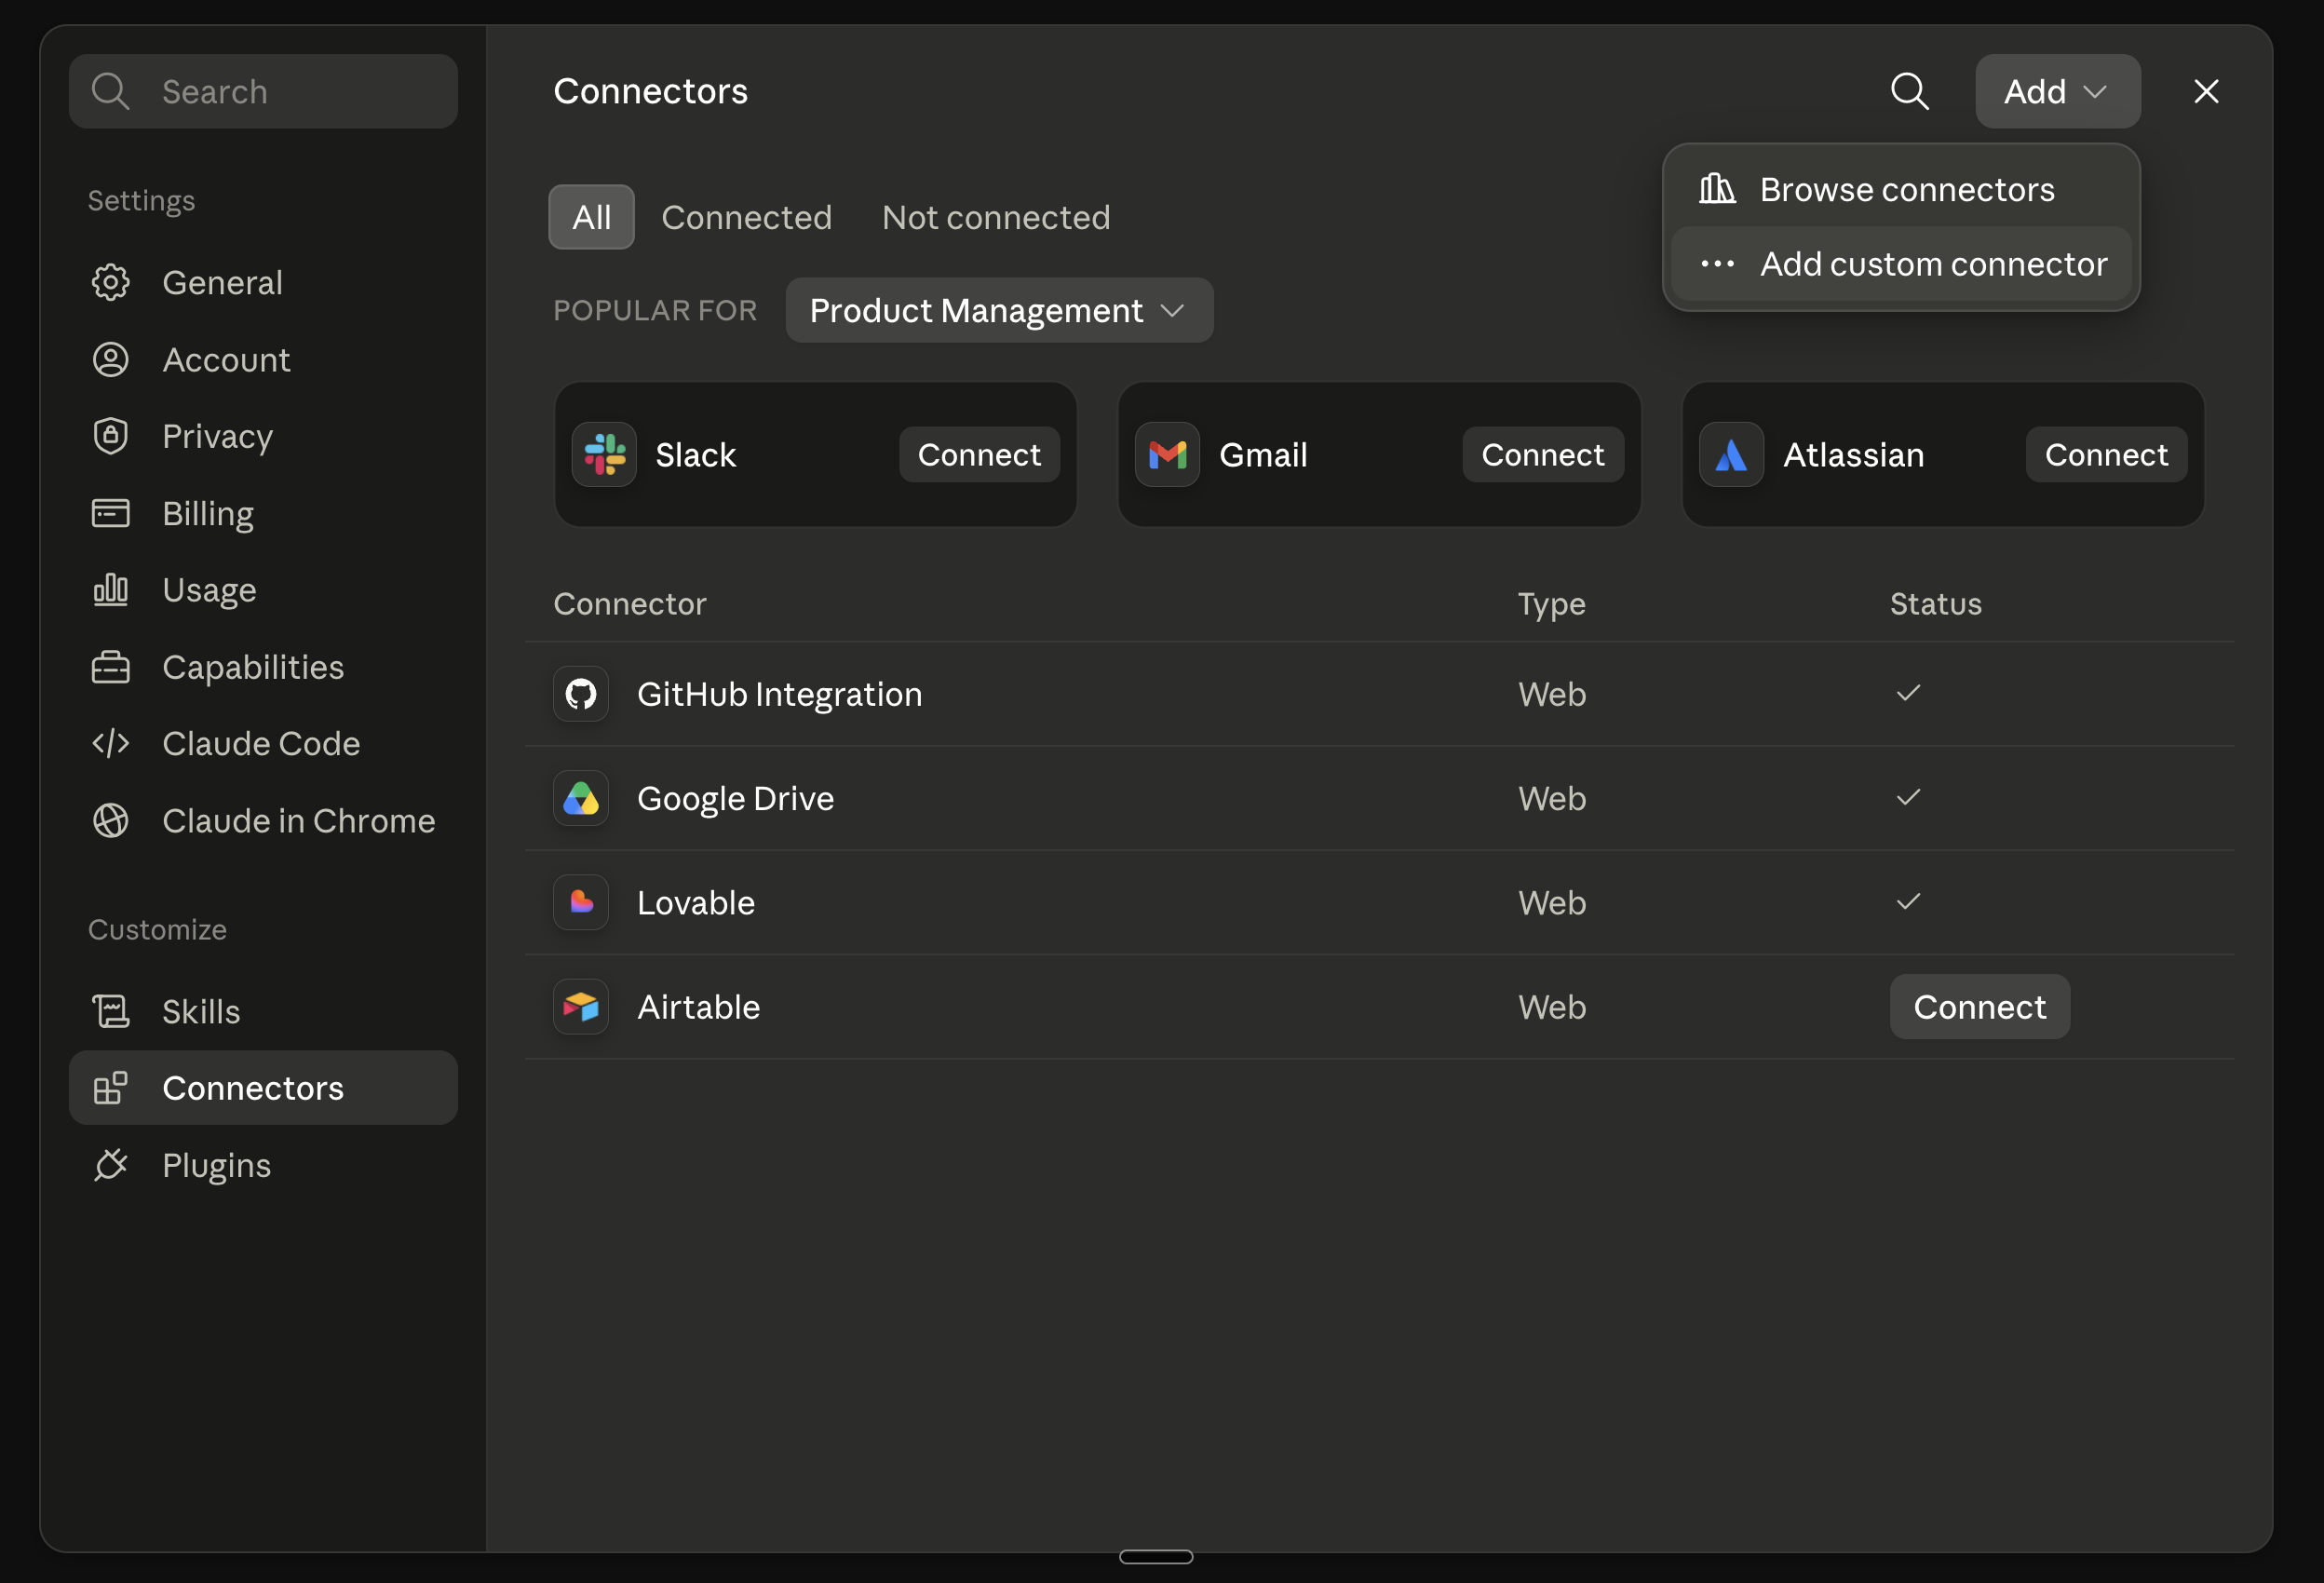
Click "Add" > then "Add custom connector"
- Then add the Knack MCP Server URL
https://mcp.knack.com/mcp, name your connection ("Knack MCP" is the name in the screenshot below), and then click through the Authentication screens
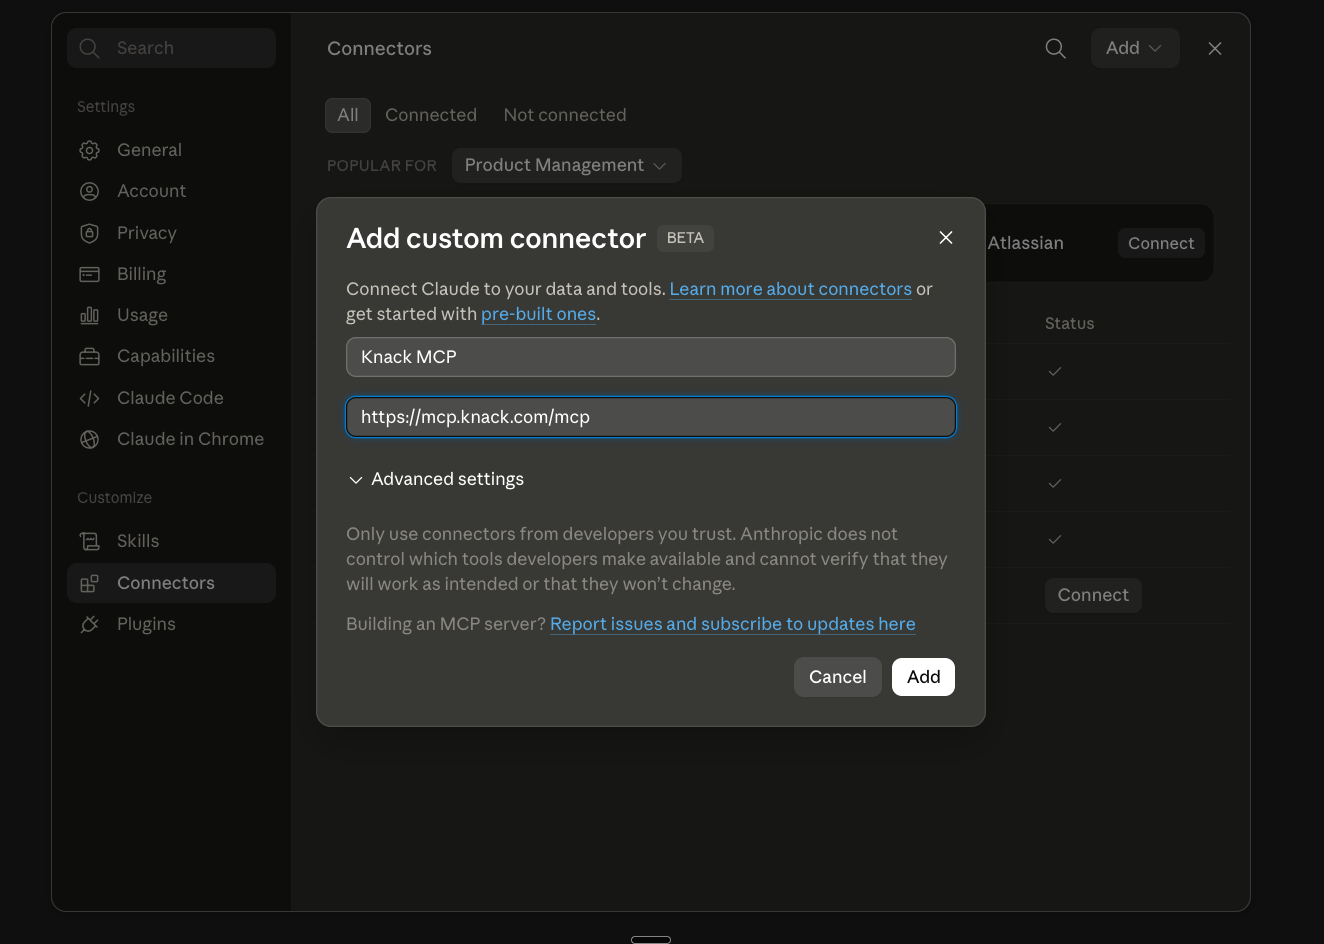
Name your connection, and add the Knack MCP URL: https://mcp.knack.com/mcp
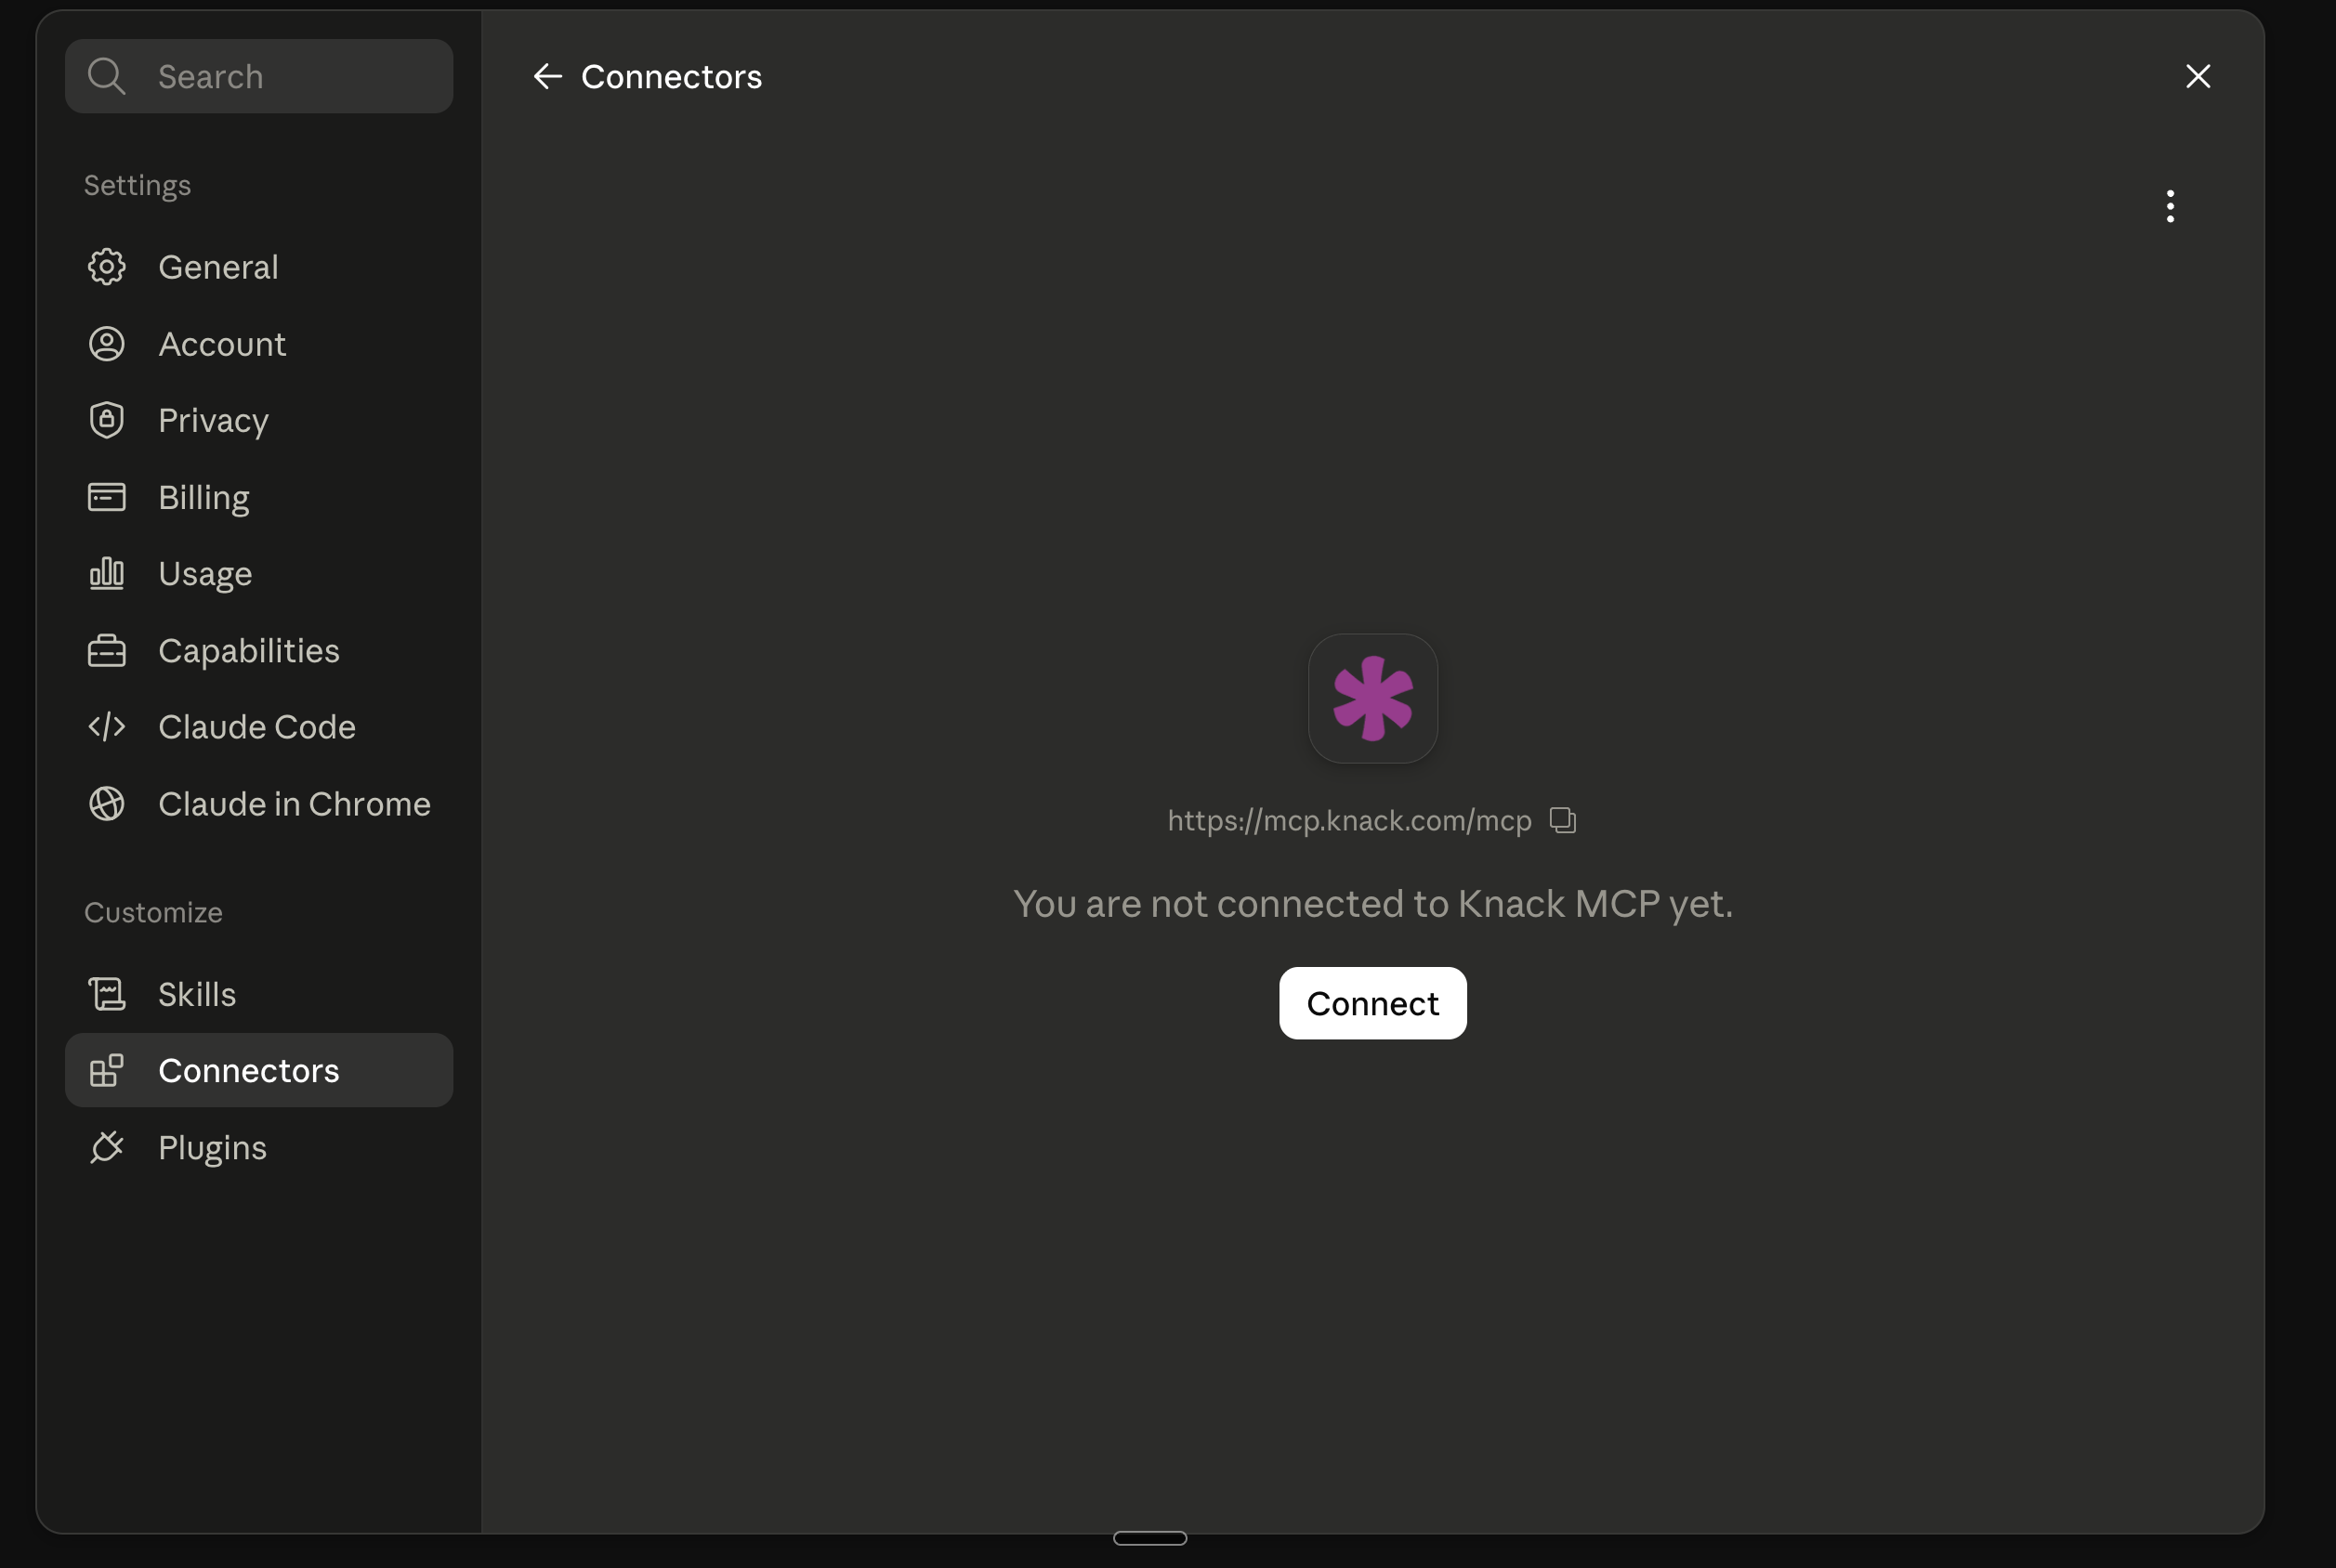
Click "Connect"
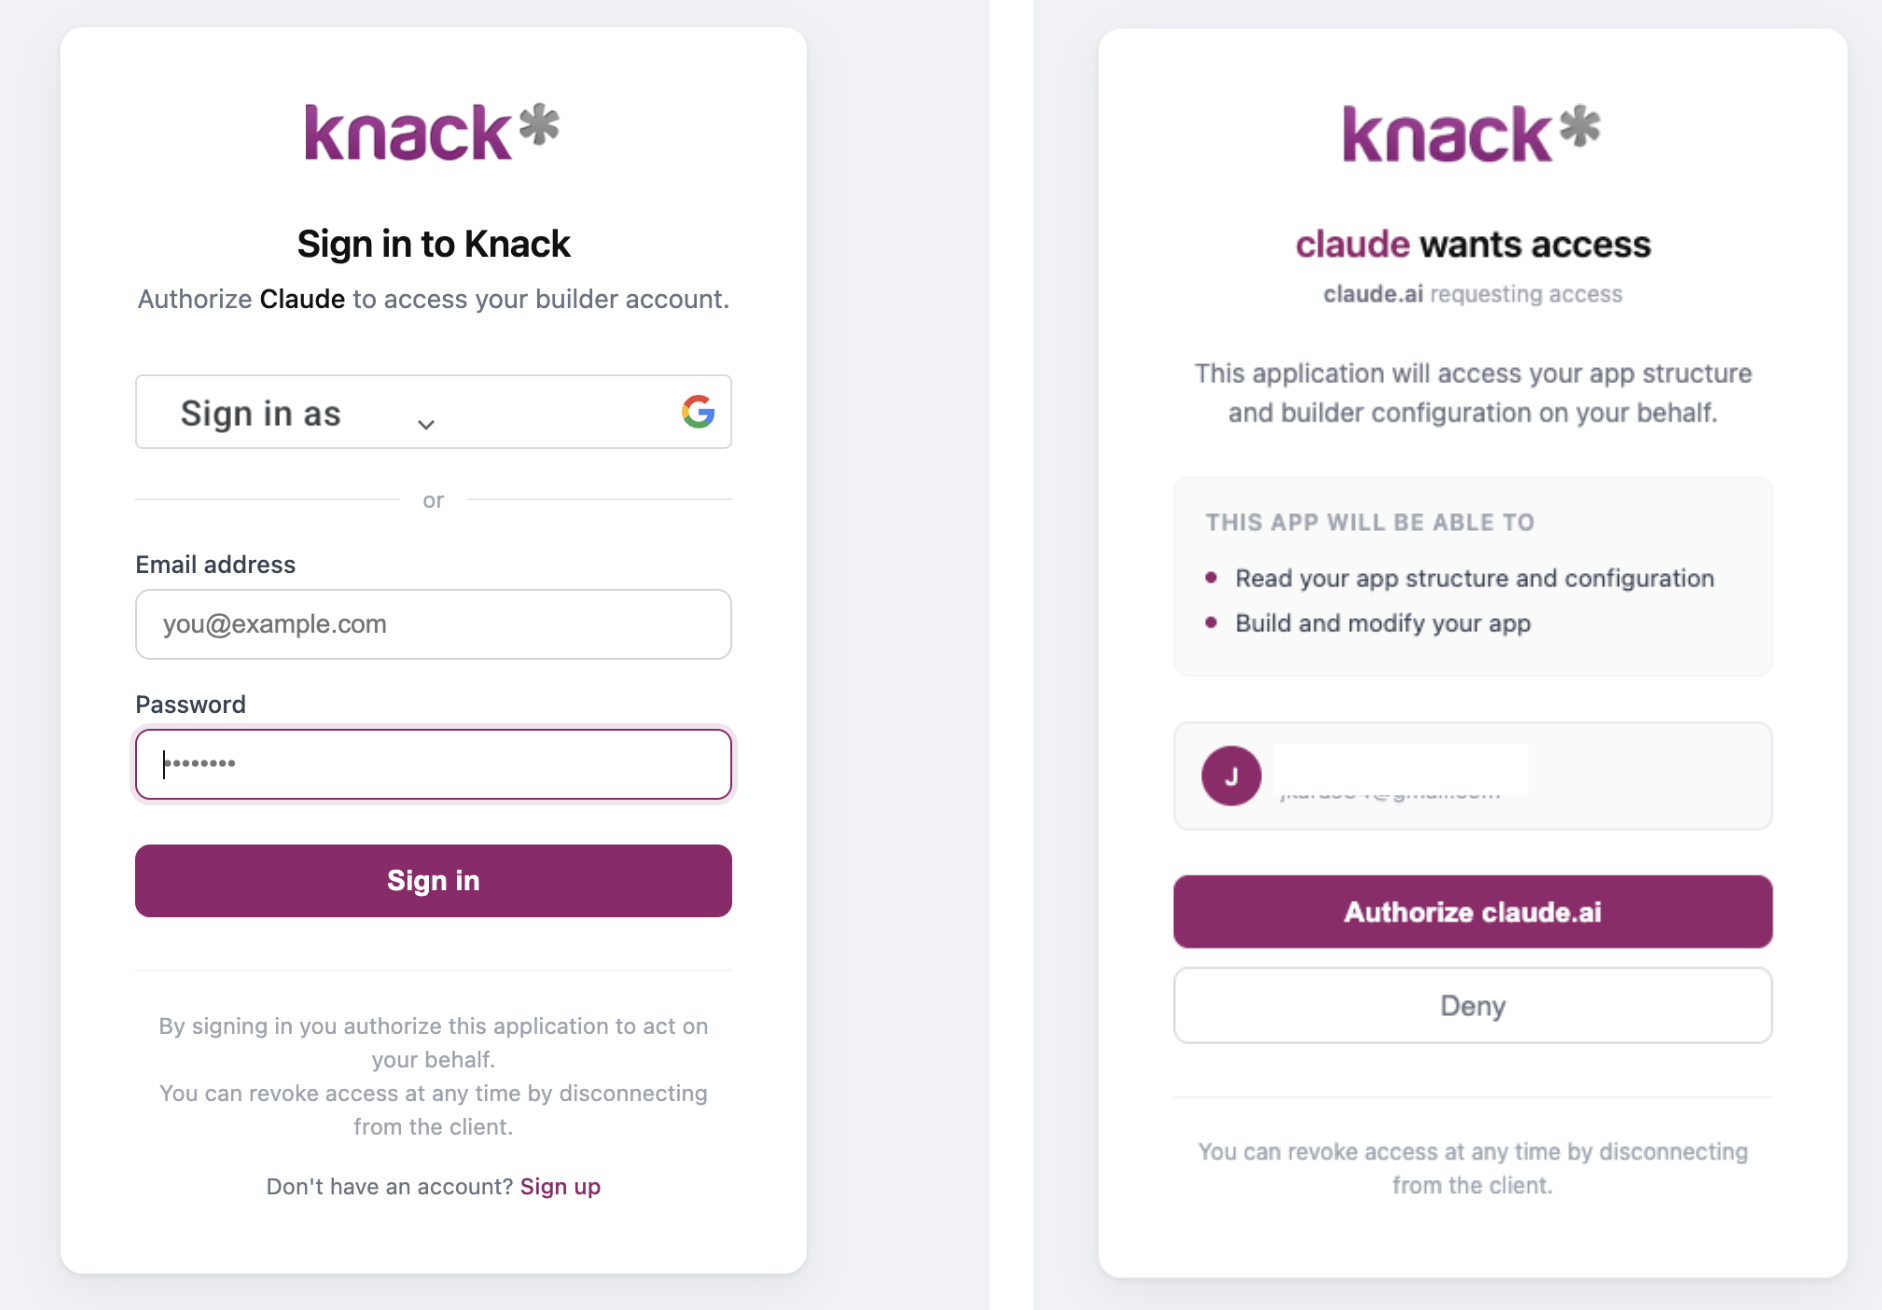
Sign into your Knack account, and authorize Claude
- 🥳 Congratulations, you're connected! Now start chatting in Claude to build new apps or edit existing ones. Here's a prompt for a patient-intake and appointment tracking app if you're looking to get started:
Using the Knack MCP Server, build a patient intake and appointment tracking app for a small medical practice. The app has three distinct user roles, each with their own login and access: Patients who can optionally create an account to view their records, Front Desk staff who manage the schedule and patient records, and Providers who manage their appointments and document visit outcomes.

The patient intake form should be publicly accessible -- no login required. Anyone can fill it out with their name, email, phone, and date of birth. After a patient submits their intake form, Front Desk staff can manually link that intake record to a Patient account if the patient later registers for one. Once a Patient account exists and the intake record has been linked, the patient can log in and view their own intake form and any upcoming appointments or outcome notes their provider has shared with them.

Front Desk staff log in to a separate view where they can see all submitted intake forms, manage patient accounts, assign intake records to patient accounts, schedule new appointments by selecting a patient and an available provider, and monitor the full schedule for the day across all providers.

Providers log in to see only their own upcoming appointments. After a visit, they can mark the appointment as completed and add outcome notes that become visible to the patient.

Create a Patient Intake object to capture form submissions from the public form, storing each person's name, email, phone, and date of birth. Create a Patients role for registered patient accounts, which can be linked to a submitted intake record by a staff member. Create an Appointments object connected to the Patients role that tracks the date, time, appointment type, assigned provider, status (Scheduled, Completed, Cancelled, No-Show), and visit outcome notes.

Populate the app with a few fictional sample intake submissions and appointments -- no real patient information.- (Optional) If you want to have Claude stop asking for permission to take actions when using the Knack MCP Server, you can update your settings by going into the "Connectors" area again, clicking into your Knack MCP connection, and then toggling the Tools to "Always Allow".
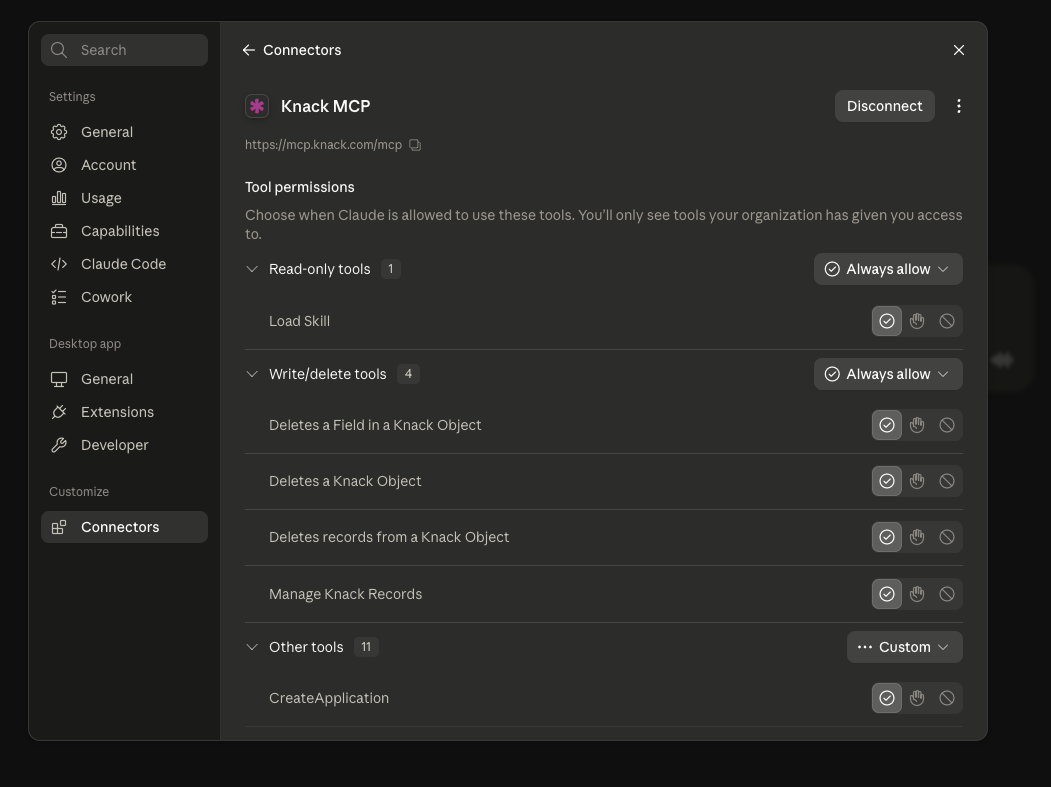
Consider toggling Tool permissions to "Always Allow" or "Custom" if you want Claude to stop asking for permission after each prompt
Claude Code (CLI)
Claude Code supports MCP servers via its configuration file. You can add the Knack MCP server globally (available in all projects) or per-project.
Terminal (Mac)
claude mcp add --transport http knackhttps://mcp.knack.com/mcp
(Within Claude Code) Option A — Global config (available in all Claude Code sessions):
Add to ~/.claude/settings.json:
{
  "mcpServers": {
    "knack": {
      "url": "https://mcp.knack.com/mcp",
      "transport": "http"
    }
  }
}
(Within Claude Code) Option B — Project config (available only in the current project):
Add to .claude/settings.json in your project root:
{
  "mcpServers": {
    "knack": {
      "url": "https://mcp.knack.com/mcp",
      "transport": "http"
    }
  }
}
After saving, restart Claude Code (or run /mcp to reload servers). On first use, Claude Code will open a browser window for the OAuth authentication flow.
ChatGPT
OpenAI's ChatGPT product can connect to other tools using the "Plugins" area.
- Since Knack is not yet listed within the official Plugin marketplace, you'll need to turn on "Developer Mode" so you can add Knack's MCP Server details
- Now click the "+" button within the Plugin area to add Knack's MCP Server details
- In the Server URL field, enter
https://mcp.knack.com/mcpand select "OAuth" as the authentication method. - Click Save or Connect, and follow the steps to authenticate / log in with your Knack Builder credentials
- Then start asking ChatGPT to build an app for you with a Knack backend!
Codex
OpenAI Codex product supports MCP servers via its configuration file. You can add the Knack MCP server globally (available in all projects) or per-project.
Option A — Global config (available in all Codex sessions):
Add to ~/.codex/config.toml:
[[mcp_servers]]
name = "knack"
url = "https://mcp.knack.com/mcp"
type = "streamable_http"
Option B — Project config (available only in the current project):
Create or edit codex.toml in your project root:
[[mcp_servers]]
name = "knack"
url = "https://mcp.knack.com/mcp"
type = "streamable_http"
After saving, start or restart a Codex session. On first use, Codex will open a browser window to complete the OAuth authentication flow — log in with your Knack Builder credentials to authorize access.
Lovable
See full Lovable instructions here
-
In your Lovable project, navigate to Connectors in the left sidebar or top navigation menu, then select Custom MCP.
Note: The exact menu path may vary depending on your Lovable version. Look for "Connectors", "Integrations", or "MCP Servers" in the project settings.
-
Click Add MCP Server (or + New Connector) and select the option for an external/custom MCP server.
-
In the Server URL field, enter
https://mcp.knack.com/mcp -
Select "OAuth" as the authentication method.
-
Click Save or Connect. Lovable will immediately attempt to reach the MCP server, which triggers the authentication flow described above.
-
Start chatting in Lovable to build apps powered by your Knack data!
- If you're connecting an existing Knack app, be sure to add your AppID to the chat conversation.
- If you have an existing Lovable frontend/project that you want to migrate to a Knack backend, start by saying "Migrate the backend tables and user roles to be based in Knack. Create a new Knack app in my account using the Knack MCP Server"
Base44
See full Base44 instructions here
-
In your Base44 account go to your Account Settings > click "Account Preferences" in the menu > then click "Builder" > then click the "+ Add MCP" button
-
https://app.base44.com/account/builder
Note: The Base44 account must be on a "Builder" plan or higher
Note: The "Integrations" area is different than the "MCP Connections" area. Please make sure you navigate to the appropriate area!
-
-
Name your Knack MCP Server connection.
-
In the URL field, enter
https://mcp.knack.com/mcp -
Select "OAuth" as the authentication method.
-
Click Save or Connect. Base44 will immediately attempt to reach the MCP server, which triggers the authentication flow described above.
-
Start chatting in Base44 to build apps powered by your Knack data!
- If you're connecting an existing Knack app, be sure to add your AppID to the chat conversation.
- If you have an existing Base44 frontend/project that you want to migrate to a Knack backend, start by saying "Migrate the backend tables and user roles to be based in Knack. Create a new Knack app in my account using the Knack MCP Server"
Replit
-
Open your Replit project and navigate to Tools → Secrets (or AI Settings, depending on your plan).
-
Find the MCP Servers configuration section in your project's AI settings.
-
Add a new MCP server entry with the server URL set to
https://mcp.knack.com/mcp -
Save the configuration. Replit's AI agent will prompt you to complete the OAuth authentication flow in a browser popup on first use.
Bolt
-
In your Bolt project, open the Settings panel and navigate to Integrations or MCP Servers.
-
Click Add Integration and select MCP Server as the type.
-
Enter
https://mcp.knack.com/mcpas the server URL and give it a name (e.g.,Knack). -
Click Connect. The OAuth flow will open in a new browser tab — log in with your Knack Builder credentials to authorize access.
GitHub Codespaces
Codespaces supports MCP servers when using Claude-powered AI extensions or through the Claude Code CLI.
Via Claude Code CLI in a Codespace:
-
In your Codespace terminal, install Claude Code:
npm install -g @anthropic-ai/claude-code -
Create or edit
.claude/mcp.jsonin your project root:
{
  "mcpServers": {
    "knack": {
      "url": "https://mcp.knack.com/mcp",
      "transport": "http"
    }
  }
}- Run
claudeto start a session. On first use, Claude Code will prompt you to open a browser URL to complete the OAuth authentication flow. Copy the URL from the terminal and open it in a local browser to log in.
Via VS Code extension in a Codespace:
If you are using a VS Code-based Codespace with an MCP-compatible AI extension, add the server to that extension's MCP settings using the server URL https://mcp.knack.com/mcp and follow its OAuth connection flow.
Sample Prompt
Once connected, try this prompt to get started building a Knack app:
I need to build a project management application in Knack.

The app needs:
- A Projects table with fields for: project name, status (active/on hold/completed),
  start date, due date, and a description
- A Tasks table with fields for: task name, assignee (text), priority
  (high/medium/low), due date, completion checkbox, and notes
- A connection from Tasks to Projects so each task belongs to a project
- A People table for team members with: full name, email, role, and department

Please create this data model in my Knack application, using descriptive names
for all tables and fields. After creating the schema, give me a summary of
what was built.
Tool Reference
The Knack MCP server exposes the following tools to the AI. These are invoked automatically based on your conversation — you do not call them directly.
Application Management
- listApplications — List all applications you own or have access to
- createApplication — Create a new, empty Knack application
- resolveApplication — Resolve an app name to its ID
- updateKnackApplicationInfo — Rename or update an app's description
- deleteApplication — Permanently delete an application (irreversible, requires confirmation)
- getKnackApplicationInformation — Batch-fetch app info: objects, fields, pages, views, themes, record counts
Data Model (Tables & Fields)
- createKnackObjectWithFields — Create a table and its fields in one call
- updateKnackObject — Rename a table, change its display field, or set default sort
- deleteKnackObject — Permanently delete a table and all its records (requires confirmation)
- upsertField — Create or update a field on a table (supports all field types including connections and aggregations)
- deleteKnackField — Delete a field from a table (requires confirmation)
Records
- (Early Access only - request access here) manageKnackRecord — CUD operations on individual records (create, update, delete)
- (Early Access only - request access here) queryDatabase — Search / find records in your app. Commonly used for analytics, getting answers to questions about your data, and targeted insights.
- createKnackApplicationSampleRecords — AI-powered bulk sample data generation across multiple tables
- deleteKnackRecords — Delete all records from a table (requires confirmation)
Access Control
- manageKnackAccessControl — Enable/disable Data Access Control (DAC) and manage role-based permissions per table
Authentication / OAuth
- registerLiveAppOAuthClient — Register an OAuth 2.0 client for a live app (for external integrations)
Skills / Knowledge
- loadSkill — Load authoritative how-to guides for building Knack-backed apps (records, auth, aggregates, assets, setup, migration)
Tips & Tricks when using Custom / Vibe-coded frontends with Knack backends
One of the most common use cases is to use a Knack backend with a vibe coded or custom frontend. Here are some tips and tricks to help you and the users of your app:
- Customize the Login screen your end-users see, to match your company's brand colors and logo = simply ask your AI assistant to update the Knack login screen to use a specific logo (which will replace the Knack logo) and use the colors of your app, and you'll be able to update the Login-component
- The logo, fonts, colors, button styles, and SSO visibility are all customizable
- Note: Custom login branding is only available on Pro-plans and above
Limitations & Important Notes
Backend Schema-only access (no Frontend Page / UI access)
The Knack MCP server manages your application's data model (tables, fields, relationships, app settings). The Frontend UI design and implementation — screens, forms, layouts, and user interactions — is either built by you in your frontend AI/vibe-coding platform of choice, or you can build no-code Pages within the Knack Builder area
Destructive operations require confirmation
Any tool that permanently deletes data (deleteKnackField, deleteKnackObject, deleteKnackRecords, deleteApplication) will always ask for your explicit confirmation before executing. Never confirm deletion unless you are certain.
Field type changes are not supported
Changing an existing field's type (e.g., from short_text to number) is not supported via the MCP server. To change a field type, you must delete the field and create a new one — be aware this will remove any existing data in that field.
Connection and formula fields
Connection fields and formula fields (sum, count, etc.) cannot be created as part of createKnackObjectWithFields. Create the tables first, then add connections and formulas using upsertField.
User-role table fields
The password and user_roles fields are automatically managed by Knack when creating user-role tables. Do not attempt to create these fields manually — they will be rejected.
Accounts table
The Accounts table is a protected system table. Its fields cannot be deleted, and the table itself cannot be deleted.
Access is scoped to your account
The MCP server only has access to applications owned by the Knack account you authenticated with. It cannot access other accounts' applications.
Updated 3 days ago